


Image source: NatureSkills.com
Being placed in a survival situation is an event for which many people simply are not prepared. Skills that may be irrelevant for everyday use – like knowing how to build a fire without matches or purifying water without tablets – can be the very skills that save lives in extreme conditions.
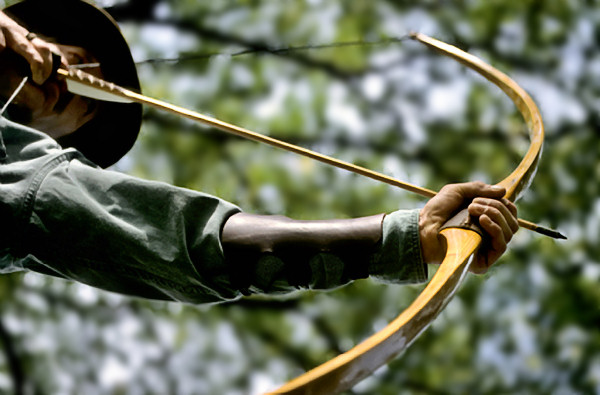
One such skill that can assist a survivalist in dire straits is the ability to make a survival bow.
There are several key differences between a survival bow and the conventional bows of yesterday and today. Unlike the meticulously crafted longbows of English acclaim, or the technologically advanced crossbows and compound bows of the 21st century, survival bows are designed with one goal in mind: Expedient assembly for immediate use.
Survival bows are hastily made weapons that require little time to create, while utilizing resources that are likely to be in abundance across a vast majority of landscapes. Because of the varying resources that are available in differing survival situations, no two survival bows are exactly alike.
While there are several different methods to create these bows, we are going to go over our favorite: A quick and simple way to assemble a bow for hunting wild game when time is of the essence. It also can be used for self-defense.
Step 1: Supplies
Constructing a survival bow will require three items: The right wood for your bow, material for your bowstring, and a sharp tool to craft it with. Of course, the more supplies you have – like a hatchet for harvesting wood or a knife for notching – the better.
Ultimate Tactical Self-Defense And Hunting Weapon That Doesn’t Require A Firearms License!
The first thing that you need to do is locate the type of wood that you’ll be working with to create your survival bow. Most hardwoods will suffice, with oak, hickory and maple saplings being perfect candidates. Once you’ve located a few saplings that may qualify for your survival bow, make sure to inspect them for a few key elements:
- Is the sapling relatively straight and absent of twists?
- Does the section of sapling have branches or knots?
- Is the section in question long enough for your bow?
When answering the third question, keep in mind that you’ll want your survival bow to be between five and six feet in length. It’s always a good idea to begin with a longer piece, since harvesting your wood – especially if you’re using a crude instrument – will mean losing a few inches off of each side once it’s time to clean it up.
Step 2: Shaping Your Bow
Now it’s time to take your survival bow from a rough piece of timber to something a little more recognizable. The first step in this process will be to determine where three fundamental elements of the bow are: The belly, the back and the middle.
The belly of the bow is the inside bend of the bow. This can be observed by standing the bow upright, placing your palm on top of the bow and holding it in place while the bow is allowed to gently swivel to a standstill.
Story continues below video:
The back of the bow is the outer bend of the bow – the side facing toward the target and away from the shooter. When making a survival bow, it is crucial to leave the back of the bow in its natural state and without modification. This portion of the bow will encounter the most tension when the bow is drawn, and any unnecessary whittles or notches will create weak points that may cause the bow to break.
The middle of the bow is just what it sounds like; this is where your bow’s grip will be. You can find the middle by taking a piece of string or loose material – such as a shoelace – and stretching it out across the length of the bow, and then doubling it over to find the middle.
Once you’ve determined these three elements, it’s time for you to shape your bow by carefully removing wood from the limb to ensure it will bend evenly when drawn. When shaping your bow, always keep one thing in mind: You can always remove more wood, but you can never put it back. Always make sure that you take your time when shaping your bow.
Step 3: Stringing Your Bow
Now that your bow has taken a more recognizable shape, it’s time for you to apply the bowstring. If you’re in a survival situation, the perfect bowstring may be hard to come by, which may require you to get a little creative.
Learn The Secrets Of A Veteran Hunter As He Demonstrates How To Quickly Field-Dress Game
Some materials that can be used for bowstrings include:
- Nylon rope
- Rawhide
- Twine
- Sinew
Finding a suitable string for your bow – especially in a wilderness setting – will most likely be your biggest challenge. Just keep in mind that whatever material you choose, make sure that it is not elastic or stretchy. Your bow’s power is derived from the limbs, not the string, so a stiff bowstring is always preferable.
Step 4: Finishing Your Bow
Once you’ve found a suitable bowstring, you’ll then need to notch your bow to provide a place for your string to rest. When notching your bow, take one end of your bow and begin cutting out two notches – one on each side – without cutting into the back of the bow. Repeat the process for the other end of your bow. Notches should only be deep enough to hold your bowstring securely in place.
After you have notched and strung your bow, you are ready to perfect your bow through a process called tillering.
Tillering is a continuation of the shaping stage for the purpose of producing a refined, parabolic curve in the bow before completion. Two things are essential for proper tillering: A sharp tool and a little patience. You should carefully remove wood bit by bit while testing for stiff points throughout the length of each limb.
Continue to follow the process of flexing your bow, then removing wood a little at a time, then flexing it again until you have created a bow that bends equally and uniformly throughout its length.
Creating a survival bow is a great skill to learn for people of all ages. With the right tools and a little elbow grease, making a bow out of materials that are already in your own backyard can be done in a single afternoon. All you need is a sharp knife, a choice piece of wood, and a little time, so why not give it a try? It’s a fun skill that you’ll carry with you for the rest of your life – and one that might come in handy when you really need it.
What are your survival bow tips? Share them in the section below.
Get $600 Worth Of Survival Blueprints … Absolutely Free!


