


 Whether you have your own herb garden, a generous friend who will share their herbs with you, wildcraft as a hobby or way of life, or are a member of a CSA and get a hefty share of certain herbs you aren’t sure what to do with, you may have wondered what on earth people do to use all of what is available before it goes bad. Herbs, once picked, don’t last long without access to water. Most will not keep longer than a week or two even when kept in a jar of water and refrigerated.
If you are not able to use your herbs within a few days, you should look for a way to preserve them so that you can make good use of them later. There are a variety of ways to consider preserving your herbs.
Drying
Drying herbs is one of the oldest and simplest methods of herb preservation. In the past, no home was truly a home without bunches of cut herbs drying somewhere. Though it will not work well in particularly humid areas or with some of the more finicky herbs, it can be used for the vast majority of them. To dry most herbs, you simply go out and cut your herbs and then hang them in an airy, shaded area until they are crisp. If you happen to have a food dehydrator, your potential for success is even greater, as you will have more control over the drying environment.
It is best to keep your different varieties of herbs separated when drying. This is to avoid any tainting of your herbs’ flavor or accidentally mixing your herbs. This is especially important if you will be using your herbs for medicinal purposes. Oregano turns out well when dried, since drying concentrates the oils. I have also had great luck with peppermint, parsley, and dill.
The best time in the growing cycle to cut herbs is just before they flower. If your herbs have already flowered, you may still cut them and preserve them. They will just not be as strong as if they were cut before flowering. Generally, morning is the best time of day to cut your herbs and get the most benefits from them, as this is the time of day in which the plants have higher concentrations of their essential oils. For best results, wait until any early morning dew has evaporated before cutting. You don’t want any extra moisture to slow down the drying process and contribute to mold in your finished product.
The hidden secrets of making herbal medicines…right at your fingertips!
Once you have cut your herbs, shake them a bit to remove any insects and inspect to be doubly sure there are none there. Remove anything that should not be on the plant, such as damaged leaves, other plant debris, straw, etc. and choose your method of drying them. Here are drying methods in my order of preference.
1. Hang to Dry
The simplest method of drying is to hang the herbs by their stems to dry. I personally have a retractable clothesline on my sun porch that I pull out at herb-drying time. I hang the herbs up in small bundles, using clothespins to hold these bundles to the line. I can open my doors if there needs to be more air circulation or if the room gets too hot. I found this especially fun when I had a lot of peppermint to dry. My porch smelled delicious! (And my cats went a little bonkers….must have been because of peppermint’s relation to catnip!)
2. Food Dehydrator
The best type of food dehydrator to use when drying herbs is one with a controllable temperature dial and a fan to circulate the air. You will not have great results with the cheap kind that only have a heating element on the bottom, but it can work in a pinch if you make sure to check on them often and be sure to rotate the trays.
If you have a food dehydrator and wish to dry your herbs that way, lay them in a single layer on your trays and set your dehydrator on low to dry your herbs. Check on them from time to time. How long it will take to dry will depend on how much moisture is held in your particular herbs. Most dehydrators come with instructions for drying herbs. Check your particular dehydrator’s instructions for optimal results.
3. Near a Room Dehumidifier
If you happen to be running a room dehumidifier in the season that you are drying your herbs, you can put this machine to use at the same time as an herb dryer. Simply place your herbs on a cooling rack and situate them in front of the air intake portion of your dehumidifier. Of course, if you have small children or animals that might disturb this setup, you will have to keep an eye on them. This might be easier than keeping an eye on the herbs in the oven, though, and it uses less energy than the oven or food dehydrator if you are already using the room dehumidifier. The drawback is that you cannot dry a large amount of herbs with this setup unless you have many dehumidifiers working at the same time.
4. Drying Racks
Since I live in a fairly humid climate, I have shied away from drying racks. I know that they have the potential to dry a large amount of herbs (and food), but I am leery of using them with our humidity levels. And knowing me, I would forget them one day and forget to bring them in from the rain. I don’t want to risk wasting all of that work and food when I can easily use one of the other methods of drying.
There are drying racks available for purchase online, as well as plans and instructions for making them yourself. Check them out. The concept is very much the same as a food dehydrator, only you are relying on an arid climate and good air circulation to aid you in the drying process.
5. Oven
Drying in an oven, while quicker than most of the other methods, tends to reduce the amount of essential oils in the herbs, reducing the flavor and, if being prepared for medicinal purposes, the effectiveness of the herbs.
If you are planning on using your oven to dry your herbs, you will need a “warm” setting of around 140-200°F, an oven thermometer, and the memory to remember to check on them often. Warm your oven, place your herbs that have been spread out on pans in the oven, and turn off the oven. Check on them often to determine whether you need to warm the oven and dry them longer or if they need to come out.
Whatever drying method you choose, check on your herbs often. When they are thoroughly dry, place them in jars or sealable baggies (suck the air out with a straw) to store. As an additional aid to keeping them dry, you may wish to put in a nitrogen pack or capsule. Label and date your containers and store your dried herbs in a cool, dry, dark place.
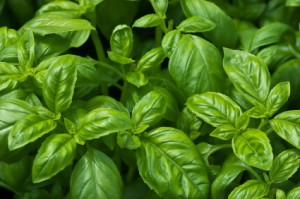
Some herbs are more tender when it comes to air drying. These include lemon balm, which will often turn black, and basil, whose thicker leaves tend to mold if not dried quickly enough. I have been able to dry lemon balm for use as a tea; the key is to get it drying immediately after cutting and to bruise the leaves as little as possible. Basil tends to do better for me when dried in a food dehydrator than if it is hung to dry; this is probably due to my humid climate and its not being able to dehydrate before the tender leaves start to show signs of oxidation (the reason they turn black).
Freezing
Some people are surprised to hear that you can freeze your herbs in order to preserve them. Freezing herbs helps to preserve their fresh flavor, especially so for herbs such as basil, dill, chives, and green onions, which tend to lose much of their flavor when dried. I have had especially good luck in freezing basil. For what it’s worth, basil will turn black when frozen, too. But the good news is that there is a way to prevent that! Read on!
To freeze most herbs, you would cut them, remove any undesirables, lay the herbs flat on a cookie sheet, and place in the freezer for a few hours. Once frozen, place them in freezer bags and they should be easily removable as you need them. Depending on your freezer space, you can decide to remove leaves from tough stems before freezing or wait until you are ready to use the herbs and remove them from the stems at that time.
New “Survival Herb Bank” Gives You Access to God’s Amazing Medicine Chest
An alternative to freezing on cookie sheets is to freeze your minced/chopped herbs in ice cube trays. Simply prepare your herbs as desired, place the desired amount in the ice cube tray compartments (usually about 1 tablespoon of minced herbs), top with water, and freeze. Once frozen, place in clearly labeled freezer bags. Now you have measured, easy-to-grab fresh herbs to add to your recipes at your convenience!
One fun way to utilize your herbs is to freeze flowers or leaves of plants such as mint or borage and add as ice cubes to summer beverages. Fancy!
Freezing Basil
Basil is the exception to the “easy to freeze” guideline for herbs. As I mentioned before, basil has the tendency to turn black when frozen. To remedy this problem, oil is added to the basil.
Here’s how I do it:
1. Pick the basil and pluck off the leaves. Discard the stems or put them in the compost pile.
2. If your basil is particularly dirty, you may wash with water and use a salad spinner to help speed drying.
3. Place the basil in your food processor and process. As it is processing, stream in a bit of olive oil, continuing to process until your basil resembles pesto.
4. Use an ice cube tray for freezing—spoon the pesto into your ice cube tray and freeze. Alternatively, you may place spoonfuls of the basil/oil mixture onto a cookie sheet and freeze.
5. Once frozen, transfer your basil cubes/blobs into freezer bags and seal. Now you have basil cubes at your fingertips to use in soups, stews, or even as the beginnings of pesto!
There are more detailed instructions and pictures of this process on my blog, Living Healthy in the Modern World.
You can use the same method for freezing basil to freeze other herbs. Be sure to label your freezer bags of herb cubes, or you may have some “interesting” herb combinations in your future!
Flavored Oils
Another option to try if you have a lot of extra herbs to play with is to make flavored oils.
To make flavored oils, you will need:
- Pan
- Funnel
- Sterilized glass jars and lids
- Mildly flavored oil of your choice (you will be heating it, so keep that in mind as you decide which type to use)
- Fresh herbs, garlic, and/or chilies of whatever combination you choose
1. Gently heat your oil until it is warm. It should only take a few minutes, depending on how much oil you are heating.
2. Place your herbs of choice into your sterilized jars.
3. Using a funnel, pour the oil into your jars.
4. Allow it to cool while uncovered. Then, place the lids on your containers.
5. Store in a cool, dark place. It will keep for about six months.
An alternative to heating your oil on the stove is to place your herbs in your sterilized jars, top with oil, place the lids on the jars, and place the jars on a sunny windowsill. Allow the oil to steep for two weeks, shaking the jar daily. Test for flavor after the two weeks. If you want a stronger flavor, strain the oil, add more fresh herbs, and repeat the steeping process. Once the oil has met with your approval, store it in a cool, dark place. These oils should keep for about six months as well.
Herbal Vinegars
Another use for your herbs is to make herbal vinegars. Use the same methods as for making herbal oils, using a cider or wine vinegar instead. Distilled vinegar will work in a pinch, but it will not have the same nuances of flavor, and distilled vinegar flavor will be stronger than that of other vinegars.
Herbal vinegars are a delicious, healthier alternative to store-bought salad dressings and marinades. They may also be used in deglazing pans and for making gravies and sauces.
Herbs add interest and flavor to your food and offer medicinal help. Savor them fresh, and find a way to make them last through the year. Try some of these methods and see which methods you prefer for each herb. Don’t let your herbs go to waste!


