 [1]
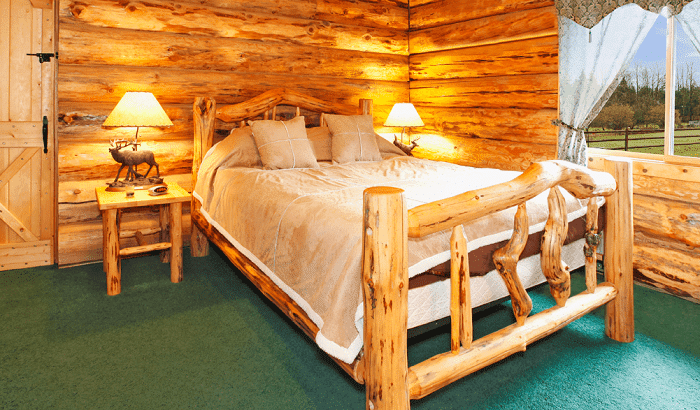
[1]Image source: thegoodtimber.com
There are 101 uses for knowing how to build lodgepole pine furniture that go way beyond the furniture itself.
Our forefathers built lodgepole pine furniture out of necessity. They needed beds, tables, benches, chairs and much more. As pioneers, they also needed to use what was around them and, for the most part, they couldn’t transport sawmill equipment when they traveled to new homestead locations. So, lodgepole pines offered relatively straight long pieces of wood that were around the right size. When you can’t mill a 2×4, a lodgepole pine works rather well in its stead.
Because lodgepole pines were easy to work with and super fast to prep for use, they ended up being used for just about everything from fences to tables, and from cribs to horse stalls.
The furniture they made and that you can make as well has what many call a rustic elegance to it. There is a reason you see lodgepole pine furniture in multimillion-dollar log homes all throughout Colorado, Montana and other states. Many of the biggest stars have it in their homes for one good reason: It’s beautiful.
The first thing you have to do is decide which of the two basic styles you want. They are:
Ultra Rustic
The ultra rustic furniture type doesn’t have round smooth tenons fitting it its mortises. They are hand shaped with a hatchet, axe or a draw knife. This type is also draw knife peeled and will, of course, show those markings.
Discover How To Make Just About Anything … From Scratch! [2]
It’s not as uniform and symmetrical and no one will mistake it for factory-built furniture. But, it does take a little more skill and patience. You can’t rush it by taking large chunks off of the tenons or you’ll soon find them too small to fit in the mortise holes.
Milled
The milled look for lodgepole pine furniture has tenons that are cut with tenon saws or tenon cutters attached to a drill or lathe. These tenons will be perfectly round and uniform. The peeling will generally be done by drying the timbers and using a rubber mallet and a putty knife which we will get into later.
1. Selecting Your Lodgepole Pines
When selecting your lodgepole pines for furniture, what you’re looking for are dead stand trees (trees that are dead, but still standing). You can use dead fall trees (ones that are dead and already on the ground), but you will have a lot of problems with rot.
The way to check them fast is to take a hammer, a rock or a short heavy piece of wood you can swing and lightly hit them up and down the length.
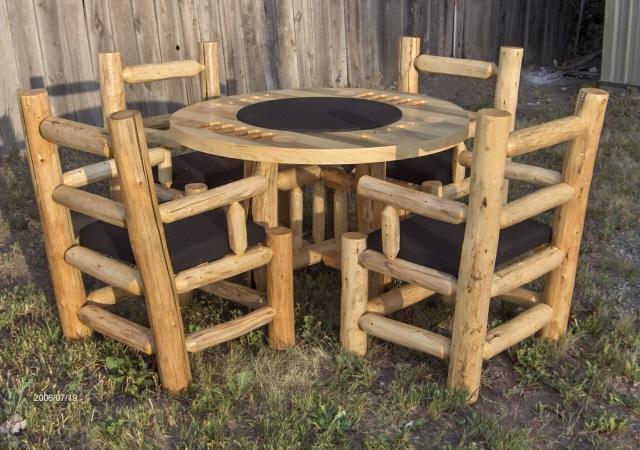 [3]
[3]Image source: bearcreekbilliards.com
What you’re looking for is hollow-sounding strikes. You’ll definitely hear the difference with a hammer when you hit a piece of rotten wood vs. a piece of solid wood. It sounds soft inside, like you’re checking a watermelon by knocking on it with your knuckles to see if it’s ripe. Only here, that sound is what you don’t want.
This will save you a ton of time from having to fire up your chainsaw and making cuts to find out if you’re looking at rot or not.
If you see dead stand trees that still have most of their needles, but the needles have turned brown, then you may be looking at a pine beetle infestation. Be careful with that. You don’t want that wood; it’s brittle in the spots they bore into and you could transport the beetles back to your home. If they get loose in your area, you’ll regret it as you watch your pine trees die.
If you find an area where fire has ripped through the forest, you can find some great dead stand trees there. Many forest fires will go though so fast all they do is burn most of the branches off and leave the timber standing.
This Cool-To-The-Touch Lantern Provides 100,000 Hours Of Emergency Backup Lighting [4]
You want to leave your lodgepole pine timbers as long (length-wise) as possible. The reason: You’ll do your cutting once you have them back home or at your shop. This way you cut them as needed and get the most out of every timber.
2. Selecting Your Tools
The draw knife: The draw knife is the No. 1 tool for the ultra rustic look. It’s used in pealing the logs, making the tenons and removing high spots.
The one thing you have to know about your draw knife is that it will give you some planer glaze. Because the draw knife is basically a low-tech planer, it does “glaze” or close the pores of the wood. This will leave you with spots on your logs where your stain won’t take as well.
Many people really like this look as it’s part of that ultra rustic effect. If you use your draw knife on a test log and stain it only to find you don’t care for the look, you can remedy this in the following ways: A) don’t use the draw knife for pealing the bark. Instead, use the mallet and putty knife we will speak of below; B) sand the draw knife marks to take off the glazing and re-open their pores.
Rubber or rawhide mallet: Back in the pioneering days most people didn’t have a rubber mallet; they had rawhide mallets instead. The reason you want a rubber or rawhide mallet is so you don’t make any marks on the lodgepole pine timbers when you’re checking them for rot or stripping the bark.
You strike the timber up and down its length to check for that hollow rotten sound, so you don’t haul it out of there only to find out later when you cut it that it is rotten.
Putty knife: If you’re not going to use a draw knife, then a putty knife and a rubber or rawhide mallet works pretty well for skinning the lodgepole pines.
Tenon cutters: There are a few styles from which to choose. You can get the ones that go onto your drill or onto a lathe. You can mount the drill on a bench and feed the pole to it. Or, you can center the tenon cutter bit on the pole and cut it that way. Having your drill mobile is much faster, but requires that you have good stable hands because when it first starts to bite it can jump a little.
Mortise cutters: Just like tenon cutters, they can be drill-mounted and that style works best for most applications. A mortise cutter (cutting bit) is basically a hole saw that takes away everything inside the circle.
New Survival Energy Product Makes Every Window A Powerful Solar Charger [5]
You could also use a hole saw and then just chip away everything inside the circle to the proper depth if you like. But, if you’re doing a bunch of them, this is going to be rather tedious and it will be better to get the mortise cutter bit.
3. Building Your Furniture
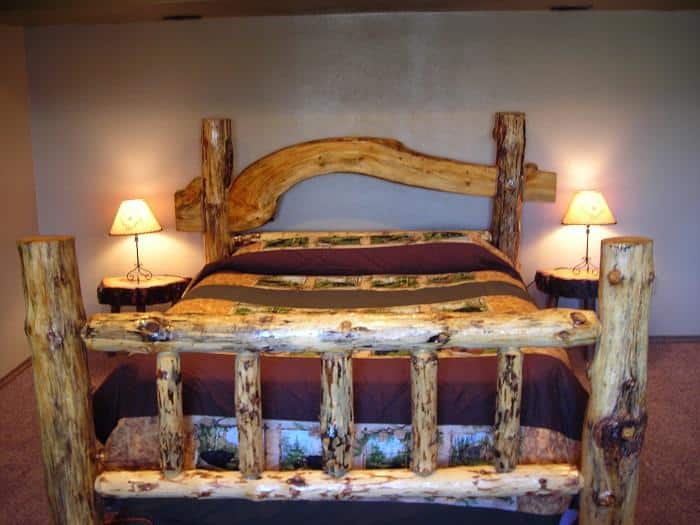 [6]
[6]Image source: rusticlogfurnishings.net
Skinning: You can skin the timbers with your draw knife, which is pretty self-explanatory, or you can use your mallet and putty knife.
If you’re using the putty knife, wait until the timbers are very dry. Put them out in a barn for a month, laid out so they’re not stacked and can dry well.
Then put them one at a time up onto a couple of saw horses (or whatever way you want to elevate them). Strike them firmly up and down their lengths with your rubber or rawhide mallet. This will loosen the bark and it’s a good idea to wear protective eye wear, as pieces will fly.
Then pop the bark off of the lodgepole with the putty knife. Get under the edges of the bark and pop it off. If it doesn’t come off easily, it’s likely your pines are too wet or too green. If they’re too green you can let them season or use a draw knife; if they’re too wet, let them dry more.
Plans: You should get yourself a set of plans for whatever piece you’re building. It’s so much better than “winging it” — and you’ll be more likely to be happier with the results.
Selecting timbers: This is pretty straightforward, but you want to choose your timbers and lay them out so you can see what you’re working with.
For example, if you’re building a bed, you’ll want your thickest pieces for your end posts, your long straight pieces for your side rails and your most gnarly but beautiful pieces for your headboard and then your footboard.
Once you have your pieces laid out so you can see it being assembled in your mind, just follow your plan and you should do great.
Building lodgepole pine furniture is relatively easy. You simply need the right timbers, the right tools and the right plan.
Have you ever built lodgepole furniture? What advice would you add? Share it in the section below:
Are You Prepared For Blackouts This Winter? Read More Here. [7]
 [8]
[8]