


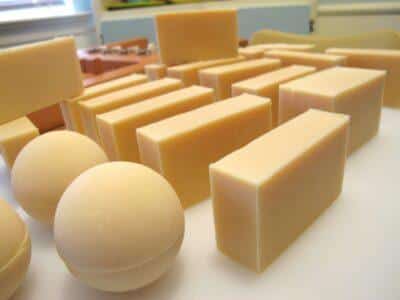
Image source: Lovinsoap.com
As you simplify your lifestyle, it is natural to consider making or growing many of the items you use every day. Not only do you save money, but you often can end up with a superior product. A great example is homemade soap. With some practice, you can make your own soap that is a gentle and natural alternative to commercial soap. Plus, soap making helps you nurture your crafty side as well.
You wash your face, hands and body with it, but, first, let’s define what soap really is. Soap is the result of a basic chemical reaction between natural oils or fats with sodium hydroxide (lye) that often has perfumes or coloring added to it.
Soap was part of early civilizations. In fact, archaeologists credit the Babylonians with inventing soap around 2800 B.C. The earliest known soap recipe was a mixture of animal fats and wood ash and was used for cleaning textiles. According to ancient historian Pliny the Elder, Phoenicians used goat’s tallow and wood ashes to make soap in 600 BC. Records reveal that soap, called “sapo” in Latin, was widely used during the time of the Roman Empire. The Celts called the product they created from animal fat and plant ashes “saippo.”
From the founding of our country up to the early years of the 20th century, only the rich bought their soap; it was common to make soap at home. Today, most people purchase their soap and those who do make it themselves often do so for the purpose of gift giving. While homemade soap does make a lovely gift, once you use homemade soap, you’ll want to keep having some for your own family’s daily use.
DVD series shows how to make your own soap quickly and easily
Basically, there are four ways of making soap:
- melt and pour method — melting pre-made blocks of soap and adding your own fragrance.
- re-batching — grinding up pieces of soap or bars of soap, adding milk or water and re-blending them.
- cold process — making soap from scratch with oils and lye.
- hot process — a variation of the popular cold process in which the soap is actually cooked in an oven.
Many cold process recipes use lye (sodium hydroxide), and since lye is a caustic and dangerous substance that requires caution, many people shy away from using it. Lye can indeed strip paint, ruin clothing and burn skin and eyes. Even its fumes can be harmful.
By protecting your work surface and your clothing, by wearing goggles and gloves, and by using caution, you can work with lye without incident, however.
There are many basic soap recipes. As with many recipes, it’s important to start with a basic one and then modify it according to your own needs and preferences.
The following recipe, which yields 51 ounces of unscented soap or 12 to 14 bars, depending on the size of your mold, provides a good starting point. You can supplement it with essential oils, such as lavender oil, for fragrance.
Ingredients you need:
- 18.5 oz. olive oil (non-virgin oil works well)
- 12 oz. coconut oil
- 9 oz. palm oil
- 1 oz. Shea butter
- 5.8 oz. lye
- 13.5 oz. purified water
Supplies you need:
- Stirring spoons (stainless steel) or an immersion blender (stick blender)
- Digital scale
- Stainless steel pot
- Heat resistant bowls
- Thermometer (the candy or cooking kind)
- Soap molds (can be almost any kind of container. For this recipe, we will be cutting the soap into bars, so we will be using a wooden box.)
- Freezer paper to line the soap mold to prevent sticking
- Cardboard box big enough to cover the soap mold (An athletic shoe box with an attached lid works well)
- Kitchen knife with a large blade to cut bars
- Safety goggles
- Rubber gloves
- Well-ventilated workspace
What you do:
- Use your scale to measure the solid oils into the pot. Warm them until they melt.
- Measure the lye carefully into a bowl or Pyrex container
- Measure the water into another heat-resistant bowl.
- Next, pour the lye into the bowl of water. Stir gently. As the chemicals react, the solution will give off fumes and heat. After a minute or two of stirring, the cloudy water will become clear.
- Measure the olive oil into a separate bowl and add it to the pot. The combined oils should reach about 110 degrees (F).
- Check the temperature of the lye solution. It should also be about 110 degrees (F). Place the bowl into a sink of cold water to reduce temperature if necessary.
- Pour cooled lye solution slowly into the pot. Blend with the immersion blender and alternate with stirring until mixture is smooth. Be careful not to raise the blender up or you will stir in air bubbles.
- After about five minutes, the mixture resembles pancake batter and will begin to thinly coat the blender. (This is the step in which you could add several drops of essential oil for fragrance.)
- Pour the mixture into the mold.
- Place mold inside shoe box and close the lid.
- Wash all materials in hot, soapy water.
- Let the soap sit overnight until it is hardened and opaque in color.
- The next day, lift the block of soap out of the box and separate it from the freezer paper. Use a knife to make score lines to cut the block into desired bar shapes. You can shape the edges with a potato peeler if you would like or leave them as-is.
- Return the bars to the covered box to dry and age for four weeks.
- Your soap is now ready to use and enjoy.
Accurate measuring and temperature are critical to soap making, and chances are you will make some mistakes. Even experienced soap makers do, but they use their mistakes to “re-batch” the soap. You simply grate the soap, combine it with a liquid, melt it, put in your chosen additives, and then pour it into your molds. You can even take parts of commercial soap and re-batch it into something unique.
Use this basic recipe and your own research to create your own homemade soap. Without all the harsh additives of commercial brands, homemade soap is good for your family’s skin, and you’ll appreciate its quality. Plus, with limited ingredients, homemade soap is easy on your wallet as well.
What soap-making tips do you have? Let us know in the comments section below.
Sign up for Off The Grid News’ weekly email and stay informed about the issues important to you


