


|
Listen To The Article
|
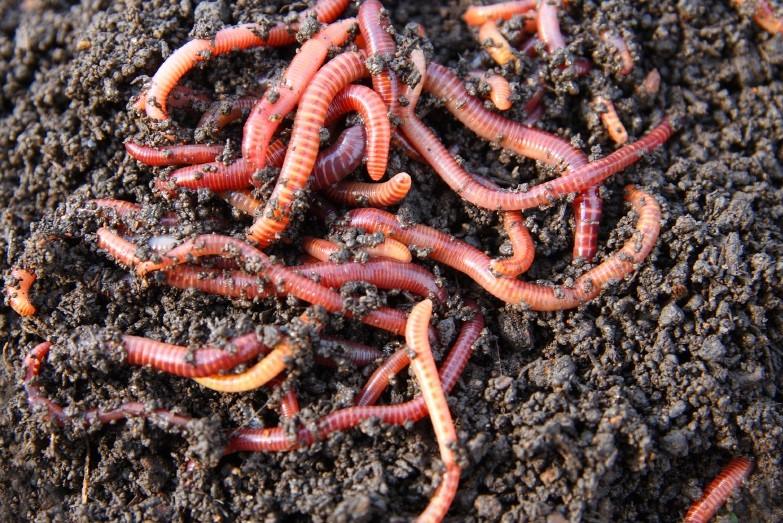
Image source: gardeningknowhow.com
Vermiculture or vermicomposting is the method of using worms to break down organic matter into useable compost for your garden. This method is catching on throughout the US, and you can often find “worm bins” for composting in your gardening catalogs.
To the uninformed, keeping worms in a bin outside or even in your home is pretty odd. However, vermicomposting has a range of different benefits that heavily outweigh any initial ick factor or hesitation over taking on a new project.
Benefits of Vermicomposting
Here are just a few benefits of harnessing the power of worms for composting:
1. Can Be Set Up Indoors.
Worm bins can easily be set up right in your home or even in a kitchen corner. A properly maintained worm bin doesn’t have a noticeable odor and to visitors it often just looks like a trash can. The real benefit of having a compost system right in your home is that you can add your table scraps right away rather than throwing away food or having to carry it out to your compost pile.
2. Organic Matter Composts Quicker.
In comparison to traditional composting methods, the vermiculture composting process is done in a third of the time. Even a substantially smaller worm bin could still produce more, and a better quality, compost compared to a compost pile.
3. Vermicompost is Superior to Other Types of Compost.
Science backs vermicompost as being higher quality and overall superior to other composts, even store-bought. You can see a data table of this on the New Mexico State University website by clicking here.
Due to its chemical makeup, vermicompost increases germination in seeds, boosts plant growth and also delivers nutrients to the plants for a longer amount of time.
Order your 2018 Heirloom Solutions seed catalog!
4. Microbes Present in Vermicompost Improve Plant’s Disease Resistance.
Those who use vermicompost regularly have noticed that plants fertilized with vermicompost are more disease-resistant and fare much better if pests are present. This is believed to be due to the presence of healthy microbes that live with the worms. They help break down organic matter but also are taken with the harvested compost and mixed into the soil.
5. Vermiculture Worm Bins Offer Two Forms of Compost.
There are two ways worms produce compost or fertilizer that you can use. The first: worm castings, which are the actual compost the worms create. The secondary way you can get fertilizer from the bin is through the excess moisture the worms create. This “worm tea” is a liquid that is rich in nutrients and can be poured right on your plants. Your worm bin set-up, even if it’s DIY, should have a spigot on the bottom bin so you can drain out this excess liquid.
6. Vermicompost Increases Soil’s Water Retention Abilities.
The worm castings which make up the vermicompost are extremely effective at retaining water. In fact, this compost can hold up to nine times its weight in water. When you mix the compost into your garden beds or pots, you are giving your soil a helping hand. This water retention means you conserve more water and also help those in dry climates improve their garden’s productivity.
7. The Whole Process is Pretty Much Hand’s Off Until Harvest.
Compared to traditional composting methods, vermicomposting is hands-off until the worms have completed the composting process. You don’t need to turn piles over or mess with the worms. All you do is feed them table scraps, inspect them regularly to ensure they aren’t underfed or overfed, and drain the extra worm tea so the bin doesn’t get too moist. You don’t go into the bin until you are ready to harvest the worm castings.
Story continues below the video
Setting Up a Vermicomposting System
Even those who live in an urban setting with a container garden or have only some herbs growing in pots can set up a vermicomposting system. The wonderful thing about using worms is that you can scale it to your needs, whether you’ve grown a couple of tomato plants or are growing a large garden that feeds your whole family.
The first step is to determine what system you want to use.
Choosing a Worm Bin
There are plenty of manufactured worm bins on the market for a good price. These are often a nice choice for those who don’t need to produce a lot of compost. They are also ideal for those of us who aren’t so DIY-inclined or just prefer the streamlined look of plastic, especially if it’s in the home.
If you’re brand new to vermiculture, it may be a good idea to start off with one of these bins. If you decide you need to scale up then you can buy additional bins or make a larger system yourself.
That being said, there are many DIY projects that you can build to save some money.
Selecting Your Worms
Even though the common regular old earthworms compost organic matter, they aren’t especially suited for a vermicomposting set-up. There are two species of worms that are best for vermicomposting: brandling worms (Eisenia foetida) or, the most common species, red wigglers (Lumbricus rubellus).
New Natural Fertilizer Doubles Garden Production!
These worms are smaller than the earthworms you tend to find in your garden and are composting powerhouses. Earthworms prefer a soil-based environment, which is why they don’t thrive in a composting set-up. Red wigglers or brandling worms prefer the more wet compost set-up and will even live right in manure.
You can purchase red wigglers or brandling worms from many different sources on the Internet, from Amazon or eBay to worm breeder’s websites. I’ve purchased worms from Amazon and from worm breeders who have listings on eBay. I recommend you do a litter research or read reviews to ensure the person or company has a history of delivering healthy worms.
You will need about one pound of red wigglers to start up a worm bin the size of the commercial ones listed above. If you need to scale up, it is recommended to go with two pounds of worms per pound of food scraps/organic material you need to compost. The worms will produce roughly their body weight in castings.
Setting Up the Bin
Setting up the bin involves simply adding bedding for the worms. Some commercial set-ups will come with bedding to get you started. If yours didn’t or you’re building one, you can use the following different materials for bedding:
-
- Shredded newspaper or printer paper.
- Shredded leaves.
- Hay or straw.
- Moistened peat moss.
- Old/aged manure.
Fill the bin with bedding and allow it to sit for a couple of days before introducing the worms. Make sure the bin is aerated (use your hands to lift the material) and slightly damp (not wet!) before adding the worms on top.
Story continues below the video
Feeding Your Worms
Your worms can be fed a wide variety of different table scraps or other organic matter, such as:
-
-
- Vegetable scraps.
- Fruit scraps.
- Eggshells.
- Tea bags.
- Used paper towels or napkins.
- Coffee grounds.
-
Never feed your worms any dairy or meat products.
Harvesting Your Compost
The average-sized worm bin can be fed for roughly three months before you can harvest the castings. Fed on a daily basis, the worms should have eaten and broken down their bedding within that time. Once you’ve noticed that the bedding is gone, it’s time to remove the worms, separate the useable compost and replace new bedding for the worms.
There are a couple of ways you can do this, but the easiest is to construct a sifting frame from some leftover lumber and hardware cloth. Set this over a wheelbarrow or a bucket. Dump your worms and compost over this and then shimmy the frame to sift the compost through. Some little worms will get through, and you can pick these out if you want.
Vermicomposting is a super-easy process and quite fascinating since it’s powered solely by worms. It is a simple project to set up and requires very little maintenance. In return, you get some of the most powerful compost available.
Do you currently have a vermiculture set-up or plan to buy/build one? Please share any tips or other comments in the section below.
A great book on shoestring gardening off-the-grid is “The Shoestring Gardener” and you can find it here.
Get $367.52 Worth Of Survival Blueprints … Absolutely Free!


