


Not much can compare to home-baked bread. The aroma of bread baking can transform a house into a home. Slathered with fresh butter and homemade preserves, the absolute pinnacle of gustatory pleasures may be reached. But what constitutes simple? French bread offers a simple palette of ingredients but a somewhat fussy and energy-intensive process. No-knead “batter” breads offer simple processing and overnight rising, but that means planning ahead and predicting bread needs days in advance – not so simple when company shows up unexpectedly! Basic sandwich breads can bridge the gap, offering a slate of ingredients as simple or as complex as you choose, quicker and more traditional kneading and rising techniques, and less fussy baking processes.
French Bread: Pros and Cons
Warm crusty baguettes offer the simplest array of ingredients: flour, salt, yeast, and water. A traditional baguette contains nothing else. French bread does not contain any fat, nor is any type of protein (e.g. milk or soy) added. The crisp, crunchy, dry crust is created in the baking process by adding steam to the very hot oven. Real French bread ovens have jets that blast steam into the baking chamber. Do-it-yourselfers can use a plant mister or just “throw” water at the floor and sides of the oven during baking. The ragged crumb is created in part by the slack dough (slack means wet in baker-speak) and minimal handling.
The recipe is flexible based on your elevation (in mountainous areas, adjust to get the right dough texture and don’t worry so much about specific measurements), but the basics are: four cups all purpose flour (King Arthur brand works well), one tablespoon of active dry yeast, one tablespoon salt, and 2 ½ cups of water. Toss all that into the bowl of an electric mixer with the dough hook attachment. Mix at low speed until all is combined and smooth. Usually this takes a total of about six minutes, but you’ll have to scrape down the dough a couple of times. As the mixer runs, check for consistency: you are looking for a smooth but slack dough – not like a kneadable traditional bread dough, but something much stickier and much more stretchy. Add more flour or water depending your texture.
Once the dough is fully mixed (check the bottom of your mixer for a “puddle” of dry flour), use a rubber spatula to ease it out of the bowl onto a well-floured surface. I repeat: well-floured. The dough should be very sticky and very loose. With well-floured hands, gently pat it into a rectangle by folding first one edge (your choice – left, right, top, or bottom) and then the opposite edge into the center. Pat with your fingertips, as if you are making focaccia. Once you have a fairly large rectangle, about one-half inch thick or a little thinner, fold one long edge about one inch into the center. Repeat this fold about six or seven times, so that you have folded the dough onto itself to make one long, skinny, multi-ply folded pile. Then fold that piles edges into the center, making a thick but narrow rectangle.
Place that “ball” of dough back in its bowl, folded side down, and cover with a floured kitchen towel. Let is rise until doubled – about one hour. In warmer temperatures, it may be fully doubled in less than one hour.
Again, using the rubber spatula, gently ease the dough onto your floured worktable. Using a dough cutter or a sharp knife, or even scissors, cut the dough in half. Work the dough really gently now, handling it as little as possible, using the folding technique to shape it into a long thin baguette. If you have vented French bread or baguette pans, place your stick-shaped dough in the baguette pan. If you don’t have baguette pans, you may have flattened baguettes – they will resemble ciabatta (flattened long bread). They will still taste great. Repeat with the other half. Slash the dough on the diagonal with a sharp knife, cover with your floured tea towel, and allow to rise again.
Preheat your oven to 500 degrees and place a pie plate full of water on the floor of your oven. Once at temperature, turn the oven temperature down to 475° and put your fully risen loaves in. Splash the oven floor and walls with water or use a planter mister to spray the oven thoroughly (about six or seven big sprays). Bake for about ten minutes, and then check for evenness of browning. You may want to move the pans around if your oven has hot spots. Shift from the top rack to the bottom, and rotate 180 degrees to be sure to bake evenly. Re-spray water every time you open the oven door. Bake for about another ten minutes. The bread is done when it is evenly golden brown.
Let’s Take a Closer Look. The Pros:
- Minimalist ingredients: flour, yeast, salt, water. It doesn’t get any simpler.
- Quick processing: the dough actually benefits from minimal handling. The large and irregular air holes, definitive of great French bread, would be removed by kneading, so after incorporating the flour in the first step, you barely touch it!
- Quick baking: high temperature is necessary, but the overall baking time is less than thirty minutes.
- Great results: full yeasty flavor and a fantastic crust make this recipe a winner. Truly delicious and really impressive, yet really easy.
- Spontaneity usually doesn’t go with bread baking, but the combination of speedy processing and relatively short baking time means that you can find out at 3 p.m. that you have folks coming over for dinner and still have fresh bread on the table.
The Cons:
- Nutrition: The downside to the classical minimalist ingredient list is that white flour is, well, white flour. Not the most nutritious option, but to have the texture remain “classical,” you really can’t add much whole wheat flour to this recipe. It weighs it down and destroys the texture.
- Energy pig: From start to finish this recipe considers energy (electricity for the mixer and whatever you are using for your oven) to be an unlimited resource. Most sandwich bread recipes use a 350 or 375-degree oven for a longer period of time, which, depending upon how well insulated your oven is, might be more energy efficient. Of course with a little trial and error, a woodstove, fireplace, or Russian oven (if you built one into your chimney), or outdoor brick “beehive”-style oven could give you fantastic results.
- Small quantity: The above recipe is fairly small. If you have a large family and would like your bread baking to occur once a week or less (again, taking into consideration energy usage), this yield is too small for most families.
The Improvements
Nix the Mixer
There are several compromises an off-the-grid baker can choose as ways to increase nutrition, energy efficiency, and still be able to preserve great taste. To start with, mix with a wooden spoon and substitute elbow grease for electricity.
Diversify the Grains, Double Duty Whey
To address the nutritional deficiencies, consider this recipe “remix:”
Start with one cup of coarse cornmeal and one cup of whey (the stuff you drained off when you made cheese or yogurt). Gently heat the whey, whisking in the cornmeal, and let that get warm but not super hot. Remove from heat and let it sit for a few minutes. The purpose of this is to allow the cornmeal to soak and soften a little.
Proof the yeast (1 tablespoon of active dry yeast) in 2 cups warm water. Add approximately 1 tablespoon of your own honey. (If you aren’t keeping bees, you should start!). Otherwise, any organic honey will work. Once the cornmeal mixture is cooled to about room temperature, add it to the yeast. Add one cup of cooked whole grains. I generally add wild rice, for both color and nutrition, as well as flavor balance with the cornmeal. Bulgar wheat would be good too. Add half a cup of flax seeds. Stir. Now add either half a cup of whole wheat flour or not – your choice as to whether or not you want the bread to have just a little more heft and a little resistance when chewing. Add one cup of all purpose flour and stir. Keep adding flour and stirring it in until the dough is forming and is too stiff to continue to stir.
Using a rubber spatula, turn the dough out onto a floured work surface and knead in more flour until you have a smooth, sticky, but not too sticky, but workable dough. Knowing when to stop adding flour takes practice, but I advise stopping and leaving the dough a little “underfloured,” rather than adding too much and making bread that could be used as a doorstop or a paperweight.
Now proceed as above: let it rise, do your gentle folding thing, and then let it rise in baguette pans. Bake the same way: high temperature and mist or splashing water as well as the pan of water on the oven floor.
You still have some flexibility and speediness, but by increasing the liquid with the whey, you have increased the amount of protein – thus adding some nutrition and increasing your yield. Adding the flax seeds and wild rice gives the finished loaf real pizzazz and great flavor as well as texture.
Ready for Some More Options?
Not worried about company showing up unannounced? Looking for even more simplicity? “No knead” whole wheat breads, while very different in texture from traditional sandwich loaves (and not much like French bread either), are super simple to make. Often you make the dough the day before, allow it to rise once overnight, and then shape and bake. These breads often have a rich flavor from the long slow rise, and a coarse texture due to the lack of kneading.
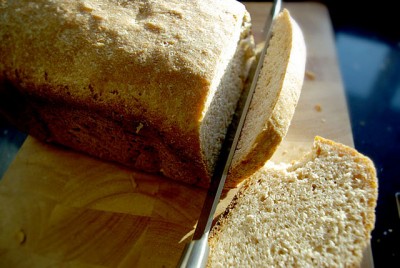
Traditional sandwich breads, whether white or whole wheat, can be as simple or as complex as you choose to make them. The larger size King Arthur all-purpose flour bags have a great recipe printed on the bags – their suggestion yields a consistent and delicious loaf. With a little recipe tweaking, you can have highly nutritious, whole grain, wonderfully slice-able results. Compared to the extremely simple French bread recipe, and its remake with cornmeal, whey, flax seeds and grains, the trade-off is in time and effort. Sandwich breads with their even, fine crumb mean two decent rising and kneading sessions and usually longer baking times with lower oven temperatures.
But what is the ultimate best bread recipe of all? Well, that’s simple! It’s the one you will make over and over again. Try them all and experiment with your own add-ins. Chocolate cherry pumpernickel rolls or wild rice baguettes – fresh bread is delicious and it’s so open to your creativity. And so what if you or others think the add-ins sound silly. If it is a hit with your family and you, that’s all that really matters.
P.S. If you aren’t sure what to spread on your fantastic fresh bread, take about five ounces of fresh goat cheese (you do have goats, don’t you?), and mash it with about a tablespoon of your own honey. Add a couple of drops of rose water. Mash and mix well. Spread lavishly and enjoy.
I would love to read your comments and/or suggestions. I personally love baking bread. It de-stresses me, it gives my hands something other to do than writing, and of course the finished product is the best part. This is also a great thing to share with your teenage kids. I was surprised at how much fun it was with my own kids.
©2012 Off the Grid News


