


Hello friends, this is Bob Whitten, coming to you from beautiful, sunny Thomson, Illinois. Have you been wanting your own greenhouse, but sticker shock has kept you from pulling the trigger? I have found a way to make it happen for much less than you might think.
These days, you don’t have to be rich to have a nice greenhouse. In this column, I will discuss how to get started in the greenhouse business with just a little money and a lot of sweat. If you want to get into greenhouse gardening and you’re not afraid of hard work, I have the plan for you. If you follow these step by step instructions, you can be gardening in your own greenhouse in no time.
1. Do your research. How much room do you have? Find a place that gets full sun, or at least a southern exposure all day. We had just over an acre, but our best area had a cement pad on it. We decided to build a frame on top of that pad and fill it with mulch. We have a mulch company right down the road, and they sold their discarded mulch to us for $3 per cubic yard.
2. Find a used greenhouse. Put an ad in your local paper, Facebook, Craigslist, or any other cheap way of advertising. We drove around our area, keeping an eye out for an old, dilapidated greenhouse. There were many out there– most were missing the plastic skins, and many of their owners were ready to sell. We found them as low as $100. Don’t be afraid of the looks. Plastic wrap is reasonably priced, so just make sure the frame is solid. We ended up with a very nice 14’x20’ greenhouse, with the plastic wrapping still in good shape, all for $500. This was just down the road, and it came with tables, pots, a heater, and a water pump.
3. Be ready to disassemble. We borrowed an old hay rack from our neighbor, then kept very detailed instructions on how we took it apart, placing the solid ends on the hay rack first. We took pictures as we went for documentation. This process took one weekend with two people helping. The ends of the greenhouse were quite heavy and very awkward, and we needed help to get them on the hay rack. We were very careful with the plastic wrap, rolling it up right away and setting it aside.
4. Get the greenhouse home. Do your homework, making sure your disassembled greenhouse is narrow and short enough to clear all power lines and trees. Pick an early morning, just after daylight, and make sure you have a vehicle behind you with flashers on to warn other cars.
5. Prepare your site. This can be done ahead of time. You need to level the ground if it is not level already. We chose to put our greenhouse on cement, so we had to build a level frame out of treated lumber, four feet longer and wider than our greenhouse. Before we could fill the frame with mulch, we had to drill holes in the concrete in order to set the poles. These stanchions had to be 2.5 feet into the ground in order to anchor the greenhouse properly. Then we filled our frame in with mulch– ten truckloads, to be precise. I would recommend finding soft ground if you can, but we had no space for that. It was a real chore drilling the holes, but we rented a hole driller for $30 for the weekend, and it worked very well.
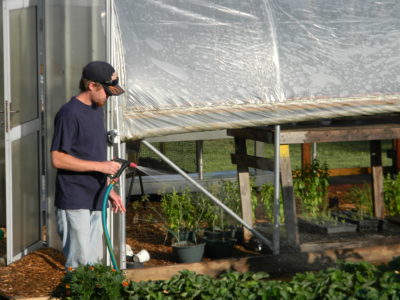
6. Reassemble the greenhouse. Be prepared to buy extra nuts and bolts and new “S” wires that hold your plastic wrap tight. We reused some of the original pieces, and the “S” wires were very cheap. You will need help stretching the plastic over the frame, so make sure you plan for that. Just look back to your documentation, and reverse the process. It is very important to make sure your frame is anchored properly.
We wanted early tomatoes and cucumbers, so that was what we planted first. We had veggies from early March to late November, and remember, we live in Northern Illinois. We also dabbled in herbs, growing cilantro, parsley, basil, and dill. We had fifty hanging baskets that came with the greenhouse, so we grew these herbs in baskets. Within eight weeks, we had plants for sale. I sold them for $5 per pot, advertising on Facebook, and we sold almost every pot. This gave me seed money for our next greenhouse project.
All together, we spent about $700, but I believe we could have gone even cheaper if we had looked harder for a cheap greenhouse. I hope this column inspires you to get started in your own greenhouse project, and look forward to hearing from you. We’ll see you next week!


