 Canning the food we harvest is among the oldest of ways to preserve our fruits, vegetables, and other foods so that our families can be fed during the long cold winters and right through the spring to the next year’s harvest. Some of us may never have canned a single jar of our bountiful harvests, so I am going to start from the very beginning. We’ll walk through the process together, and maybe even those of us who have canned for many years can learn a new trick or two! Please feel free to leave any canning tips or tricks you’ve learned over the years in the comments section to help those who may be just learning this new skill.
Equipment
Quart jars are good for most of your garden veggies and meats. Pint and half-pint jars are good for jams, jellies, sauces, and smaller portions for those of you with small families.
We will start with what you will need for water bath canning. A large kettle with a lid that will hold the rack for your jars is essential. The rack will leave spaces between the jars and keep them from banging against each other while processing. I guess I have been blessed—I inherited my grandmother’s water bath canner with the wire rack that holds seven quart or twelve pint jars at one time. This would be the basic kitchen canner that all women had in their kitchens, until about 50-75 years ago. With this canner you will need jar tongs to lift your jars from the hot water that they are placed in while you process them to preserve your bounty. A jar opener/tightener, thermometer, funnel, and sieve are all also necessary items, as well as the jars that you will fill with your fresh garden offerings. A second, but smaller, large pot may also be needed for blanching vegetables or heating fruits before you put them into your jars. You’ll also need a plastic jar spatula for running along the sides of the jar to remove trapped air bubbles, as well as a magnetic wand for lifting hot lids out of the holding pan. You can usually purchase many of these items as a canning kit at your local department store.
Water Bath Canning
This is the process for preserving fruit and vegetables with a high acid content. These include fruits, pickles, relishes, tomatoes high in acid content, fruit jams, butters, marmalades and preserves. (Some of the newer hybrid tomatoes don’t have sufficient acid for water bath canning. Add about 2 tablespoons of lemon juice to these varieties to insure adequate acidity for water bath canning.) You will want to keep the water in your canner at 212 degrees Fahrenheit during this process. This will kill any bacteria that may be lingering on your food after you have washed them. Checking the most up to date canning information is a good idea for being sure that your food won’t make you sick when you have completed the preservation process. If you live at higher elevations, you will need to add one minute processing time for each 1000 feet above sea level. Most foods will process in 5 to 85 minutes depending on the food, style of packing, and jar size.
Equipment Preparation
- Assemble all of your utensils and equipment.
- Place boiling water bath canner, filled half full with water, on a large stove burner and bring to temperature. Make sure your rack fits well in your canner. When you place your jars into the bath, the kettle should be large enough to cover the tops of your jars with at least 1-2 inches of water when they are put into it for processing.
- Place an extra large kettle of water on the stove burner so that you will have it ready should your canner need additional water added.
- Check all of your jars for any nicks or cracks and throw away any that are damaged. Also, check your rings for rust, dents or other damage—throw away the damaged ones. When canning, never reuse the lids as used lids will not seal completely and may cause your canned foods to get an unseen bacteria—botulism. It is always better to be safe when you are canning then to try taking short cuts.
- Wash and rinse the jars in very hot water. Boil your jars and rings at least 10 minutes. In high altitudes, you will need to add 1 minute for each 1000 feet above sea level. Boil the rings with your jars. Prepare the lids according to the package directions.
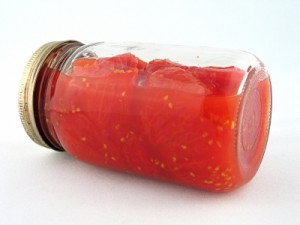
 Canning Tomatoes – Whole or Halved (with liquid)
21 pounds whole tomatoes for canner load of 7 quarts.
13 pounds whole tomatoes for canner load of 9 pints.
To remove skins, wash tomatoes and dip in boiling water for 30 to 60 seconds or until the skins begin to split. Then dip in cold water, slip off skins, core, and remove any blemished or discolored parts. Leave whole or cut in half.
Raw Pack
Heat the water you’ll be using to cover your tomatoes in the jar to boiling. Add 2 tablespoons of lemon juice to each canning jar, and if desired, ½ teaspoon of salt (the salt is not a necessary ingredient for canning purposes). Pack hot jars with prepared tomatoes and fill with boiling water, leaving ½-inch head space. Run your jar spatula along the edges of the inside of the jar to remove trapped air bubbles. (Never use a metal instrument for this. You can damage your jars.) Wipe the rim of the jar and screw threads, then put a lid and screw band on, hand tightening. Do not over-tighten.
Hot Pack
Place your peeled tomatoes in a saucepan and cover with water. Heat to a boil and boil gently for 5 minutes. Add 2 tablespoons of lemon juice to each canning jar, and if desired, ½ teaspoon of salt (the salt is not a necessary ingredient for canning purposes). Pack hot jars with hot prepared tomatoes and fill with boiling water, leaving ½-inch head space. Run your jar spatula along the edges of the inside of the jar to remove trapped air bubbles. (Never use a metal instrument for this. You can damage your jars.) Wipe the rim of the jar and screw threads, then put a lid and screw band on, hand tightening. Do not over-tighten.
Processing Time:
Pints: 40 minutes
Quarts: 45 minutes
After the processing time is over with, turn off the heat to the canner and remove the lid. Allow the contents of the canner to cool down a bit. Then remove the jars and place them on a towel on the counter in an out-of-the way place. Make sure to keep them upright until the lids are properly sealed. Do not set them underneath an air conditioning register or anywhere with an extreme temperature differential. Allow the jars to cool completely and test the seals. If any jar has not properly sealed after 12 hours, put it in the refrigerator and use fairly quickly.
You can remove the screw bands after the jars have cooled and sealed. If you will be stacking the jars on top of one another (such as with pints), then it may be prudent to keep the screw bands on to avoid compromising the seal of the lid. Wash and reuse any screw bands you take off for your next batch of jars.
** When canning only use standard canning jars for both water bath or pressure canning. Other jars may not withstand the temperatures or pressure of canning processes and could cause food loss if the jars crack or break while processing. **
 Off The Grid News Better Ideas For Off The Grid Living


