|
Listen To The Article
|
Maybe you are too young to remember, but there was once a time when packaged seed was rare. In those days, next year’s harvest depended on successfully harvesting seed from this year’s vegetables. Saving seed may not be as necessary today, but it does allow you to continue growing heirloom vegetables that seed companies no longer carry.
While the process for saving seed is easy, you do need to start earlier than you think. So let’s start with the basics:
 Gather seed only from open-pollinated plants, not hybrids. Hybrids are genetically engineered, not the way God created them. Most of the time these plants are sterile. When they do produce seed, they will not be like the parents they came from, but will revert to the separate qualities of the grandparents. Open-pollinated varieties will normally carry on their parents’ qualities, or “breed true.”
- Make sure that the plants you gather from are healthy. Plants weakened by insects, disease, or poor nutrition will not produce the best seed.
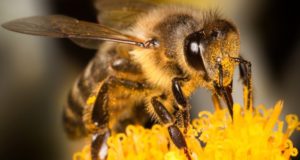
- Be sure the plant you are trying to replicate has not been cross-pollinated with another variety of its species. Squash are very good at cross breeding. The safest way to ensure this is not to plant more than one of variety of that particular vegetable. This precaution still may not work if you live near enough to your neighbors to share bees. Another way to protect plant integrity is to tent them with plastic – in late summer, cheesecloth. When it is time, pollinate them by hand. If you do this twice, you will pollinate just about everything, even if you don’t know male from female flowers. Pollinate using an artist’s soft paintbrush. Gently rub it over every blossom on the same variety of plants, without cleaning brush between flowers.
- To avoid hand pollination, use only those plants that “self-pollinate.” This type of plant has both male (stamen) and female (pistil) parts in one flower. The pollen will be moved from the stamen to the pistil with out any outside assistance. Lettuce, beans, and peas are self-pollinators. Tomatoes also have complete flowers, but there is still a risk of cross-pollination if there is more than one variety of tomatoes in close proximity.
Saving seed from peas, beans, lettuce, peppers, and tomatoes is rather easy. It is a good place for beginning seed savers to start. We will look at each of these individually.
- Beans – Allow pods to dry on the plant before picking. This takes about six weeks after the edible stage. If frost is forecast, pull the plants up, roots and all, and hang in a cool dry place until pods are brown. Pods in small quantities can be opened by hand. If you have a large amount, the pods can be beaten (flailed) and winnowed, either by fork or by hand.
- Lettuce – Lettuce produces perfect, self-pollinating flowers, and each flower will produce one seed. Flowers are grouped tightly together in little heads – ten to twenty-five flowers to a head. Some outer leaves may be eaten without harming seed production. Each flower head will ripen at different times. This will make harvesting large numbers of seed at once impossible. After half of the flowers have gone to seed, cut the whole top of the plant off and hang it upside down in a paper bag to dry. Rub the plant between your hands to remove the seeds.
- Peas – Allow pods to dry on the bush, like beans. This will take four weeks after edible stage. If frost is forecast, pull plants up, roots and all, and hang in a cool, dry place until pods are brown. Pods in small quantities can be opened by hand. If you have a large amount, the pods can be beaten and winnowed, either by fork or by hand.
- Peppers – Pick mature, fully ripe peppers for seed. Most peppers turn red when fully ripe. If frost is forecast, pull the entire plant and hang upside down until peppers mature. Cut the bottoms of the fruit and carefully reach inside to strip the seeds that surround the central cone. Rinse the seed and spread on a paper towel to dry. Place tray in cool dry place until seed is dry enough to break when folded.
- Tomato – If possible, let the tomatoes completely ripen before picking for seed saving. Tomatoes saved from first frost for seed will ripen slowly if kept in a cool, dry place. Most of the seed from these tomatoes will be viable if extracted after allowing the fruit to change color. Halve the tomatoes, horizontally. Squeeze out the jelly-like innards from the cavities gently – it holds the seeds. If carefully done, tomatoes can still be canned, dried or eaten after removal. Place seed-jelly into small jar. Cover loosely and put jar in warm place [60-70 F] for three to four days, stirring once daily. Some mold will grow on it, which will eat away the jelly that surrounds the seeds. This jelly prevents germination and produces antibiotics that help to prevent seed-borne disease (like black spot, canker, and speck). After three to four days, fill the container with warm water. Let the contents settle and start pouring out the water, immature seeds, and bits of tomato pulp. Viable seed weigh more and will sink. Repeat this until the water being poured out is almost clear and clean seed lines the bottom of the jar. Pour seed into fine mesh sieve and let excess water drain away. Invert sieve onto a piece of newspaper or paper towel. Let the seed dry two to three days, break up clumps into individual seeds, label, and store in a plastic bag or envelope.
Happy seed harvesting!
©2011 Off the Grid News
 Off The Grid News Better Ideas For Off The Grid Living

 Gather seed only from open-pollinated plants, not hybrids. Hybrids are genetically engineered, not the way God created them. Most of the time these plants are sterile. When they do produce seed, they will not be like the parents they came from, but will revert to the separate qualities of the grandparents. Open-pollinated varieties will normally carry on their parents’ qualities, or “breed true.”

