


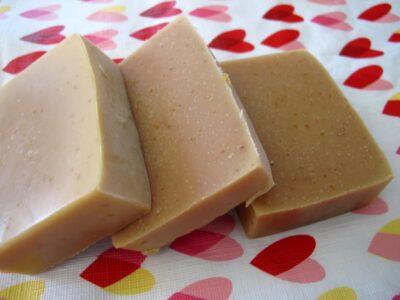
Image source: lovinsoap.com
Making your own soap at home is a rewarding and frugal endeavor. There are many kinds of soap that you can make, but if you’re going to make a soap for everyday use, then you can’t go wrong with goat’s milk and oatmeal.
This soap is fairly simple to make and with this recipe you will get more than enough soap to last a year, even with daily use by a family. There aren’t too many ingredients and only a few steps. And if you have goats already, then that can make the whole process even more affordable.
First things first, though. This recipe uses lye, a caustic and dangerous chemical that can cause all sorts of health problems, including death. In other words, don’t make this stuff near the kids or pets. And make sure you wear eye protection and rubber gloves. Also, the powdered lye can easily become airborne, so if you make this outside make sure it’s not a windy day.
For the ingredients, you will need the following:
- 5 cups of goat milk
- 12 ounces of lye
- 10 ounces of lard
- 2 ounces of coconut oil
- ¾ cup of whole oats
- ¾ cup of ground oats
You also will need equipment, some of which can’t be used for food again after having been exposed to lye. (But you can use them again to make soap and other non-edible products.) I have marked those items in the list below with an asterisk (*).
- Digital thermometer (for the lard and coconut oil)
- Digital thermometer* (for the milk and lye mixture)
- Vinegar (only for safety, as it will neutralize the lye in case of skin contact)
- Rubber gloves and eye goggles
- Large bowl*
- Large metal spoon*
- Large pot (for melting lard and coconut oil)
- Forms, cups, or something to put the soap into so it can harden*
The first thing you will need to do, preferably a few hours before starting, is to put the goat’s milk into the freezer. You don’t want it frozen, but you do want it slushy. This will help immensely in step three.
Everything You Need To Know To Become A Self-Sufficient Homeowner
Step two is to melt the lard and coconut oil in a pot. They melt quickly and easily, so use a very low heat and only let the mix reach about 80 to 90 degrees.
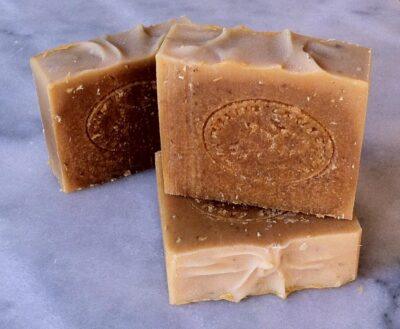
Image source: cariahandmadesoap.com
Step three is to very slowly add the lye to the milk. The chemical reaction this will cause will create a tremendous amount of heat, hence the slushy milk. Slowly add the lye, stirring constantly. Remember, do not drop all the lye in at once. This will cause an explosion.
The lye will create so much heat, in fact, that it will caramelize the sugar in the milk and turn it a bright yellow color. Don’t worry, this will not be the color of the soap at the end of the whole process. You may want to mix the lye and milk outside, if possible. If you’re making the soap in the winter that’s even better because you want the lye and milk mixture to cool down to about 90 to 100 degrees.
Once the lye and milk has cooled, and the lard and oil have warmed to their respective appropriate temperatures, it is time to mix them. Again, this may be better done outside. You’ll also want to mix these two slowly while stirring continuously.
Take the melted oils and slowly stir them into the bowl with the milk and lye. Do this slowly. Once the oils are in the bowl, toss in all of the oatmeal. Now grab your favorite beverage and get comfortable. You’re going to be stirring for a little while.
New Survival Seed Bank™ Lets You Plant A Full Acre Crisis Garden!
You’re going to stir until “tracing” begins. What this means is that the mixture will have cooled enough to be kind of like pudding, where you could trace a line in the surface and it would stay visible for a while.
When the tracing occurs (it won’t happen suddenly), it is time to pour the soap into whatever molds you’ve chosen. Old yogurt containers, bread pans, or even a cardboard box lined with plastic wrap or wax paper will do. Or you can get silicone molds that put logos or shapes to your soap.
Pour the soap into the molds and then wait overnight for the soap to harden some. You can even wait a couple of nights if you’re busy, but the longer you wait, the harder the soap gets. If you used a large container to hold the soap it’s easier to cut it into bars in the first day or two after making.
Then comes the hard part: waiting for the chemical process of saponification to occur. This is the process of the lye saponifying the fats so that you get that nice lather and clean feeling. You will need to wait at least a month before using the soap. This is really important, as the lye needs time to finish the chemical reactions.
Once that month has gone by, feel free to use the soap at will. With its nice lather, scent of oats, and beautiful deep cream color, this soap also makes a great gift.
This soap is a great, healthy product to add to your homemade arsenal. The coconut oil and oatmeal are great for your skin, and the whole oats provide a nice scrub that feels great on the skin.
Have you made soap? What tips would you add? Share your advice in the section below:
Don’t Stop With Soap — Harness The Power Of Nature’s Most Remarkable Healer: Vinegar


