One of my favorite summertime passions is gardening. I generally attempt to grow all the needed vegetables I consume over the course of the summer as a way of ensuring I am eating high quality products while also saving a little bit of money.
I already use landscaping fabric to keep the weeds to a minimum, and I employ a variety of other methods to help with water retention in the soil. I am always concerned with maximizing space and effective pest control measures to ensure the crops I am able to harvest are the best I can get.
But one of the hardest things for me – with a busy summer schedule — is keeping track of watering the garden. I do my best to make sure that each plant receives the necessary amount each day if there is no rain, but this isn’t always an option. Just like everyone else, there are days that I just can’t get to it.
Due to the design of my yard, the area I am able to use as a garden is far from a water source. It requires me connecting two hoses together and keeping two doors propped open in order to reach my garden – something that simply isn’t practical.
So what I have done this year is to begin construction of an irrigation system that utilizes some of the things I already have in place. I currently have a shed that sits within 10 feet of my garden. It is roughly 15 feet by 15 feet and is equipped with a set of old gutters. The gutters originally funneled to separate downspouts and out into the yard, but I have since tied them together to one communal downspout. I don’t live in an overly rainy area, although as the phrase goes, “when it rains, it pours!”
Discover 1,147 Secrets Of Successful Off-Grid Living!
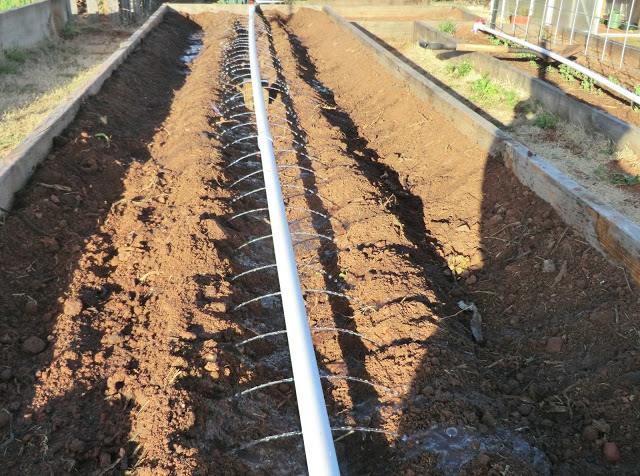
Thus, I am building a functioning irrigation system that can be utilized as needed. Here is what I’m using. All total, it cost about $35:
Materials
- 40 feet of ½-inch PVC pipe
- Four (4) ½-inch PVC T connectors
- Five (5) ½-inch PVC pipe caps
- One (1) ½-inch PVC elbow
- Six (6) ½-inch PVC ball valves
- Two (2) ½-inch PVC adapters
- Two (2) pipe clamps
- 10 feet of ½-inch plastic tubing
- One (1) 50-gallon garbage can with lid
(Things I did not take into account when pricing this project: I had previously reworked the gutters to one downspout for a separate purpose and already had the garbage can prior to this project.)
Step One
- Reroute the gutters to flow to one communal downspout.
- Modify an old 50-gallon trash can with lid so the gutters can drain directly into the can itself and water can be stored there. It also helps to have the garbage can raised off the ground on several level cement blocks.
- Cut a hole near the base of the trash can so that a 40-inch section of ½-inch PVC can be installed and secured. (Note: You will need to silicone or otherwise seal this installation in order to provide a watertight seal.)
- Onto this section of pipe, attach one of the valves, followed by a 2-inch section of ½-inch pipe, and then an adapter.
Step Two
- Cut 5 sections of ½-inch PVC at 5-foot intervals.
- Using a cordless drill, drill holes in a staggered pattern every 12 inches or so in each of the 5-foot sections of PVC. You will want holes on both sides of each pipe. (Note: I used a ¼-inch drill bit for this step.)
- Put an end cap on one side of each of these pipes.
Step Three
- Fit the opposite end of each these pipes with a ½-inch valve.
- Cut 5 individual 2-inch long sections of ½-inch pipe.
- Place each of the 2-inch pieces on the opposite side of the valve in each of the 5-foot sections.
- Onto the 2-inch sections, place an elbow on one branch followed by Ts on the remaining 4 sections.
- You want to make sure that each branch is laying on the ground in such a way that the holes you drilled are parallel to the ground and adjust the valves and fittings as needed.
Step Four
- Cut 4 individual 3-foot sections of ½-inch pipe plus one additional 1-foot section.
- Run each of the 3-foot sections from the elbow through each T.
- Attach the final 1-foot piece to the end of the final T.
Step Five
- To the end of the 1-foot section, attach the other ½-inch PVC adapter.
- Run clear ½-inch plastic tubing from the adapter on the trash can to the adapter on the end of the irrigation system.
- Secure each end of the tubing using a pipe clamp.
The reason I used this many valves in my design is that I want to have as much control over the flow of water as possible. Not all plants need the same amount of water, and this design will hopefully provide me with the ability to target individual rows of plants instead of the garden as a whole. It is, I hope, a handy way to ensure that there is little potential for waste.
The project should cost somewhere around $35, depending on local prices, taxes and any materials you already may have on hand. This cost does not take into account the rerouting of the gutter system or the purchase of a trash can, which most people already have. (Trash cans vary widely in price, depending on what you want.)
The idea behind the clear tubing is to allow for a connection to the irrigation system only as needed. This way. I can still mow in this area and won’t run the risk of damaging any critical parts.
This irrigation system is made so that it can be left out throughout the summer, without fear of damage. Since I keep it located in my garden, it is generally out of the way most of time and doesn’t require me to find a new space for it.
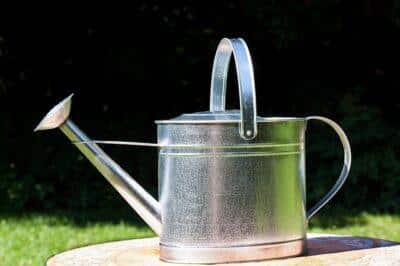
The idea is to find a functional way to utilize water that otherwise goes off into my yard and serves no purpose. This design also allows for me to fill a watering can.
Have you ever built such a system? What advice would you add? Share your tips in the section below.
Discover The Secret To Saving Thousands At The Grocery Store. Read More Here.
 Off The Grid News Better Ideas For Off The Grid Living


