


Image source: WomansDay.com
Winter is coming on fast. There is a chill in the evening air holding over into the morning.
We are beginning the process of tearing out the last of the summer crops and prepping the high tunnel for our fall planting of winter greens and herbs. As a former longtime Florida resident, in a land devoid of seasonality, I love it! I can’t wait for the frosts, and having a wood fire every day. Walks in the winter woods, fall deer and turkey hunting, and running a modest trap line come November 1 when the trapping season here in Missouri opens up — all great stuff!
Along with the changing of crops, there are a host of pre-winter chores that need to be attended to. Finishing touches need to be put on the wood pile. The last of the meat chickens need to be finished and butchered. Walnut husks need to be boiled to make trap dye, and the traps need to be dyed and waxed. Lip balm needs to be made.
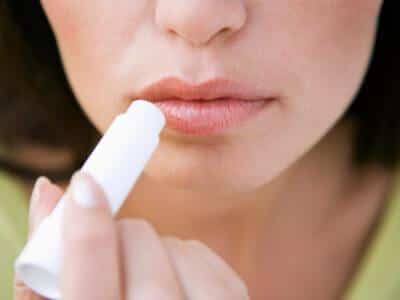
That’s right, lip balm. With the cold dry air, and all the great opportunities for outdoor activities, with the dry wood heat keeping the house toasty and warm, with all the great stuff that comes with winter, also comes dry, cracked lips. This can go well past the point of inconvenient and work its way up to downright painful, so you don’t want to be caught out without the proper remedy.
Lip balms, and lip glosses for the ladies, are great for relieving sore, chapped lips and are a practical enhancement to your wife’s cosmetic collection. Knowing that the over-the-counter products are laden with synthetics, chemicals, preservatives and petroleum-based additives, we prefer our own natural concoction over the store brands. Just thinking about how our bodies absorb all the FDA-approved ingredients, deemed safe by your ever-vigilant government, makes the skin crawl. My wife is the practitioner of all the natural health and body care alchemy in our household, so she is faced with the challenge of crafting her own health care products, including lip care products. This takes a bit of time, a collection of supplies, and a few basic skills.
Take control of beauty treatments with homemade products that use safe, nourishing ingredients.
Making lip gloss or balm is not the easiest of tasks, but it is far from impossible. Most of the basic recipes will call for beeswax pellets for hardness, and butters for smoothness and nourishment. Most will be hard at room temperatures. Carrier oils are added for balance and as a blending agent, and a plethora of oils can be added to suit your individual tastes and needs. Vitamin E is used as a preservative and as an antioxidant (skin cancers of the lips are considered unattractive in almost every society!).
The general formula to make your own lip balm is:
- 1 part wax
- 2 parts vegetable butter
- 1 part carrier oil
Making Lip Balm
Ingredients:
- 1 1/3 tablespoon beeswax
- 2 tablespoons coconut butter, Shea butter, or Kokum butter
- 1 tablespoon Olive oil
- 2 tablespoons Sweet almond oil
- 15 drops of Essential oil such as lavender, orange, vanilla, or whatever suits your taste or aroma therapy needs.
- 5 drops of Vitamin E oil
Other supplies and equipment:
Double boiler or a pot of water, a quarter to half full with a Pyrex glass bowl to set in it.
Lip balm tubes and tray (Available from online suppliers, health food stores, etc.), small tins or the recycled containers of your choice (old film canisters work well. I am fond of primer tins, but my wife won’t use them!).
Procedures:
- In a double boiler over medium heat mix the beeswax, butter, olive and sweet almond oil. Stir occasionally with a stirring rod or spoon. The butters and the wax will bind to the stirring rod or spoon; don’t worry, this is normal, and it will melt off as the mixture begins to blend together. It should take about 10 minutes to completely melt the wax pellets and the butter.
- Once the ingredients have liquefied, remove from heat.
- Next, stir in the essential oils, 15 drops total, and the vitamin E.
- There are several ways to transfer the hot liquid into your containers. My wife likes to use plastic pipettes because they provide a high degree of control over the amount transferred. Pouring from a Pyrex measuring cup proved to be very sloppy and wasteful; spoons yielded similar results. Bear in mind that the pipettes are not reusable, but are cheap and convenient.
- Let your containers cool for a full day before capping. Use as you would any other lip balm.
If you want to add a cosmetic flair, the formula can be modified to create a lip gloss.
Make your own lip gloss
Ingredients:
- 1 tablespoon beeswax
- 1 tablespoon coconut butter, Shea butter or Kokum butter
- 2 tablespoon coconut oil, Sweet almond oil, avocado oil, olive oil, or the carrier of your choice
- 15 drops of Essential oil such as orange, grapefruit, or vanilla
- 1/8 teaspoon of beet powder for a reddish tint, coco for dark brown, turmeric for yellow or the natural food color of your choice
- 5 drops of Vitamin E oil
Other supplies and equipment:
Double boiler or a pot of water, a quarter to half full with a Pyrex glass bowl set in it.
Lip balm tubes and tray (Available from online suppliers, health food stores, etc.), small tins, or the recycled container of your choice.
Procedures:
- In a double boiler over medium heat mix the first four ingredients as in the first step of making lip balm. It should take about 10 minutes to completely melt the wax pellets and the butter.
- Once the ingredients have liquefied, remove from heat.
- Stir in the essential oils, 15 drops total, and the vitamin E oil.
- Add your coloring agent and stir vigorously to blend.
- Transfer hot mixture into your chosen container as in making lip balm.
- Let cool for about a day before capping the containers. Use like any other lip gloss, and enjoy!


