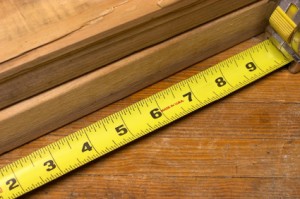
 Once you’re serious about preparing your family (or even just yourself!) for an off-grid lifestyle, you may quickly run out of space for all your stuff. Properly organizing and storing them is critical to avoid becoming overwhelmed, so today I wanted to share with you my own easy to build, custom storage shelves.
I know … you’re thinking, “My time is more valuable than building shelves. I’ll just go to Home Depot and buy some pre-fab shelves.” Well, that’s fine, but let me point out that store-bought shelves are mass produced and may not fit your space or, as is very likely, may waste a great deal of space. I discovered very quickly with my own store-bought shelves that the lack of flexibility and the size of the spaces between the shelves made it difficult to use the space efficiently. Plus, when you consider the actual out-of-pocket costs for my custom shelves, you will likely save a bundle.
I like to use lumber that is already cut to standard sizes to save time and make life easier. An example of a foundational piece of lumber is the 2×4. (A little piece of trivia: a 2×4 is actually only 1.5 inches by 3.5 inches.)
Anyway, one final tangent and then I’ll walk you through the actual building process: measure twice, cut once. This saves a lot of frustration, time and wasted wood.
In my case, I’m building shelves that are 8 feet tall, 8 feet wide and 2 feet deep. Critical to my design is the shelve spacing, which will be 2 feet apart and gives me just enough room to stack my food storage containers, one on the other, without wasting a lot of space.
I learned a long time ago that projects go more quickly and easily when I “stage” or prep my gear, so I made a list of everything I would need: hammer, electric saw, chisel, rubber mallet, nails/screws, and safety goggles. As far as the lumber, you’ll need:
- Six 2x4x96
- Ten 2x3x96
- Two sheets of 4×8 plywood
- 32 screws (2.5 inches long)
Along the lines of “measure twice cut once”, I begin marking off my lumber where the supports for the shelves will go. This is a two-step process, because I first mark the actual height of each shelf, and then the corresponding mark at the bottom of that shelf where the actual support must be affixed. In this example I’m putting shelves at two feet, then four, six and eight feet, and since I’m using 2x3s for supports, my second mark is 2.5 inches below the height of the actual shelf.
In my case I’m using a handsaw, so I also make a 1.5 inch mark wherever I’m going to cut so I know how deep to make the cut. This ensures a higher level of workmanship and hopefully a more stable, secure structure. Of course, if you use a circular saw you can set this on the saw itself.
I know you readers are all grown-ups and are already safety conscience, but we don’t like lawsuits, so let me remind you to be careful of all your fingers and other appendages, as well as loose-fitting clothing. Wear your eye goggles and ear plugs, look behind you, etc., etc. When you’re cutting and assembling there is no point to being in a hurry, so take your time.

Another little tip I can give you is to make all the marks on all the wood and not just one at a time. If you’re really obsessive, you can even then match up the marks on one piece of wood to the marks on another to make sure they match. Nothing is more frustrating than thinking you’ve measured two different pieces of wood perfectly and then cut them, only to discover you made some mistake and now you’ve wasted a bunch of wood.
In my case a lot of the cuts I’m making are on 2x4s where I need notches for the shelves. I then use the rubber mallet and chisel to cut away the notches that are 75% cut by the saw. It takes a little longer but it is more precise this way.
(By the way, long ago I made a habit of keeping my waste wood, even these little pieces I’ve knocked out for the notches. You never know when you’re going to need a little piece of wood, and one Christmas I even stained and painted some and they became playing blocks for toddlers. They loved those blocks more than the expensive, breakable toys from Toys R’ Us!)
Next I cut two of the 2x3s into pieces 21 inches long, because these are the supports for the plywood shelves. This gives me a total of eight 21 inch long pieces.
I like to assemble things on the floor where it is easier to line things up, so I put the 2x4s down and attach the shelf supports with screws. I know, I know, I could probably use nails but my dad always taught me to overbuild unless it resulted in too much weight or expense, and in this case, neither is a consideration.
The next step is to screw or nail the 21 inch long 2×3 perpendicular to the shelf supports, two feet from the end of the unit. This will support the depth of the shelf and give it plenty of strength to handle all the weight I plan on putting on there.
From this stage, things are pretty much downhill. I screw the other two notched 2x4s to the 2×3 shelf supports, just as I did with the first section. Next I nail the 21-inch piece of 2x3s to the shelf supports.
Now it is time to affix the plywood, and whether you use OSB (oriented strand board) or plywood is not particularly important (although men are known to argue about such things). In my case I’m using ½ inch plywood. If you’re thinking that you’ll need ¾ inch to support the weight, remember that we have those shelf supports in the middle of each four foot section, so it’s not really necessary. (I know, I weigh 225 pounds and they support my weight!)
A full sheet of plywood is 4’x8’ so it’s no problem to get four 2’x4’ sheets out of it. Naturally, you want to mark it off at 24 inches from the shortest end, and when you are cutting something as long as four feet it’s always a good idea to make three or more marks to ensure a straight line. I usually mark about 12 inches apart myself, just to be certain, and then use one of the remaining 2x3s to trace the line I cut along.
Of course, you’ll need to put a notch into the corners of the plywood to fit onto the supports, so put a mark 1.5 inches from the short side and 3.5 inches from the long side and then cut the notch out. On the other end of the plywood, you’ll be doing the mirror image, measuring ¾ of an inch from the short side and 3.5 inches from the long side, because we want the shelves to match up neatly. Otherwise, you’ll have a little gap between them that would allow things to fall through the middle of the shelves.
If you have a large basement or open room like I do, it’s easy to expand this shelf by affixing another 2×4 with notches every 12 inches to the side of the shelf. You just keep adding on in sections!
Other articles in this issue:
 Off The Grid News Better Ideas For Off The Grid Living


