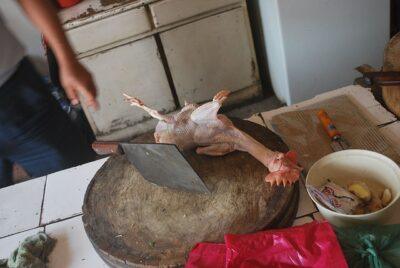
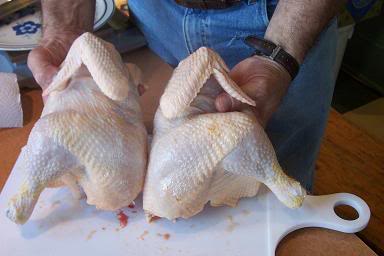
Now that we are heading into fall, it is time to begin thinking about butchering those animals set aside for providing meat. Not all homesteaders or off-the-grid lifestyles include meat animals but for those that do, this is a busy season.
How you handle butchering on your homestead will differ depending on you, your time, your abilities, and the number of animals you will be butchering. You may be culling chickens, ducks, geese, turkeys, rabbits, yearling lambs, yearling goats, calves, steers and pigs. Hunting season is coming up, so you may also have a variety of wild game carcasses to manage as well. Many people choose to have their larger animals butchered by a professional due to the necessary space for proper handling of the meat, and so that it doesn’t get tainted accidentally. Rabbit and various fowl can be butchered on a large table in any clean, enclosed room or even outside if you prefer.
Unfortunately, there is no one-size-fits-all butchering method that will fit every single animal. Even members of the same family, such as chicken, ducks, geese, turkey and game fowl, will need slightly different techniques to get the most use out of the carcass. That being said, there will still be several things that will be the same no matter the type of small animal carcass being broken down for immediate use or storage.
Once your bird or animal has been dispatched, bled, skinned/plucked and gutted, it is ready for breaking down. At the end of breaking down a chicken, you’ll have eight edible pieces and the scraps can go into the stew pot for making stock. With rabbits you’ll have two large pieces (the rear haunches) and two small pieces (the front legs and shoulders). I take off the belly and loins before the rest of the back goes to make stock for when I want rabbit stew. Four-legged animals will, of course, give you more selection of cuts as well as ground meat from the scraps.
All The Answers To Every Chicken Question And Quandary …
Because most homesteaders I know tend to keep chickens for eggs and meat, this is the animal I will focus on in this article. With a few exceptions, other fowl will follow these guidelines as well.
Tools Required
- 7-9 inch chef’s knife
- Cleaver or kitchen shears
- Cutting board
- Storage bags: vacuum sealed is best to prevent freezer burn
Breaking Down a Chicken Carcass Into 4 Pieces
- Lay out your chicken on the cutting board with the breast up.
- Pull the drumstick out and down from the body of the carcass until the skin is stretched taut.
- Using your chef’s knife, cut through the skin. You don’t need to cut too deeply, just through the skin.
- Grip the large part of the leg firmly and bend it out and down until the ball joint pops out of the socket. It doesn’t take too much force, but you will need to exert firm, steady pressure.
- Now that you have the thigh bone separated from the body, use your chef’s knife to cut the thigh from the rest of the carcass. Make sure that you get the little nugget of meat that sits close to the spine with that cut. That is one of the tastiest pieces!
- Repeat steps two through five for the other leg and thigh. At the end of this, you should have two nice leg quarters.
- Now you are ready to separate the back from the rest of the carcass. Position the carcass with the butt end up on your cutting board. Cut through the skin and cartilage between the breast and the back. It’s thin, but the skin can be a bit tough. Cut through until you reach the first or second ribs.
- Time to use your cleaver or shears. With the carcass still in that upright position you want to use short, firm strokes with the cleaver to cut through the remaining ribs. If you don’t have a cleaver, you can use the shears to cut through the ribs on both sides.
- Cut through the shoulder bones at the top of the back on either side. When you have finished here you should have the back with the tail (pope’s nose) on it, ready for the stock pot and the combined breast/wing quarters still connected by the breast bone. You’re halfway done!
- Lay the breast and wing combination out with the inside surface down. The keel bone is easily felt between the two breasts. Slice carefully through the skin along the center groove of the keel and continue cutting through the bone until you feel the sternum. You’ll need to press down hard with your free hand on the back of your chef’s knife to break through the sternum.
At this point you have four pieces. If you want to stop here, which I recommend for the leg quarters if you will be grilling them, you can do that. Below are the guidelines for breaking the quarters into individual pieces.
Breaking Quarters Down Into 8 Pieces
- Let’s start with the leg quarter. Use your fingers to find the ball joint between the leg and thigh.
- Once you have found the joint, carefully cut down just to where you can see the cartilage.
- When the cartilage is exposed, take the leg in one hand and the thigh in the other to pop that joint apart to make the separation a bit easier.
- As soon as the joint has separated you can cut the leg free from the thigh.
- Repeat steps one through four to separate the second leg and thigh.
- Now we can move on to separating the wing from the breast. Pull the wing away from the breast until the skin is taut.
- Cut through the skin and carefully twist the ball joint from its socket where it is attached to the rest of the breast.
- Once the wing is disjointed from the breast, carefully cut through the last bit of skin to separate it completely.
- Repeat steps six through eight with the second breast and wing.
And that’s all there is to it. Remember that these are just guidelines for how to break down a chicken carcass. You will find the techniques that work best for you. Most fowls, including game birds, will follow a similar method of being broken down. The only differences will be the size of the bird and how many pieces you actually want to break it down into. Quail are likely to be only halved, while ducks may leave the wing attached to the breast. Turkeys, of course, are usually roasted whole unless they are dismembered for the legs and the rest can be made into ground meat.
Congratulations and may your harvest be plentiful!
What advice would you add? Share your tips in the section below:
Discover The Trick To Saving Thousands At The Grocery Store. Read More Here.
 Off The Grid News Better Ideas For Off The Grid Living


