 [1]
[1]
I must tell you: I am no survival expert. But my husband and I love the outdoors, and sustainable living is a major part of our lives.
If it’s not building a rocket stove in our backyard, it’s baking cakes on the beach. Experimenting and building our own gear is just our way of life, so when we moved off-grid, the habit came with us — and so did our love for baking. Ready for the challenge of building an off-grid oven, we started experimenting with baking techniques.
In this article, I will share with you a basic outdoor oven we built and the concept behind building an off grid-oven so that you can build one yourself.
New Solar Oven Is So Fast It’s Been Dubbed ‘Mother Nature’s Microwave’ [2]
 [3]Mud/clay, stones, bricks and tin (or metal plating) are the basic materials we use for making our ovens. My husband always says, “It’s not as hard as it looks. An oven is just trapped heat.” So we did some research about outdoor ovens, and this gave birth to our favorite trench oven. It’s simple and can be built in under an hour.
Here are the three steps:
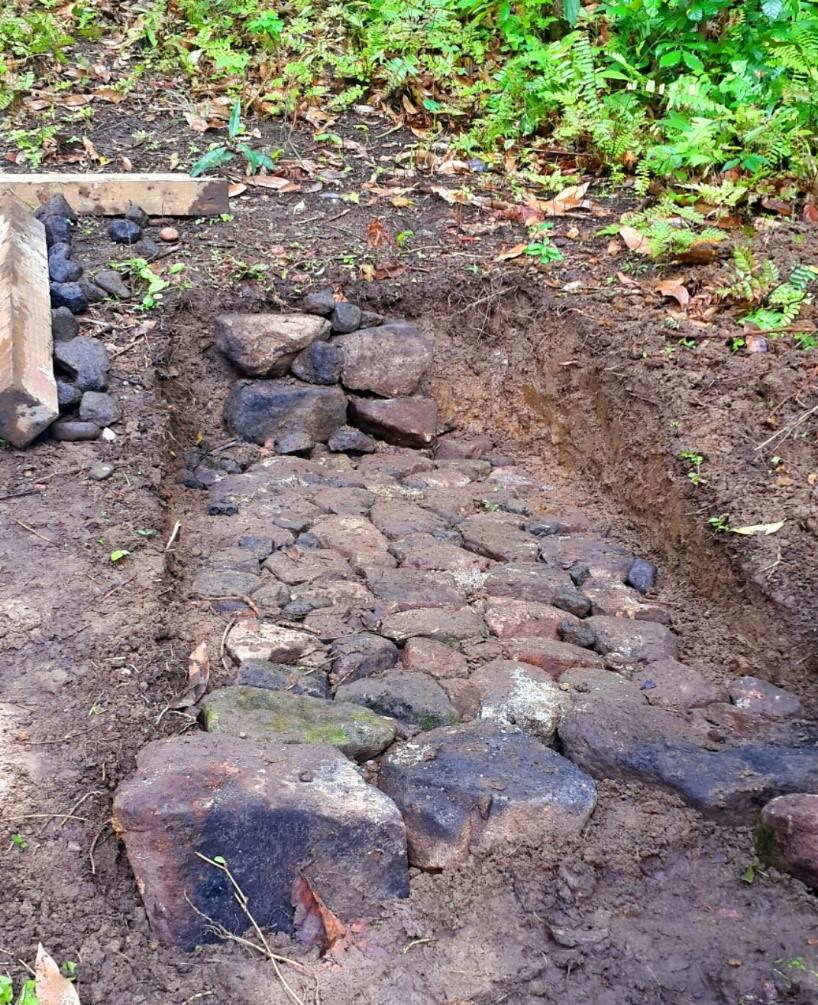
- We dug a trench, 3 feet by 4 feet, that was about 1 to 2 feet deep.
- We put a layer of dry stones on the bottom and the sides. This trench was also used for our bonfire when our friends come over.
- We gathered our materials to build the fire: tinder, kindling and fuel. We used wood for our oven, so we placed the tinder in the bottom of the trench to cover the stones. Then we added kindling and covered it with a layer of fuel (large branches and logs). I lit the fire in the center of the trench by making a small hole in the kindling layer. Then we added another layer of logs diagonally.
We waited about 15 minutes while the fire heated up the stones. By then, logs were charred and there was no more smoke. We placed tin on top of the stove, and then began baking our bread.
Since we didn’t know the temperature, we checked it every 15 minutes to ensure the bread was cooking properly. We rotated the trays or moved the coals around to share the heat more evenly. Within 45 minutes, we had hot, steaming, whole wheat bread we couldn’t wait to cool down to eat. My husband and I can bake 80 small rolls using this baking technique.
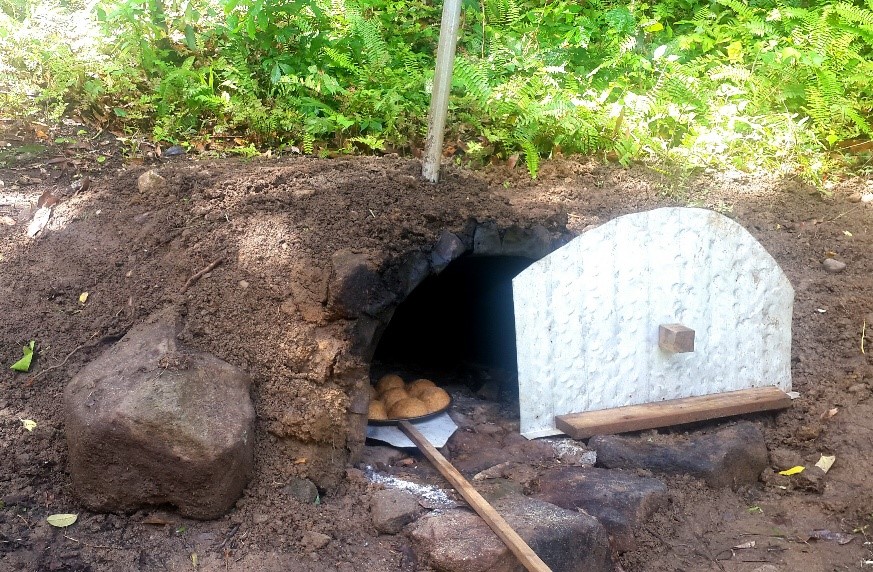
It was simple and easy, but we wanted to build something more permanent, so we dug a trench into the side of a hill in our front yard. (See pictures at bottom and top.)
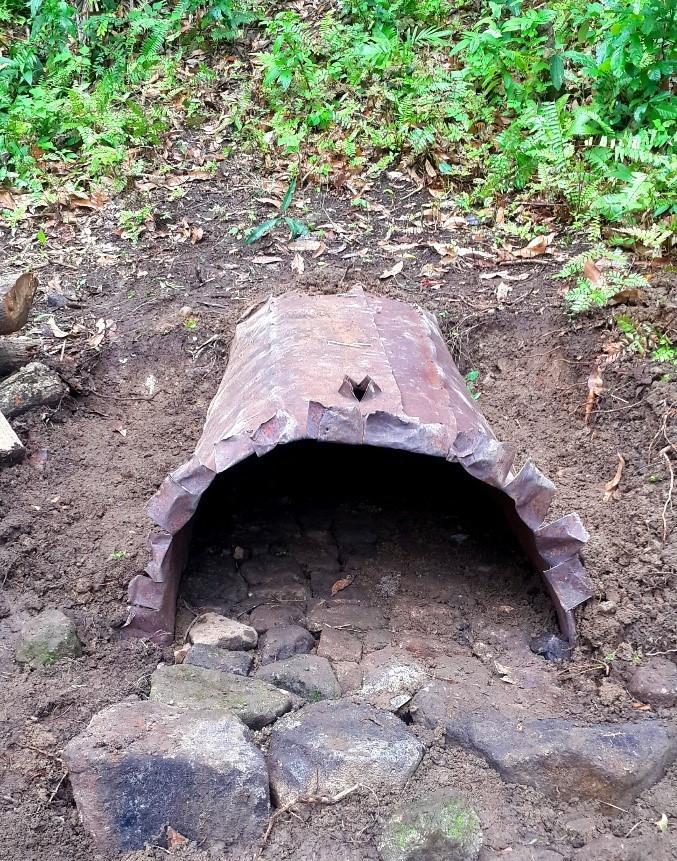
Then, we plowed the soil and placed 5-inch diameter stones on the base of the trench. We ramped the stones into the mud floor with a 4×4 post. My husband cut out the bottom of a metal drum, and then cut it down the center to use as the ceiling for our oven (see picture). We test fitted the metal drum in the trench and adjusted it until it fit snuggly. My husband then cut a hole in the top for the chimney. After which, we started from one side and layered the drum with clay and stones. Then, we added layers of dirt to give the effect that the oven was cut into the mountainside. As impatient bakers, we put in a fire to quicken the drying process.
“Let the baking begin!” I said, excited to test our new oven.
World’s Smallest Solar Generator … Priced So Low Anyone Can Afford It! [4]
We made the bread dough and heated the oven. When the oven was ready, we pushed the coals to the side and inserted our bread in cast iron. We couldn’t resist calling up some friends to check out our new earthen.
Important tips
 [5]An off-grid oven is a simple concept. We need convection to feed oxygen to the fire that radiates heat to bake, and a chimney for smoke to escape. Whether you to want a fire inside the baking chamber, or a firebox that spends hot air into the oven, the concept is the same — cooking with trapped heat.
Think of the shape of an igloo when building your off-grid oven. The entrance of the oven should be approximately 60 percent of the height of the oven. To allow for the right conditions for convection, the oven ceiling cannot be too high, because the heat will be lost, yet not too low as the oven won’t be heated properly. A thick fire resistant material like clay, concrete or firebrick is best to store heat for long hours, especially when baking bread.
Building an off-grid oven is a fun activity, so don’t be upset if you don’t get it right the first time. With an overcharged imagination and people who love to learn new things, you can do it.
What advice would you add on making an off-grid oven? Are there other concepts you’ve tried? Share your off-grid oven device in the section below:
Every Spring, Gardeners Make This Avoidable Mistake — But You Don’t Have To. Read More Here. [6]
 [7]
[7]