


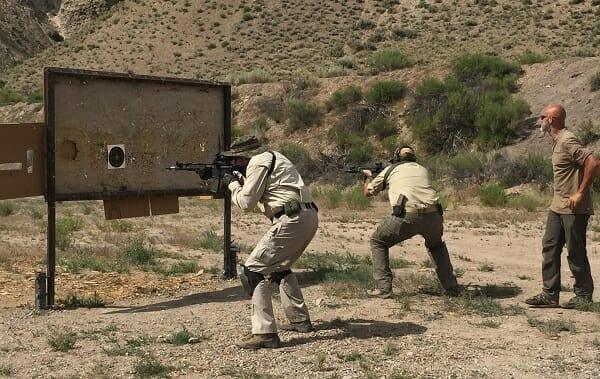
Combat Focus Carbine course in Gypsum, Colo. Right: Rob Pincus. Photo by: Terry Nelson
Most serious students of home defense have a handgun or two prepped and ready around the house. I know many that also have a good shotgun at the ready. But fewer folks I know and train with seem to consider the carbine for home and vehicle defense. Aside from some legal issues while carrying in your car (know your state and local laws), I routinely carry a carbine in my vehicle and have the same placed strategically in my home.
Recently I had the opportunity to attend a Combat Focus Carbine course in Gypsum, Colo. This class is part of a series of courses sponsored by Personal Defense Network (PDN) and Rob Pincus, executive director of PDN. Although there are numerous instructors working nationwide for PDN, Pincus was the on-site instructor for this class.
Aside from a discussion of safety and responsibility concerning firearms inherent to any good firearms course, the emphasis of Combat Focus Carbine was the defensive use of your carbine (both AR and AK platforms were present in this class) in and around your home and vehicle. If you have watched training videos or read any of Pincus’s work, then you know that his approach is focusing on the threat when firing from about 10 yards and closer, rather than a focus on the front sight. Hence his “Combat Focus” trademark. This carbine course, as the name suggests, was no exception.
Pincus led the class through a series of drills and shooting techniques designed to enhance the shooters’ manipulations of the carbine. I wholeheartedly agree with that priority. Four baseline drills from the class are listed below.
1. Raise/touch/press
This drill started out the day at the five-yard line. The distance is realistic to defensive actions taken within your home or around your vehicle. While in a good stance, (squarely facing the target with feet placed shoulder-width apart) and the toe of buttstock in the pocket of the shooting shoulder, the student would raise or bring the carbine into the cheek weld while beginning trigger touch, and then press the trigger as the muzzle was on the threat/target. All the while the focus is on high-center mass of the target, looking into the desired strike zone.
This technique is very fast and more than combat accurate at the five to 10-yard line. This drill was repeated several times while increasing rounds fired from two up to six.
After several reps of extend-touch-press, Pincus added lateral movement while moving into the shooting position … a very realistic tactic.
2. Flow drill
After having discussed and demonstrated a variety of shooting positions, including standing, kneeling and sitting, Pincus had students commence with what he calls the Flow Drill. At about 12 to 15 yards, students would flow through all three of these shooting positions (as physical abilities allowed) while engaging the target with multiple shots. The realization that as distance increases, one must start using the iron or red-dot sights, became obvious. This exercise forced students to maintain good muzzle awareness and finger discipline while moving between positions and attempting to make good combat accurate shots. It also made the point to maintain good physical fitness within your own capabilities.
Also introduced were the squat or “rice paddy prone” position and the supine (flat of back). Both are excellent positions if the shooter’s body and joints will allow.
3. Wind sprint
This drill also required some physical movement and exertion. Shooters would start on about the 30-yard line. On the command “front,” shooters would run to a certain yard line, say the 10-yard mark, and fire multiple rounds into target center mass. A command would then be given to move forward or back to another called yard line and turn to fire multiple shots again. This drill got heart rates up and created a bit of stress with movement. In my opinion, this provides a real-world application because few confrontations are static. Safety protocols were, of course, in place so that no shots were fired until all shooters were on the same yard line and facing downrange.
4. Target ID
The target used for this course was the PDN-trademarked “Balance of Speed and Precision.” This target is a silhouette and provides a center mass zone that is slightly blurred, along with a head zone, plus eight-inch “A” and “B” squares at the bottom. In addition, there are numbered and colored circles on the outer margin of the target.
The instructor called out different colors or numbers, or puzzles with numeric answers. Shooters would move laterally, find the correct colors and or numbers, then fire at those specific targets. It’s a good exercise that incorporates movement, multiple threats and target ID. This drill was conducted from around the five- to seven-yard line.
Many other shooting skills were addressed during this course including transition to and shooting from support-side shoulder, use of cover and cornering, assessing surroundings after shots fired, shooting through small ports or openings, and shooting from supine both left and right positions around and under a vehicle. Total rounds fired for the day approached the 400 mark.
Overall, the course was very thorough and well-conceived. You could categorize the course as a home and close quarter’s defense with your “fighting carbine.”
If you’re interested in upping your skill set with a carbine, check out the Personal Defense Network online for a list of training and course locations nationwide.
What carbine advice would you add? Share your self-defense tips in the section below:


