 Print
Print
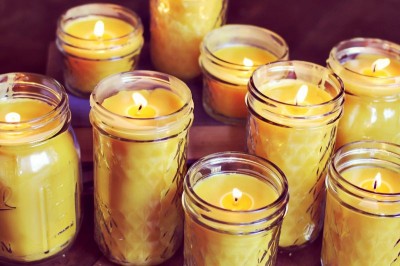 Candle-making can be a fun and useful skill to have in the event of a power outage, an extended stay in the wilderness or the good old zombie apocalypse. They also can be beautiful and fragrant and make great gifts for friends and family around the holiday season.
But you want to make sure that you go for all-natural products like beeswax and soy wax because they burn cleaner and longer than all of those petroleum/paraffin waxes that most commercial candles are made from. If you choose to add a fragrance, it is best to go for natural fragrances, such as essential oils or you can use citrus shavings, crushed lavender and other home grown spices, too.
A few things you will need to get started:
- A double boiler – this will keep your wax melted while you are using it without letting it get burned. (If you don’t have a double boiler, you could also just fill a pot 1/3 full of water and set a smaller pot inside of it to melt your wax; it’s basically the same as a double boiler, just not as nice looking.)
- Wax – soy wax or beeswax are best. Beeswax is my personal favorite because it is the hardest wax, so it burns the longest and I tend to never have a problem with dripping. It also doesn’t require fragrance because when it burns, it smells like honey and fills your whole house with the smell of fresh baked goods. It’s really kind of perfect the way it is, but fragrances can be nice, too, depending on your preference.
- Wicks – you can purchase premade wicks that are fairly inexpensive, but I don’t trust the materials they’re made from. I prefer to make my own. If you decide to make your own wicks, you’ll need a lot of (unbleached) cotton cording. You can usually find this at any hardware store or co-op because a lot of farmers use it for staking their crops. (We’ll get into how you make the wicks in a little bit).
- Something to hang your candles from (if you’re doing dipped candles) so they can dry smooth without having a flat side from being laid out to dry. For this, I like to use one of those stand-alone toilet paper roll holders, but you can get creative and hang them however you like.
- If you’re doing poured candles, you’ll need jars, pots, teacups, whatever you want them poured into. I don’t usually do poured candles because dipped candles burn longer and I find them more visually appealing.
- Essential oils, citrus shavings, crushed herbs, or whatever other kind of fragrance you might be inclined to use.
- If you’re pouring your candles, you’ll also need skewers, wooden or metal, it doesn’t matter, or popsicle sticks.
The first thing you’ll need to do is set up your work station. Lay out all the things you’ll need so that you have easy access to them. Start your double boiler and get that wax to melting right away. While it’s melting you can make your wicks (because depending on how much wax you have, it may take awhile to melt).
To make your wicks, cut off three or four strands of your cotton cord (I prefer to use four because it burns a little brighter). When cutting your cord, remember that you’ll want each wick to be a little more than twice as long as one candle so you can do the double-dip method. It’s easier to hang your candles this way. Also, the wicks will be braided, and the cord will shrink as you braid it, so make sure you cut your strands long enough. If you don’t want to double dip, just cut enough for the length of one candle, but remember to account for shrinkage. Then tie a knot at one end and braid the strands together as tightly as you can until you reach the end. (For a four stranded wick, I like to do a herringbone braid, but you can do whatever you like.) When you have your wick braided, knot the loose end (if you’re going to double dip, if not, hold the loose end in your fingers). When your wax is melted, coat the wicks with a few coats of wax to hold them together and draped them somewhere to dry.
Once your wax is melted, this is the time to add fragrance, herbs or shavings if you’ve decided to go that route. Make sure they are mixed in well and keep stirring them periodically to keep them from settling to the bottom of the pot.
If you’re double dipping, start by holding your wick in with two hands between your thumb and forefinger, about two inches apart and dip both ends of the wick into the melted wax. Pull it out quickly. (If you let it set too long in there, it will just melt the coats of wax off your wick and you’ll have to start over.) Hold your coated wick out of the pot a few seconds and dip again. Repeat this process until your candles are the desired thickness, then hang them to dry. (Sometimes I like to hang them to dry when they’re about half the width I want and then come back and dip them the rest of the way once they’re hardened completely.) If you’re single-dipping, do the same thing, just hold one end of the wick and hang it to dry when you’re done (You will probably have to get some binder clips or something to hang the wick from.)
If you’re pouring your candles, prepare your container, make sure it’s clean and then prepare your wick by tying it to a skewer or popsicle stick placed across the top of the container. Tie it long enough that the wick touches the bottom, but doesn’t curl up on the bottom. Then you’re ready to pour in the wax. Make sure you leave room at the top of the container so the melted wax won’t run out and so that there is enough room for the wick to stand up about 1/4 of an inch.
And that’s it! Another really simple, useful trade that can also be enjoyable and relaxing.