|
Listen To The Article
|
 If you are like many people these days, you are cutting back on unnecessary expenses. This does not mean you have to cut out all of life’s little luxuries. Many people are learning to make products at home that they once bought in the store. Gel candles are one of those items. In addition to saving money, you can also earn money selling them. Before you start ordering candle-making supplies, however, it is a good idea to explore the steps involved, and get a thorough understanding of how it works. This brief overview should get you started making your own candles.
Gel And Other Supplies
Before you can start making candles, you have to find your supplies. You will also have to use the research you did earlier to determine the types of supplies you need. For instance, if you do not want scented candles, you do not need to order fragrant oils.
The main ingredient in gel candles is the gel. In order to purchase the right density, you have to decide what kind of gel candles you are going to make. If you want to make scented candles, the density of the gel determines the strength of the fragrance. Higher-density gels provide more fragrance than lower density gels.
You also need high-density gels if you are going to use embedded objects in your candles. Embedded objects are part of what makes gel candles unique. From fish aquarium scenes to seashells suspended in air, embedded objects are the icing on the cake.
A word of caution about embedded objects: you have to be careful that the ones you choose will not melt. The basic rule of thumb is anything can be used as an embedded object as long as it’s not flammable. Silk flowers are beautiful, but they should not be used in gel candles, nor should anything plastic.
Other supplies that you will need include:
- Large glass measuring cup: You can also use a large glass bowl with measurements, as long as it has a spouted lip for pouring. You will need this to pour your melted gel into your containers.
- Heat source or electric Presto kettle: Used to dissolve the gel.
- Thermometer: The gel needs to reach 225°F, so a candy thermometer is ideal.
- Metal utensils: These are used for stirring the gel as it melts. Do not use wooden utensils. Wooden utensils will cause bubbles to form in the gel and your candle will not be as attractive.
- Metal skewers: These are used to move the embedded objects around after they have been put into the hot gel.
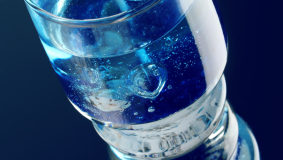
- Glass containers: These are your candle containers; they can be mugs, champagne flutes, votive cups, and more. Use your imagination. As long as you choose objects that will not burn or melt, the sky’s the limit.
- Gel: Candle gel in the density required for your project; remember, the higher density gels are used for candles that will contain embedded objects or scents. Lower density gels are perfect for basic, unscented candles.
- Fragrance oils: Fragrance oils are what make candles have a lovely aroma. However, keep in mind that these must be made for gel candles and have a flashpoint of 170°F. You cannot use oil that you have in your perfume collection.
- Liquid or color block dye: Again, make sure it is appropriate for gel candles. Do not use cloth dye, crayons or food coloring.
- Embedded objects: Use your imagination and choose embedded objects that will enhance the candle. For example, if it is a candle for the nursery, you could put diaper pins in it and use a soft powder fragrance.
- Candle wicks: You should get these from a quality gel-candle supply company so that you are getting wicks that will last a long time. Pre-tabbed wicks are the best for gel candles.
There may be other things you find that you need or want to include in your supply list, such as work apron or coverings for your worktable. You can add them to this list as you learn more about making gel candles.
Getting Started
Once you have your supplies, it is time to start making candles. Gather all your tools in one central location. You will want to be near your heat source so that you do not have to walk back and forth. This could be your kitchen or a room with a hotplate. Do not use the microwave for melting your gel. It can catch fire if it reaches its flashpoint, and it needs to be the exact temperature for making candles.
Use your imagination and the following basic steps make unique gel candles.
- Melt the gel: Use your candy thermometer to monitor when you reach the desired temperature of 225°F. Keep the thermometer in the gel to help you monitor the temperature. If you are using a glass cup for melting, put it in your oven to melt it. The Presto pot is great, but do not rely on the gauge; use a thermometer. It can take a few minutes or longer for the gel to melt. You can move on to the next step while the gel melts.
- Wash your containers and dry them thoroughly. There should not be any residue or oils to cloud your candle gel wax.
- Assemble your embedded objects and your wicks. Put them near your candle container so that they are within reach.
- If you are going to color your wax, use a toothpick to add a small amount of color. Stir well and drop a small amount on a piece of white paper to see the result. If you are adding fragrance, add it now as well. You can add as little or as much scented oil as you want. However, start out with a small amount and increase gradually. You need to allow the oil time to penetrate the gel. Keep in mind that you can always add more, but you cannot take out what you add.
- Insert the wick. Secure your wick to the bottom of your container with a small dab of hot glue. Try not to use too much hot glue, as it can make your candle murky.
- Fill your containers partially with hot wax.
- Add your embedded objects as desired, using metal skewers to arrange them.
- Top off the container with wax.
- Allow the candle to solidify.
- Trim the wick to 1/4” from top.
Your masterpiece is now ready to use. You can give them as gifts, use them in your home, or sell them. You will not have to buy candles anymore, and you can make a profit as well! In addition, gel candles are a great introduction to old-fashioned candle making. Once you get the hang of making gel candles, you can try making natural versions.
Tips for Bubbles
Sometimes, no matter how hard you try to avoid them, you will get bubbles in your candle. Bubbles do not damage the candle’s function, but they do deter from the appearance, unless you are making an aquarium candle or a champagne glass candle.
As the gel is melting, stir slowly to avoid bubbles. You should also pour it slowly. If you do see bubbles, you can use a heat gun to remove them. Heat the gel with the heat gun until the bubbles disappear. If the gel has started setting, you can put the candle in a warm oven and leave it until the bubbles are gone.
Gel candles are a simple, inexpensive mean of letting your creative juices flow. Sharing your talent with friends and family makes gift giving that much more meaningful.
©2013 Off the Grid News
 Off The Grid News Better Ideas For Off The Grid Living


