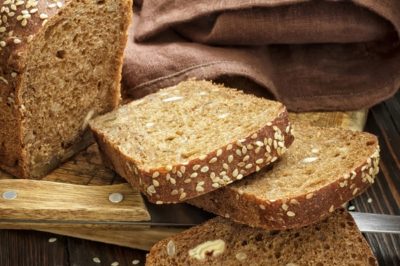
 Making whole grain bread from scratch takes a little knowledge and a healthy amount of elbow grease, but the rewards are immense. Homemade bread is by far one of the healthiest foods. As a girl, I ground wheat berries and baked bread from scratch. Delicious, soft loaves of warm, whole grain goodness were the result!
Whole Wheat Flour
The most important component of whole grain bread is the grain itself. Whole wheat flour is processed from wheat berries. These berries are made up of three parts: bran, endosperm, and germ. Each of these parts offers different health benefits, so when white flour is processed and only the endosperm remains, important nutrients are lost.
The bran, or outer layer of the grain contains fiber, antioxidants, B vitamins, phytochemicals and several minerals (iron, copper, zinc, magnesium). The middle layer, the endosperm, contains carbohydrates, protein and smaller amounts of B vitamins and minerals. The inner layer, the germ, consists of healthy fats, more B vitamins, phytochemicals and vitamin E. In white flour, all of the bran and a significant amount of the germ is lost. Over 30 vitamins and nutrients are removed. Enriching white flour tries to offset this loss by adding some nutrients back into the flour, but the levels are low (about five added back in, as opposed to the original 30). Health-wise, whole wheat flour is the best.
But, it is no secret that white bread is luxuriously soft. How can whole wheat bread compare with that? Enjoying homemade whole wheat bread may be an acquired taste, but I have found that it is a pretty rapid and easy transition. If you’re trying to help your family switch to whole wheat bread, try baking when they are home. When the baking bread aromas start wafting through the house, you won’t be able to keep them out of the kitchen. And when those loaves come out of the oven and they can eat fresh warm bread slathered with butter, they’ll become immediate fans!
Discover tried-and-true ways of making wonderful homemade breads for your family…
The recipe I share below is one that has been tried and tested by my mother for decades. Since taking the recipe to my own home, I’ve added a little gluten to help my bread achieve a richer softness. (If you aren’t comfortable with using extra gluten, the recipe makes up fairly well without it.)
The following recipe makes two loaves. You can double it to make four loaves, or halve it to make one loaf. Some recipes don’t adjust well, but this recipe handles it quite well.
How to Make 100 Percent Whole Grain Bread
I like to keep things simple, so I use just one large bowl when I mix all the ingredients together. I measure the water and pour it into the bowl and then follow that with adding each of the other liquid ingredients. I stir them all together with a fork. (You can use a wire whisk for this, but you’ll need to switch to a fork or wooden spoon when you add the flour as wire whisks quickly become clogged with dough.) The salt and yeast are added next and gently stirred in. I sprinkle a cup of flour over the top of the liquid and add the gluten on top of that. I find by adding the dry ingredients together in this way, they mix up better.
I continue adding flour, mixing after each cup is added. The dough starts to take shape. Eventually I dump the dough and leftover loose flour out on my clean counter top and knead in the remaining flour.
Watch the clock and knead for at least five minutes. The kneading is key to working the gluten and the flour together. Press down the edge of the dough, pull back and roll up a bit more and press that down. Do this again and again until the dough is fairly firm and elastic. This is what gives the loaf its shape and texture, so don’t cut it short.
Next, form the dough into a mound, place it back in the bowl and allow it to rise somewhere warm. I turn my oven on to warm and place my dough in the oven. (If you use your oven, be sure to pick an oven-safe bowl, and keep the oven temperature setting at its absolute lowest.)
I usually allow the dough to rise at least 30 minutes. Depending on the day (air temperature, pressure, etc.), the dough rising time will vary. Once it has reached about one and half times to two times its original size, it’s ready to be kneaded and formed into loaves.
Story continues below video
Before you start kneading again, prepare your two loaf pans. My preferred pans are glass ones because I find the dough rises rapidly in them. However, other types of pans will work fine. Try to use pans of the same material, as dough will rise differently in each kind and you’ll end up baking two mismatched loaves. Apply some non-stick oil to the pan. I prefer wiping the pans down with some vegetable shortening. My loaves never stick and I’m not spraying propane (often a propellant in nonstick sprays) onto my food.
Pull the dough out of the bowl and put it on your floured countertop once more. Divide the dough into two equal sized balls and knead each of them for at least five minutes.
There are two ways to form nicely shaped loaves. The first is to gently shape and pat the dough into a loaf shape, tucking under the edges and nicely rounding the top. (This is my method of choice because it’s simple and fast.) However, you can also use a rolling pin to flatten the dough out into a rectangle. Then gently roll up the dough into a loaf size.
Allow the dough to rise to one and a half times its size. Then pull the pans out of the warm oven and place them on the stovetop. Start heating your oven to 400 degrees Fahrenheit. By the time your oven is heated up, your loaves should be about double their original size. If not, give them a little more rising time. Then place them in the oven and time them for 10 minutes. If the tops of the loaves are getting too dark, place an aluminum foil tent over each of them. Cut the heat back to 350 degrees Fahrenheit and bake the loaves for 18 to 20 more minutes.
Pull your loaves out of the oven, gently turn them upside down and ease the loaves out onto wire cooling racks. If your loaves stick, run a knife around the edges of the pans before trying to remove them again. Brush the tops of the loaves with butter. I find it simplest to just take a butter stick from the refrigerator and run it over the tops, but you can also melt some butter and use a brush to coat the tops.
Allow the loaves to cool some before slicing them. This will help them retain some moisture, as homemade whole wheat bread does tend to dry out faster than store-bought loaves. Your bread should keep on the counter for a day or two. After that, you’ll need to move it to the refrigerator or freezer. Bread dries out when put in the refrigerator, but revives wonderfully in the toaster at the lowest setting. You can also freeze whatever you aren’t going to use right away in serving sizes.
Here is the recipe. I recommend making a loaf just as the recipe states so you can get a good feel for things before you start experimenting, but feel free to change the recipe to suit your own needs!
100 Percent Whole Wheat Bread Ingredients:
2 ½ Cups Lukewarm Water
¼ Cup Honey or Molasses
1 ½ Tablespoons Apple Cider Vinegar
3 Tablespoons Canola or Vegetable Oil
1 Tablespoon Lecithin
2 Teaspoons Salt
1 Tablespoon Active Dry Yeast (add with flour)
3 Tablespoons Wheat Gluten (add with flour)
6 Cups Whole Wheat Flour
Enjoy the warm, soft goodness of 100 percent homemade whole wheat bread!
Sign up for Off The Grid News’ weekly email and stay informed about the issues important to you
 Off The Grid News Better Ideas For Off The Grid Living


