 Print
Print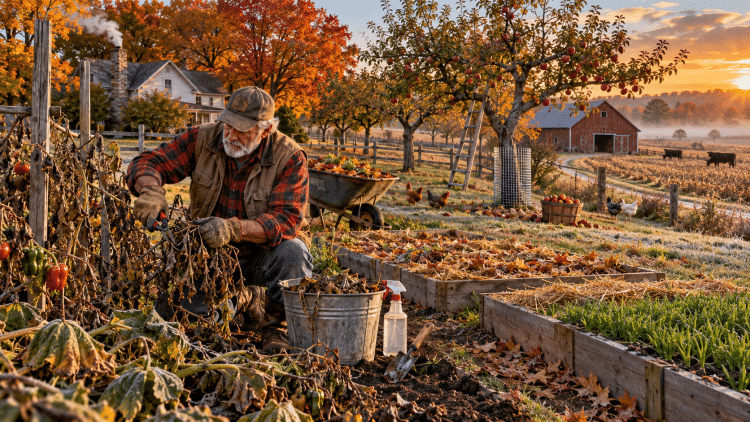
The Fall Garden And Orchard Cleanup That Can Save You Hours Of Backbreaking Work… And A Whole Lot Of Heartache Next Spring
There’s a particular kind of silence that settles over a homestead after the first killing frost.
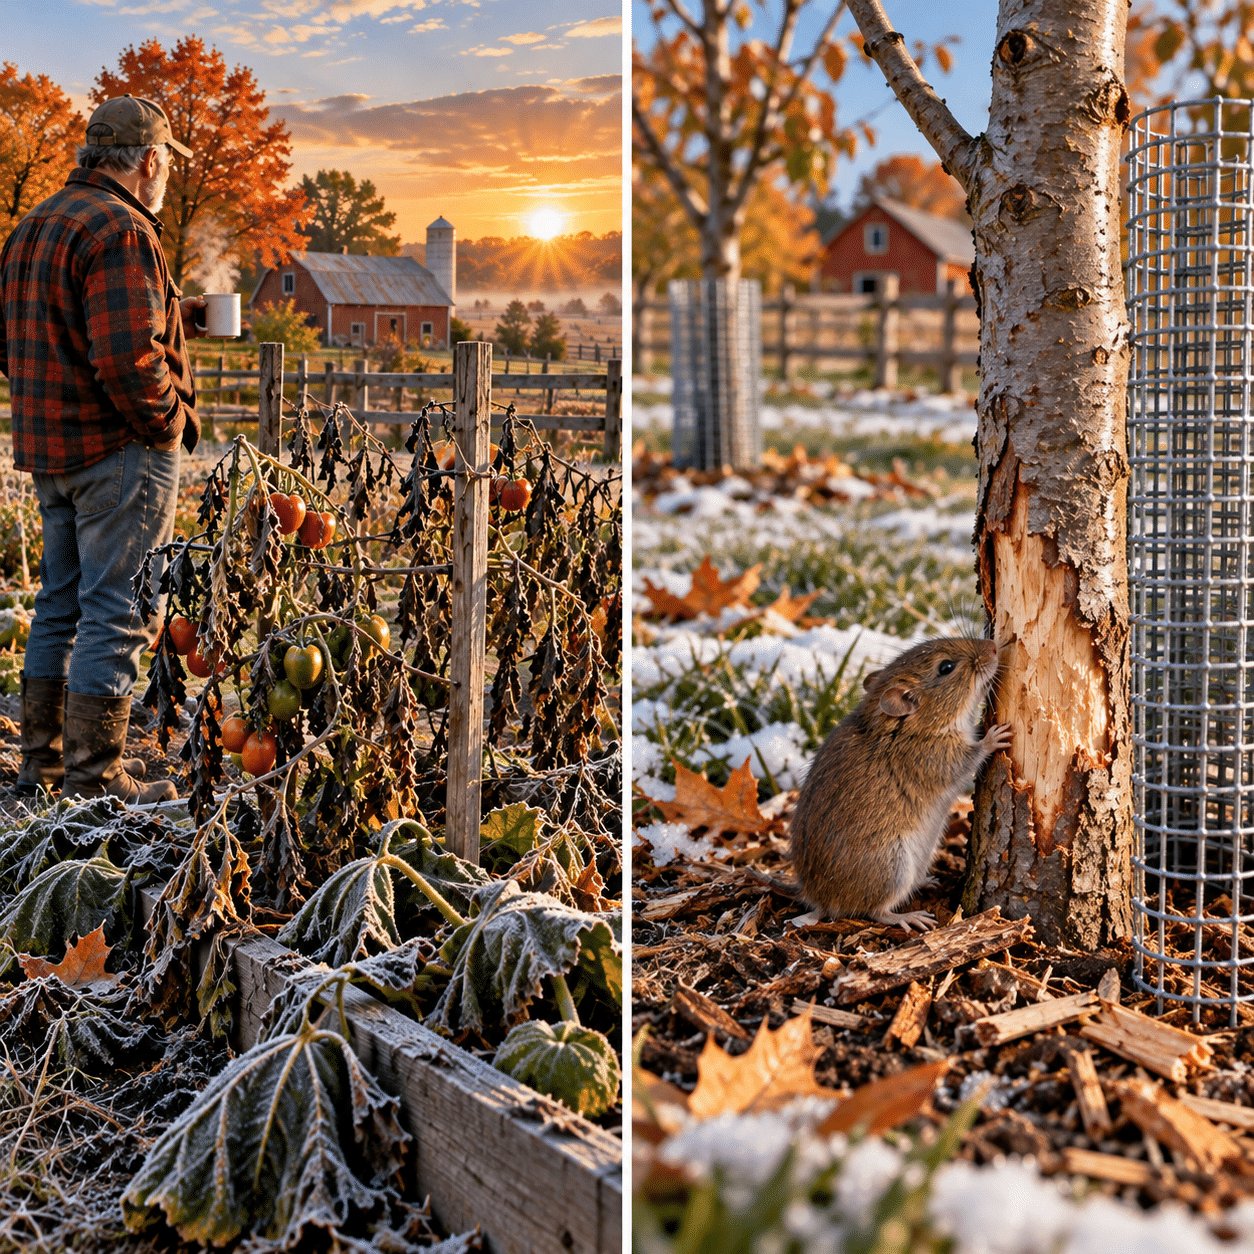
Yesterday, your tomato vines were still hanging on, the peppers were trying to squeeze out one last harvest, and those big squash leaves looked like they might just keep growing until Christmas. Then you wake up one morning, step outside with your coffee, and discover Mother Nature pulled the plug sometime around 3 a.m.
The tomatoes hang black and limp. The squash leaves have collapsed like wet newspaper. And the garden you’ve spent six months watering, weeding, feeding, and fussing over suddenly looks like somebody held a barn dance in it.
But here’s something worth knowing.
What you do with that mess over the next few weekends could determine how much trouble you’re buying yourself next spring.
You see, a dying garden isn’t necessarily a dead garden. Beneath those frost-bitten vines, the soil is still alive. Earthworms are working, microbes are breaking down organic matter, and next year’s growing season is already being shaped by what you leave behind.
Unfortunately, the bad guys are making winter plans, too.
Fungal diseases, insect pests, weed seeds, and hungry rodents would love nothing better than for you to toss your gloves in the shed and forget about the garden until April.
And that’s exactly why a little smart fall cleanup can pay off bigger than another expensive bag of fertilizer.
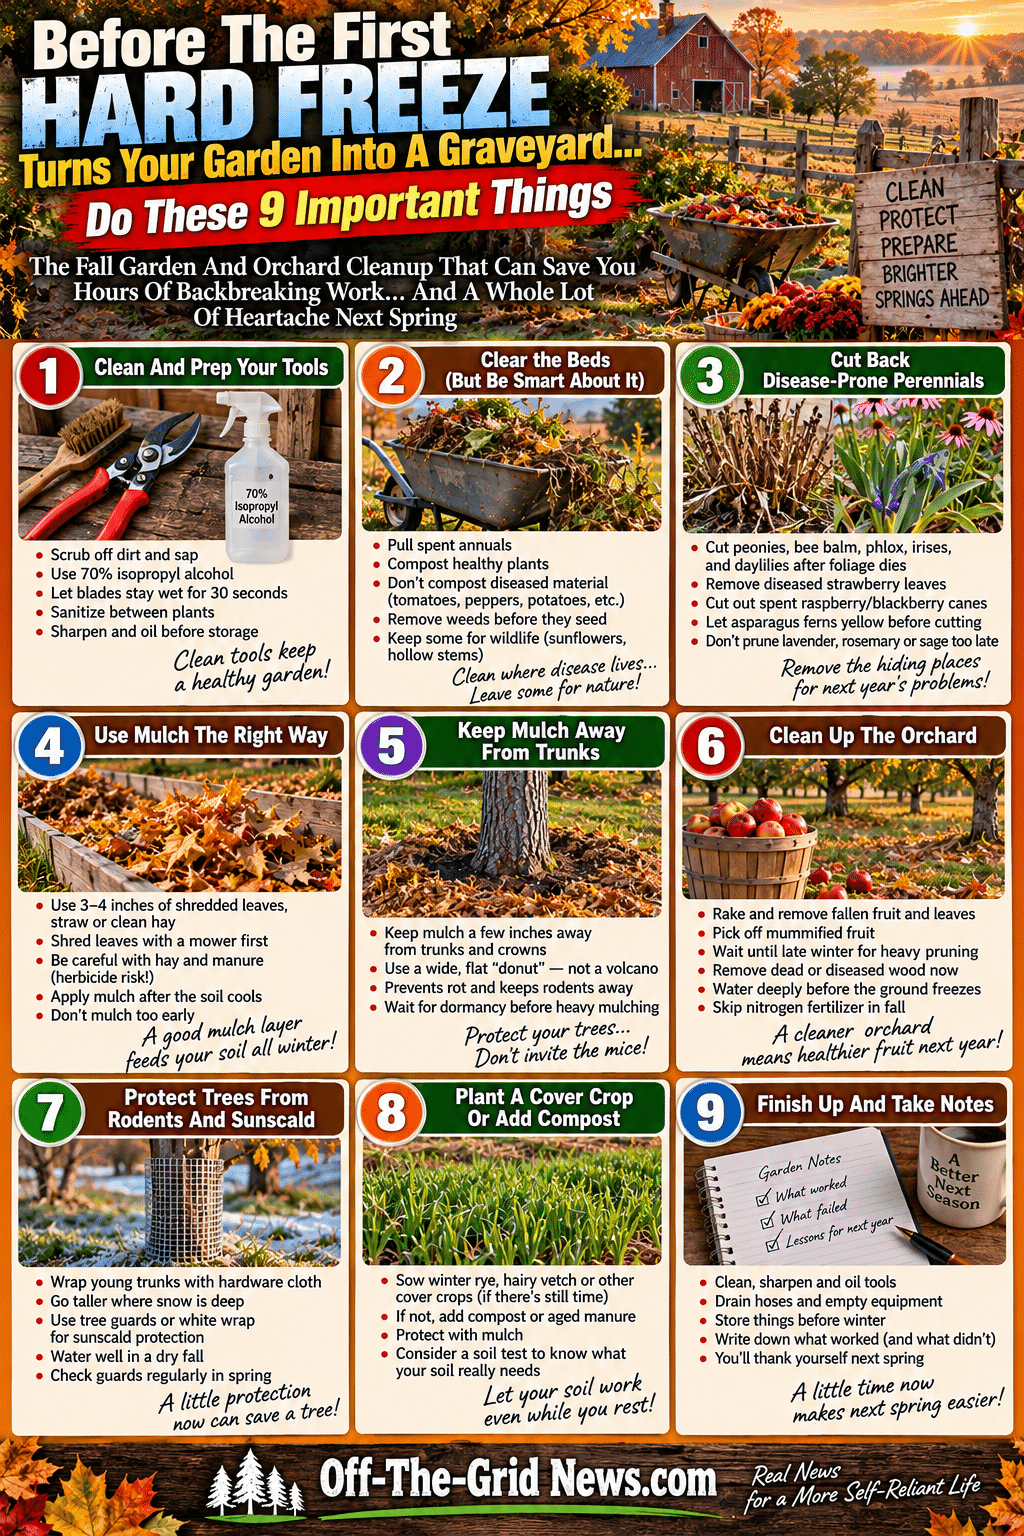
1. The $3 Bottle That Could Save Your Entire Raspberry Patch
Before you start chopping down dead plants, there’s one little job most gardeners overlook.
Clean your tools.
That pair of pruning shears hanging on the pegboard might look harmless, but it can carry disease-causing organisms from one plant to another. Cut through an infected stem, then use the same dirty blade on a healthy plant, and you’ve potentially delivered trouble straight into an open wound.
Fortunately, you don’t need a fancy disinfecting station or some overpriced specialty product.
A bottle of ordinary 70% isopropyl alcohol will do the job for many common plant pathogens when used correctly.
And yes, there’s a reason to reach for the 70% bottle rather than assuming the stronger 91% stuff is automatically better. Water helps alcohol remain in contact with surfaces and can improve its effectiveness against certain microbes, although the right contact time depends on the organism.
Here’s the routine I recommend:
- Scrub first. Remove dirt, dried sap, and plant debris with a stiff brush and soapy water. Disinfectant can’t do its job properly when it’s fighting through a layer of grime.
- Disinfect the cutting surfaces. Wipe or spray them thoroughly with 70% isopropyl alcohol, following an appropriate wet-contact time. Don’t assume a quick splash kills every pathogen.
- Repeat when disease is suspected. Especially when moving between infected and healthy plants, or working on different fruit trees.
- Finish with a little maintenance. Dry the tools, sharpen dull blades, and wipe on a thin coat of oil before storing them.
For more guidance, see the University of Minnesota Extension’s advice on cleaning and disinfecting garden tools.
One caution: alcohol is flammable. Keep it away from the woodstove, burn barrel, and anything throwing sparks.
It’s a small habit, but one worth developing before you discover that your favorite pruning shears have been spreading more than good intentions.
2. Don’t Make Your Compost Pile A Winter Resort For Plant Diseases
Now comes the part where you get to make a glorious mess.
Start pulling the spent annual vegetables. Dead beans, collapsed squash vines, exhausted peppers, and whatever else has finished its growing season can come out of the beds.
But don’t throw everything into the compost pile without looking it over first.
Healthy plant material is valuable compost feedstock. Diseased material is another matter, especially when you’re dealing with blight, wilt, or other persistent problems.
Most backyard compost piles never maintain the temperatures needed to reliably destroy every disease organism or weed seed. That means tossing infected tomato vines into a cool pile could bring some of those problems right back when you spread the finished compost.
So, if a plant was seriously diseased, remove the infected material and follow local disposal guidance. Bagging it for municipal disposal is often the simplest choice. Burning may be an option where legally permitted, but some pathogens can also survive burial, so don’t assume burying everything is a guaranteed cure.
And while you’re down there, go after the weeds.
Especially the ones that have already gone to seed.
A single neglected weed can scatter enough seed to keep you muttering under your breath for years. Thistles, bindweed, and other perennial troublemakers deserve particular attention, although some established weeds will need repeated control rather than one heroic afternoon with a shovel.
Still, there’s a difference between cleaning up disease and declaring war on every standing stem.
Leave a few sunflower heads for the finches. Let some healthy hollow stems stand for native bees. And consider keeping a quiet corner of the garden a little wild for beneficial insects.
The Xerces Society’s guidance on overwintering habitat explains why fallen leaves and standing vegetation can be valuable wildlife shelter.
The trick is knowing what needs to go… and what deserves to stay.
A good homesteader doesn’t confuse a healthy garden with a perfectly manicured one.
3. These Innocent-Looking Dead Stalks Could Be Hiding Next Year’s Problems
Perennial beds are where fall cleanup gets interesting.
Some plants benefit from being left alone. Others are practically begging you to remove their dying foliage before winter gives disease organisms and insects a place to hide.
Take peonies, for example.
Those big, beautiful spring flowers can suffer from Botrytis blight, which survives on infected plant debris. Once the foliage has died back, cut the stems close to the ground and remove the remains.
Don’t give obviously infected peony leaves a free ride into next year’s growing season.
Then move through the rest of the perennial beds with a little judgment.
- Bee balm and garden phlox: Remove foliage badly affected by powdery mildew to reduce infected debris, while remembering that spores can also arrive from elsewhere.
- Irises: Clear dead leaves and plant debris that may harbor iris borer eggs.
- Hollyhocks: Remove rust-infected foliage rather than letting it accumulate around the plants.
- Daylilies: Clean up leaves showing significant disease, but don’t butcher healthy crowns.
- Strawberries: Remove badly diseased leaves and rotting fruit, while protecting the living crowns and avoiding unnecessary late-season stripping.
And then there are the brambles.
Raspberries and blackberries don’t follow quite the same rules as ordinary garden plants. Many varieties produce fruit on second-year canes, which die after their harvest is finished.
Those spent canes can be removed at ground level.
However, primocane-fruiting varieties have different pruning options, so make sure you know what kind you’re growing before you start cutting everything down.
Healthy young canes that will carry next year’s crop generally deserve to stay until the appropriate pruning season.
Meanwhile, your asparagus patch needs patience.
Those tall, fernlike stalks may look ready for the compost pile, but they’re still feeding energy back into the underground crowns while they’re green. Wait until they have completely yellowed or browned before removing them.
Asparagus beetles can overwinter in garden debris, so sanitation helps, but it isn’t a guarantee that every beetle will disappear.
And here’s one more place to keep your pruners in your pocket.
Lavender, rosemary, and sage generally don’t appreciate a hard haircut right before winter. Late pruning can expose tender growth or reduce winter protection, particularly in cold climates.
Sometimes the smartest gardening move is leaving well enough alone.
4. The Free Garden Blanket That Can Save Your Soil All Winter
Every fall, folks spend good money hauling bags of mulch home from the garden center while one of the best soil-building materials on earth is lying all over their yard.
I’m talking about leaves.
Those maple, oak, and other hardwood leaves aren’t just something to rake up and haul away. They’re free organic matter, future earthworm food, and a protective blanket for the ground you’ve spent all summer working.
And unlike a lot of things sold to gardeners, they don’t come with a fancy label and a ridiculous price tag.
For empty vegetable beds, a loose layer of shredded leaves or clean straw can protect the soil from pounding rain, erosion, and winter temperature swings. Three or four inches is a reasonable starting point, although the ideal depth depends on the material and your drainage.
Here’s a little trick worth stealing.
Run your lawn mower over a pile of dry leaves before spreading them. Shredded leaves settle more evenly, decompose faster, and are less likely to form the soggy, matted blanket that whole leaves sometimes create.
Straw works nicely, too. But be careful with hay, particularly hay that has already gone to seed.
Otherwise, you might discover next June that you’ve planted a bumper crop of weeds without meaning to.
And there’s another danger hiding in some bargain hay and manure.
Persistent pasture herbicides can survive the trip through a cow… and still damage your vegetable garden.
Certain herbicides used on pastures and hayfields can remain active in manure, compost, or hay. Sensitive vegetables such as tomatoes, beans, and peas may emerge twisted, stunted, or badly damaged.
North Carolina State Extension has an excellent explanation of herbicide carryover in hay, manure, and compost.
So before accepting that free trailer load from somebody down the road, ask where the hay came from and whether the pasture was treated.
Free mulch isn’t much of a bargain if it ruins your tomatoes.
5. Don’t Build A Cozy Winter Motel For Mice Around Your Fruit Trees
Now let’s talk about one of the most common mulching mistakes.
You’ve probably seen it. Somebody piles wood chips around a young apple tree until the trunk looks like it’s sticking out of a miniature volcano.
It might look neat from the road, but it’s a lousy way to protect a tree.
Mulch piled against bark holds moisture where it doesn’t belong. Worse, it creates a sheltered place where mice and voles can hide while chewing away at the very bark that keeps your tree alive.
And those little fellows can do a shocking amount of damage before spring.
Instead, spread two to four inches of mulch in a broad ring around the tree, keeping the material several inches away from the trunk. Think of a big, flat donut with an open hole in the middle.
The same principle applies around perennial crowns. Give them protection without burying the growing points beneath a wet mountain of organic matter.
For winter protection around tender perennials, wait until the ground has cooled and plants have entered dormancy before applying heavy insulating mulch. That helps reduce premature warming and protects plants through repeated freezing and thawing.
Meanwhile, keep an eye out for vole tunnels and mouse activity as the weather turns cold.
A little mulch can protect your investment.
A badly placed pile can feed the critters that destroy it.
6. Your Orchard Is About To Become A Disease Nursery… Unless You Do This
If you’ve got apple, pear, peach, plum, or cherry trees, fall cleanup doesn’t stop at the garden fence.
In fact, some of the most expensive springtime problems begin beneath your fruit trees during October and November.
Walk through the orchard after leaf drop and take a good look around.
You’ll probably find fallen apples turning brown in the grass, shriveled fruit hanging stubbornly from branches, and piles of leaves collecting around the trunks.
That mess isn’t always harmless.
Apple scab, for example, can survive winter in infected fallen leaves. Brown rot can persist in shriveled, mummified fruit, giving the disease a head start when warm, wet weather returns.
And here’s the frustrating part.
You can spend money on disease-control products next spring while leaving the very material that helps those diseases survive lying beneath your trees all winter.
So, make sanitation your first line of defense.
Rake or mow infected fallen leaves to encourage decomposition, remove rotting fruit, and pick those dried fruit mummies from the branches. Dispose of heavily infected material appropriately rather than leaving it in a pile beside the orchard.
Not every leaf needs to disappear, but reducing known disease reservoirs is worth the effort.
For more on orchard disease management, see Penn State Extension’s home fruit growing resources. And while you’re out there, resist the temptation to give every tree a major haircut.
Fall is generally the wrong time for heavy pruning in a cold-climate orchard.
Trees need to enter winter fully dormant and properly hardened. Major pruning is usually better saved for late winter or early spring, when the worst cold has passed but new growth hasn’t started.
For now, concentrate on obvious hazards and sanitation. Remove broken limbs when necessary, and follow disease-specific recommendations before cutting infected wood.
Some diseases, including fire blight, require special pruning precautions. Alcohol alone is not reliable against every pathogen, so don’t treat a quick wipe as a universal cure.
Your orchard has worked hard all year.
Give it a chance to rest.
7. A Hungry Rabbit Can Destroy Five Years Of Apple Growing In One Night
There’s a particular kind of heartbreak that comes with walking into your orchard in March and finding a young apple tree stripped of bark.
The tree looked fine when the snow started falling.
But somewhere beneath that white blanket, mice or voles spent the winter chewing around the trunk. By the time the snow melted, the damage was done.
If enough bark is removed around the circumference, the tree can be girdled, interrupting the movement of food through its living tissues.
And sometimes, that means the end of the tree.
Fortunately, prevention is cheaper than replacement.
Wrap young trunks with a cylinder of quarter-inch hardware cloth, keeping the wire far enough from the bark to allow growth and extending the protection slightly into the soil.
Eighteen inches above ground may help against small rodents in some settings, but where snow piles up, taller protection is necessary. Rabbits can stand on crusted snow and reach bark that was safely above their heads in October.
In rabbit country, a taller wire cylinder is often a better investment.
Meanwhile, young trees with thin bark face another winter enemy.
Sunscald.
On a bright February afternoon, the southwest side of a young tree can warm considerably in the sunshine. Then the temperature plunges after dark, and the bark may suffer injury that eventually shows up as cracking or dead tissue.
White tree guards or appropriate white trunk wraps can help reduce those temperature swings.
Just remember to inspect guards regularly and remove seasonal wraps when appropriate so they don’t trap moisture, shelter insects, or constrict the growing trunk.
And here’s one more chore that deserves a place on your list.
Don’t send thirsty trees into winter.
If autumn has been unusually dry, water your orchard deeply while the soil is still unfrozen. A slow soaking that reaches the root zone is worth far more than a quick splash from the garden hose.
Established trees may need less supplemental water than newly planted ones, especially when autumn rainfall has been adequate. The goal is moist soil going into winter, not a swamp around the roots.
Finally, skip the late-season nitrogen fertilizer.
You don’t want to encourage tender growth just as the tree is preparing for winter. If a soil test shows that lime, phosphorus, or potassium is needed, fall can be a suitable time for certain amendments.
But don’t fertilize just because the calendar says October.
Let the soil test tell you what the ground actually needs.
8. Plant One Last Crop Now… And Let It Work While You’re Sitting By The Woodstove
Here’s one of my favorite things about fall gardening.
You can plant something in October that doesn’t need to produce a single tomato, bean, or ear of corn to earn its keep.
It’s called a cover crop.
And when properly managed, it can protect bare soil, capture nutrients, suppress some weeds, and add organic matter to your garden.
Winter cereal rye is a particularly useful choice for many northern homesteaders because it tolerates cold weather and can establish later in the season than many other cover crops.
Depending on your climate and planting date, winter wheat or hairy vetch may also be worth considering.
The University of Minnesota Extension’s cover crop selection guide explains the tradeoffs among different choices.
Now, don’t expect miracles from seed scattered onto frozen ground.
Cover crops need suitable conditions to germinate and establish. And if you plant an overwintering crop like cereal rye, remember that it will start growing again in spring.
You’ll need a plan to cut it, incorporate it, or otherwise terminate it before planting vegetables.
Otherwise, that helpful cover crop can turn into an unwanted competitor.
But suppose the weather has already turned nasty and you’ve missed the planting window.
No problem.
Spread finished compost over your empty beds and protect the soil with shredded leaves or clean straw. Well-aged, properly composted manure can also be useful, provided it comes from a trustworthy source and is applied with food-safety precautions.
Fresh manure is another matter. It can carry pathogens, excess salts, and weed seeds, so timing and proper handling matter when growing food crops.
And while we’re talking about soil, here’s another little job that can save money.
Take a soil sample.
A proper test can tell you whether your garden needs lime, phosphorus, potassium, or something else. That’s a whole lot smarter than buying fertilizer because the fellow at the garden center has a pallet of it sitting by the cash register.
The cheapest fertilizer is often the bag you discover you don’t need.
9. Before You Shut The Shed Door… Do This One Thing Your Springtime Self Will Thank You For
By now, the garden is looking pretty good.
The diseased plants are gone. The perennial beds have been handled. The orchard is protected, and the soil has a blanket over it.
You’re probably tired, your knees are reminding you how old they are, and that woodstove is starting to sound mighty inviting.
But there’s one final chore.
Take fifteen minutes and write down what happened in your garden this year.
Not what you hoped would happen.
What actually happened.
Which tomato varieties produced well? Which ones cracked, rotted, or succumbed to disease? Did the beans struggle in that shady corner? Did the squash borers get your zucchini before the Fourth of July?
And what about the orchard?
Which trees produced well? Which ones showed signs of scab, insect damage, or drought stress? Did the deer discover your new apple trees before you got the fence finished?
Write it all down while the evidence is still fresh.
Because come April, when the seed catalogs are spread across the kitchen table and you’re dreaming about another perfect garden, you’ll have forgotten half the aggravations of the previous summer.
And you’ll be tempted to make the same mistakes all over again.
While you’re at it, clean and oil the tools, drain the hoses, empty watering equipment that could freeze and crack, and put away anything that doesn’t need to spend the winter outdoors.
Give the wheelbarrow a place under cover. Hang up the garden hoses. And check that your sprayers are properly cleaned and stored according to their labels.
Those little chores might not seem terribly important today.
But when spring finally arrives, you’ll be mighty glad you didn’t leave a shed full of rusty tools and busted equipment waiting for you.
The Best Spring Garden Often Starts With Two Good Saturdays In October
There’s something satisfying about looking over a garden that’s been properly put to bed.
The tomato cages are stacked against the shed. The orchard is cleaned up. The beds are tucked beneath a blanket of leaves, and the last few sunflowers are nodding in the cold wind while the finches pick at their seeds.
Beyond the fence, the fields are turning brown and gold. Somewhere in the distance, a combine is finishing the last rows of corn before winter closes in.
And beneath your boots, the soil is still doing its quiet work.
That’s the part we sometimes forget.
A homestead doesn’t stop working just because the growing season ends. The earthworms, microbes, roots, and natural processes that make a productive garden possible don’t punch a time clock when the first frost arrives.
Your job is to give them a decent place to spend the winter.
You don’t need an expensive new piece of equipment. You don’t need a shed full of miracle products. And you certainly don’t need to spend every weekend between now and Christmas raking your property into something that looks like a golf course.
You just need to know what deserves cleaning up, what deserves protecting, and what deserves being left alone.
That’s the difference between working with your land and constantly fighting it.
So, pick a couple of decent fall days. Grab your gloves, your sharp pruners, and that little bottle of alcohol. Get the garden beds cleaned up, give the orchard some attention, and tuck the soil in before the real cold arrives.
Then go inside, put another log on the fire, and enjoy the satisfaction of knowing you’ve done something worthwhile.
Because next spring, when your neighbor is fighting weeds, replacing a girdled apple tree, and wondering why his tomatoes are struggling again, you may already be planting.
And there’s no better feeling than getting a head start on spring… before winter has even begun.