


|
Listen To The Article
|
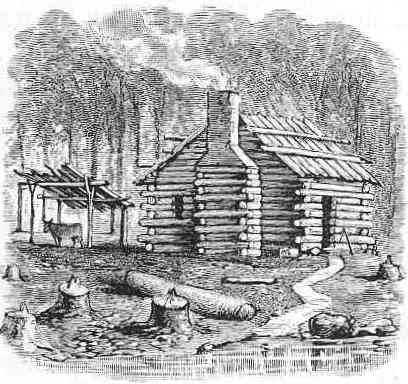
For the pioneers, building a log cabin was not just a cool project that you took on for the fun of it. You had to know how to build your own home because there was no one else to build it for you.
Below, we will discuss the basics of building a log cabin. If you want a more detailed diagram, there are books on the subject. However, I would read this report first, as we will cover things, from experience, that others may not.
Back in the day of the settlers, the log cabin we are speaking of was their home. So, we are not talking about building a home by today’s standards, where homes average several thousand square feet.
Tools You’ll Need
Sure, you can get by without a few of these items. However, for the most part you’ll be darn glad you have them.
- A crosscut saw to fell the trees, cut your lengths and make any strait cuts.
- An axe for hundreds of jobs.
- A two-person log carrier, because carrying a 20-foot long log up a hill can be challenging.
- A draw knife or barking spud to debark the logs.
- A peavey to roll the logs into position.
- An adze to start most of your notches, smooth limb stubs and knots.
- A hand drill and a 20-inch drill bit so you can pin the logs together at the corners if you choose to build that way.
- A broad axe is likely the most useful tool you will have. Use it to smooth and fit notches, shape any part of any log, and more.
- A mallet or sledgehammer to drive corners together and set corner pins.
There are other basic tools that you and everyone should have, such as a tape measure, a hammer and a hand saw, just to name a few. We won’t cover them, as they are basic tools and not specialized for this task.
The Basic Steps
1. Get a plan. If you don’t have a log cabin plan, we suggest you get one. They can be found at many local libraries and also online.
Discover More Than 1,000 Off-Grid-Living Tricks!
On your land, face your door true south. There are three big reasons for this: A) The southern sun will warm and light your home if you have windows there. B) Just by looking at your cabin, you’ll know the compass directions. C) You won’t have to worry about snow drifts covering your front door nearly as often.
 2. Pick your wood. Here, you can go with many different types of trees for your cabin logs, but two of the best are spruce and tamarack, while pine, too, can be used.
If you can, forage your timber in the winter and let it set for two years before you build. Winter harvesting will allow it to dry slower at first. This, along with two years of seasoning, will minimize checking and cracking.
Go for trees that are 8 to 10 inches in diameter and have the lowest degree of taper that you can find. You really can’t go with any more than 2 inches of taper on a 16 -foot log or you’ll run into problems that chinking won’t even solve.
3. Debark your logs when they are fresh. If you let them sit for 2-3 days, the bark begins to adhere to the tree, and you’ll have a lot more work with your barking spud or draw knife.
You can debark them where you fell them or haul them first to the building site before cleaning them up. That’s up to you. But, hauling them with your log hauler first leaves them looking better, as the bark protects the wood hauling.
4. Build your foundation and set your sill logs. Your foundation should be a rock wall 2 to 3 feet tall; most are closer to 2 feet.
Then, build stone walls in rows at 4- or 6-foot intervals all across the prepared and packed dirt within your outer walls. These will allow you to lay your girders on the full length of them and give you anchors for your flooring.
Others just tell you to use small support pillars. But, that means you have to hit those pillars spot on with your flooring. When you build walls on rows, every floorboard is fully supported and you don’t get floor sway as the girder longs sag over time.
Pro tip: Leave a 3-foot section of each girder support wall open and unbuilt. The reason: If you ever have to crawl to the center of your cabin under your floor, you’ll have a path. Stagger these openings so that one side of your cabin doesn’t have less support that another area.
You can joiner your girders in with a mortise and tenon approach, which will secure them well.
Cut your girders flat on top to get a wider spot for your subflooring to nail to. Most settlers used the adze for this.
In one spot where you’re going to build your fireplace, build up a platform for it and build your subflooring around it.
5. For your subflooring, you’re going to want to hue logs into boards. This can be done with your adze or with the crosscut saw. The adze is faster, and since it is subflooring no one will see it anyway.
Do NOT cover your sills with your subflooring; your subflooring goes inside your sills.
6. Erect your walls. Here’s a pro tip: If you live in areas with a lot of rainfall such as Washington and Oregon, you should strongly consider single-sided saddle notches with all the notches facing downwards. This is so that you don’t have any upward-facing notches to collect rainwater and develop rot.
A lot of cabin builders will number their logs on how they see them going up on the walls. We are here to tell you that the best laid plans of mice and men sometimes go awry.
You’re better off looking at how the walls are shaping up, looking at your inventory, and seeing what fits. Once you do this a few times, you’ll see what we mean.
Don’t cut your log long groove in the bottom log for the next log to fit on top of. Instead, cut your grove in the bottom of the next log before you seat it. This will prevent any accumulation of water, dirt and debris, as all your grooves are facing downwards.
If you’re in dryer territories, you can double saddle notch your log ends, which is the simplest method. Just roll them together, scribe them and notch them. When they look good, refit them, scribe any areas that need better fitting and broad axe the notch into that perfect fit.
 7. With your log in place, drill your hole for your alignment corner pin. Tap in your alignment pin and prep for the next log. You can use metal pins or wooden pegs — that’s your choice.
Here’s another pro tip: don’t drill them through your notches like most people do. Drill them about a foot inward of your notches. The reason: The wood at the notch is thin. When the cabin settles as they nearly all do, you won’t split your thin wood at the notch as the stress is put on the log from the settling.
8. Build your fireplace. Visit our article on how to build a mountain or river rock fireplace here.
When you meet your roof to your fireplace, you’re going to need to flash it. Most pioneers brought some hardware with them along with their windows. One thing they nearly always brought was flashing.
If you don’t want to do it that way, then there is a pine tar chimney sealing trick, but that is beyond the scope of this article.
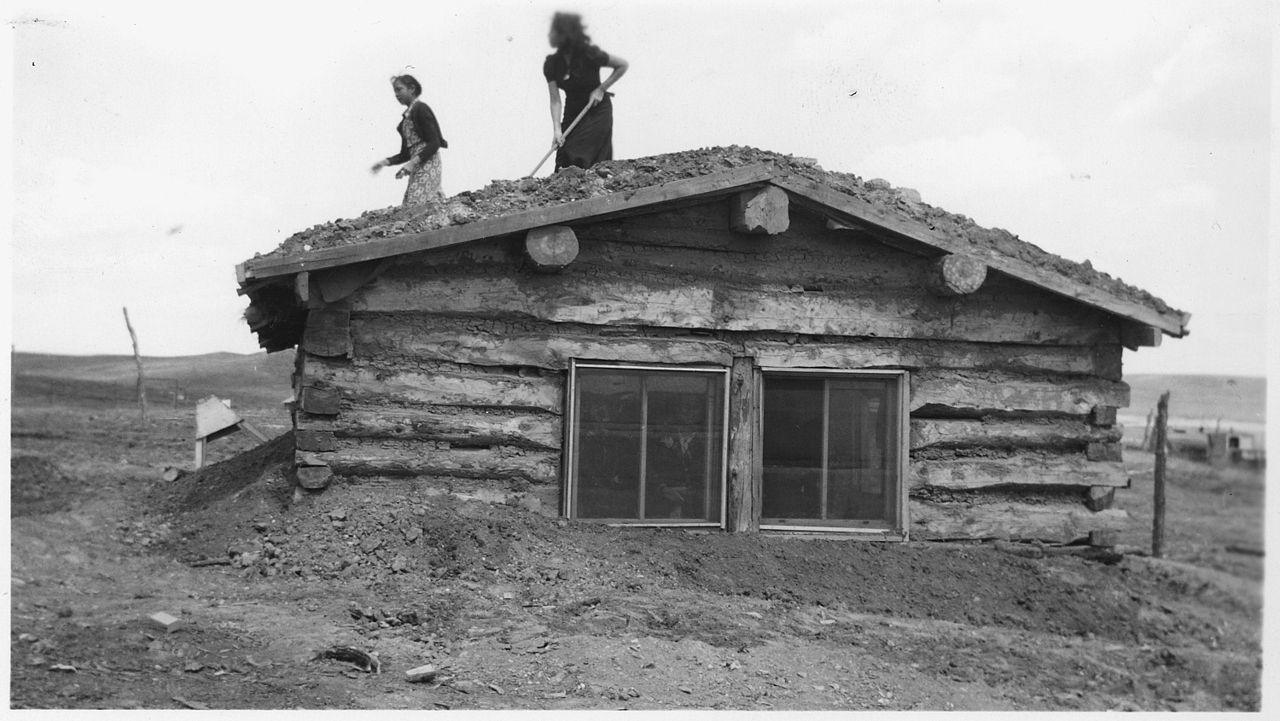
9. Do the roof. Most cabins are going to be rectangles of some sort. It’s easiest to run your roof long ways on your cabin.
The roof we’ll discuss has purlin and rafter construction, as this is the most sound in a high wind or heavy snow situation. No, we are not going to talk about premade trusses; this is not how your pioneering forefathers did things.
Your end walls are built to the height of the peak of your roof. Scribe your wall and cut it at the proper angle of your roof to both sides.
You then set your two end rafters just a couple of inches from the end of your purlins as they hang over the outside of your walls. You notch them into place so they are flush with the purlins themselves.
Install the rest of your rafters at regular intervals.
New Survival Energy Product Makes Every Window A Powerful Solar Charger
Attach your roofing boards that you’ve split horizontally to the rafters.
Then, shake your roof. We strongly suggest reading our article on cedar shaking a roof here.
10. Window the frames and doors. The simplest way to frame your windows and doors of a cabin is going to be to cut a notch in the ends and lengths of the logs surrounding your windows and doors that you then put a pre-made board into. So, you’re recessing your frames into the ends and lengths of the logs, all the way around the windows, but on only three sites for the door, as you don’t cut the bottom one because it’s the floor.
 Mount your windows to your recessed boards that should have been so tightly fit that it required that mallet in your tools list to pound them into place, before nailing them in as well.
Next, simply hang your door.
11. Finish your flooring. You may want to slit and sand the boards for your floor that goes atop the subfloor. Or some many want a stone floor. How you finish your floor for the look you want is up to you.
12. Clean and protect. The pioneers didn’t have any bleach or chemicals to wash down the outside of their cabins. However, it is advisable to water wash it with a long handled brush or similar to remove the dirt.
Let it dry for 2 weeks before you protect it.
Mix 1 part linseed oil to 5 parts turpentine, and apply to the outside of your cabin. This process should be repeated on an annual basis for the first 3 years, and then as needed for every five years thereafter.
That’s it — you’ve just build a log cabin just like the pioneers did.
Have you ever built a log cabin? What advice would you add? Share it in the section below:
Every Spring, Gardeners Make This Avoidable Mistake — But You Don’t Have To. Read More Here.


