 Print
Print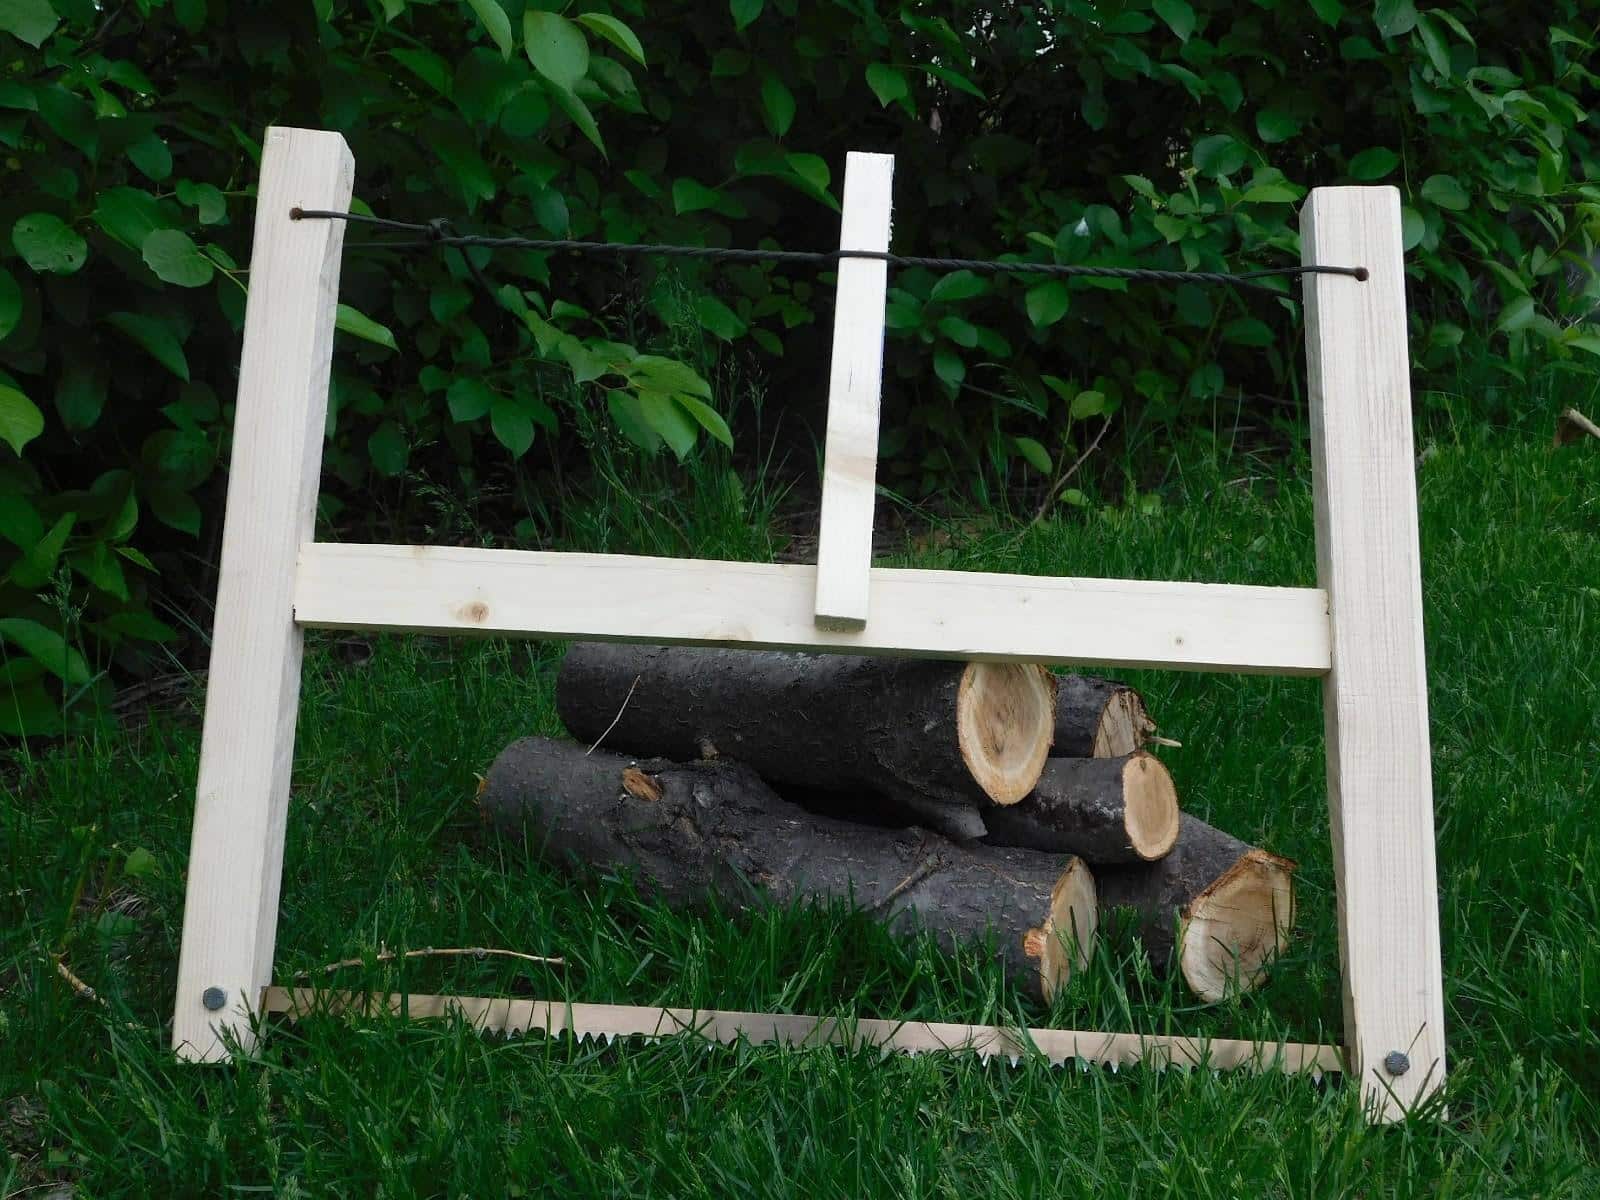
“If you don’t have the right tool, make it.”
This advice was given to me by full-time bushcraft instructor Doug Hill a few years ago and has really stuck with me. What Doug what alluding to is the simple fact that tools make our lives easier. With them we can perform jobs we could not otherwise accomplish, and in an easier fashion. People interested in survival or self-reliance need to be selective about the tools they carry. Tools take weight and space, two valuable commodities for a person who is living light.
Another bit of advice buried in Doug’s motto is to recognize what you can’t recreate in nature. Important tools such as steel knives and hatchets that cannot be recreated easily in nature are items that should find their way into your survival or backwoods kit. Other items, such as an extra hatchet handle, fire starting materials, and even shelter, should be created when you need them.
That being said, I recently watched a video of Ray Mears on a canoe trip into Canada. Ray’s philosophy on gear is going light; it is what his show is all about. On this particular episode, he was demonstrating how to make a canoe paddle in the bush if his would happen to break. After he had selected the proper tree for the job, he unrolled a tiny package from his pack and revealed a decently sized bucksaw.
New Solar Oven Is So Fast It’s Been Dubbed “Mother Nature’s Microwave”
After seeing this clip I decided I, too, needed to learn how to make a bucksaw. After all, half the problem with saws in the backcountry is the space they take up, and their awkward shape make them hard to pack. Also, I wasn’t going to be making just any saw; I wanted to learn how to make a take-down bucksaw so it could fit snugly away like Mr. Mears’ saw.
If you like the possibility of taking a saw with you into the wild, then follow along and learn how to make a take-down bucksaw in nine easy steps.
1. Gather your materials
Before you actually start to make a take-down bucksaw, you need a few supplies. You will find most of the stuff for the project lying around your house, or in the junk pile of any construction crew. You will need the following items before getting started:
- Bucksaw blade. I ordered a 24-inch blade
- 2×4 lumber 15 inches long
- 1×2 lumber 22 inches long
- Scrap lumber 9 inches long
- 5 feet of rope/paracord
- 2 2-inch bolts and nuts
Tools: Hammer, chisel, saw and drill.
2. Rip the 2×4

To begin the construction of your saw, you will need to cut the 2×4 in half. These will become the handles of your saw.
3. Notch your brace
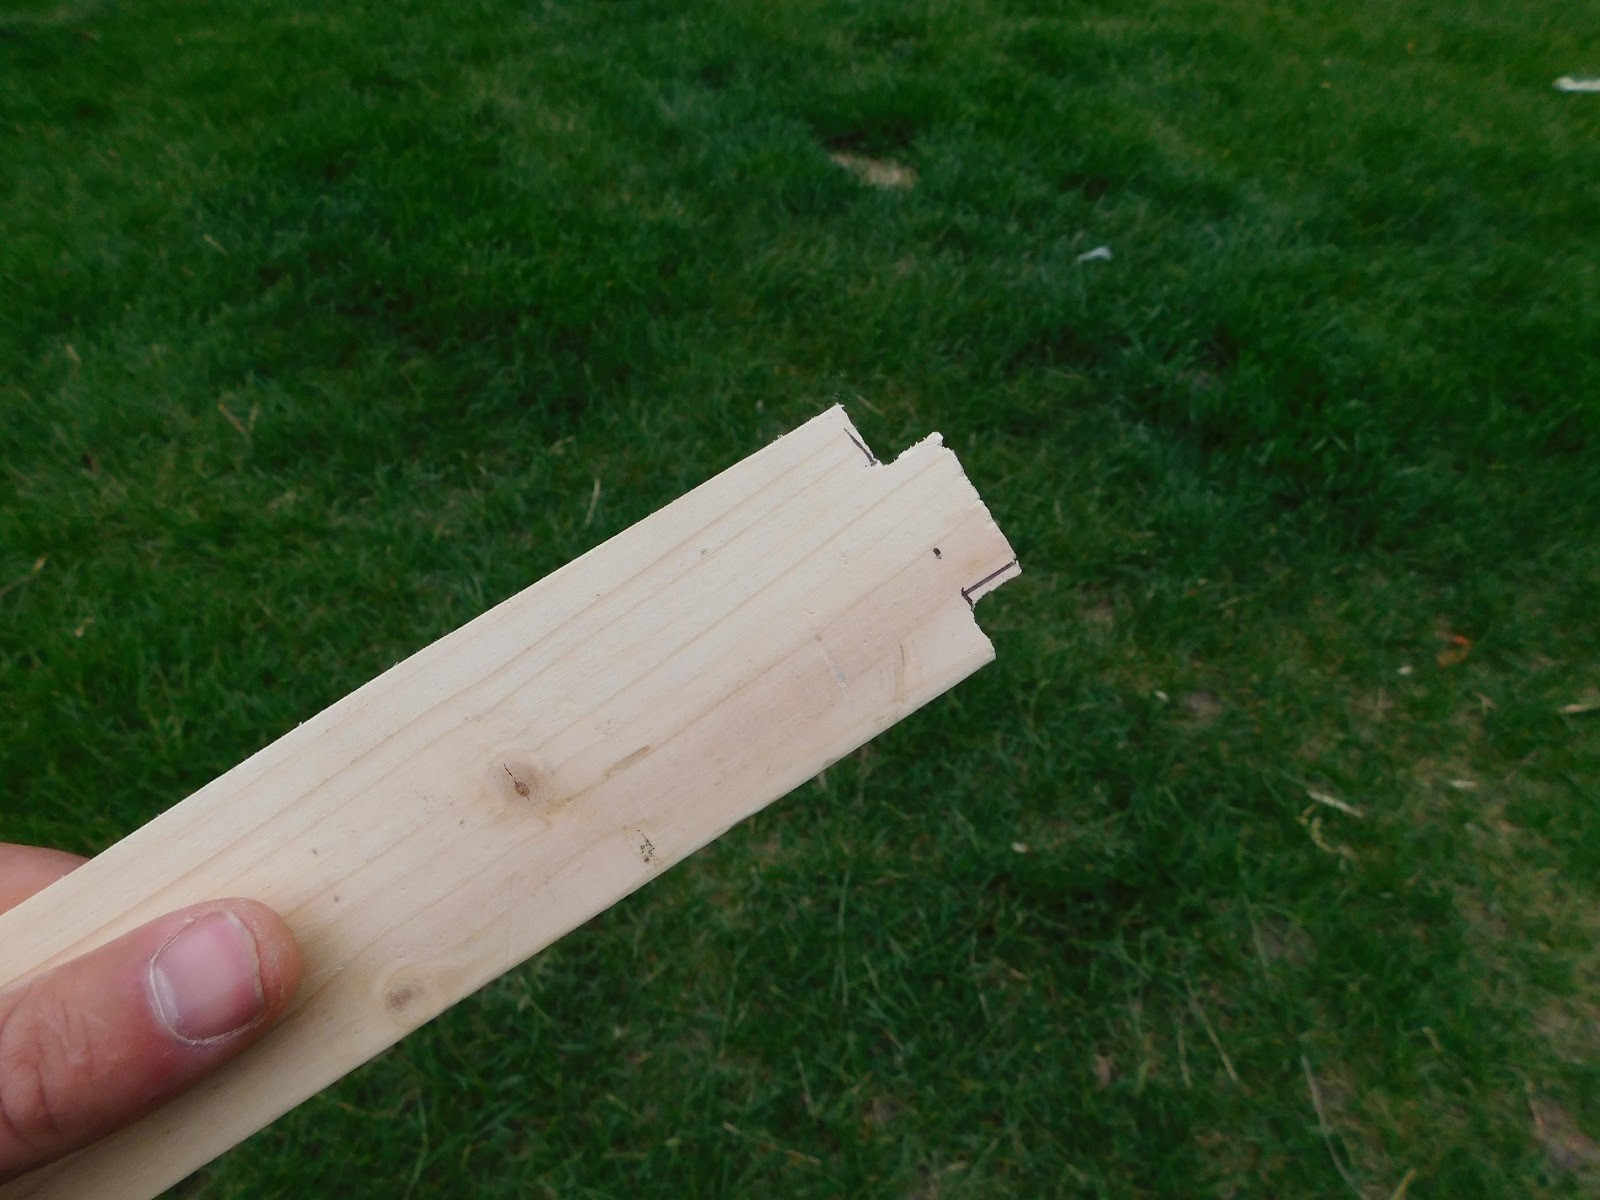
With your 2×4 ripped, the next step to make a take-down bucksaw is to notch your 1×2. The 1×2 will be the brace, or horizontal piece, of your saw. In order to do this, measure a square 3/8ths of an inch in each corner of your 1×2. These will be removed to create the notch. Going much bigger may decrease the strength of the wood and isn’t really necessary in the end. I used a small saw to make my cut and a chisel to clean up the edges.
4. Slot your handles
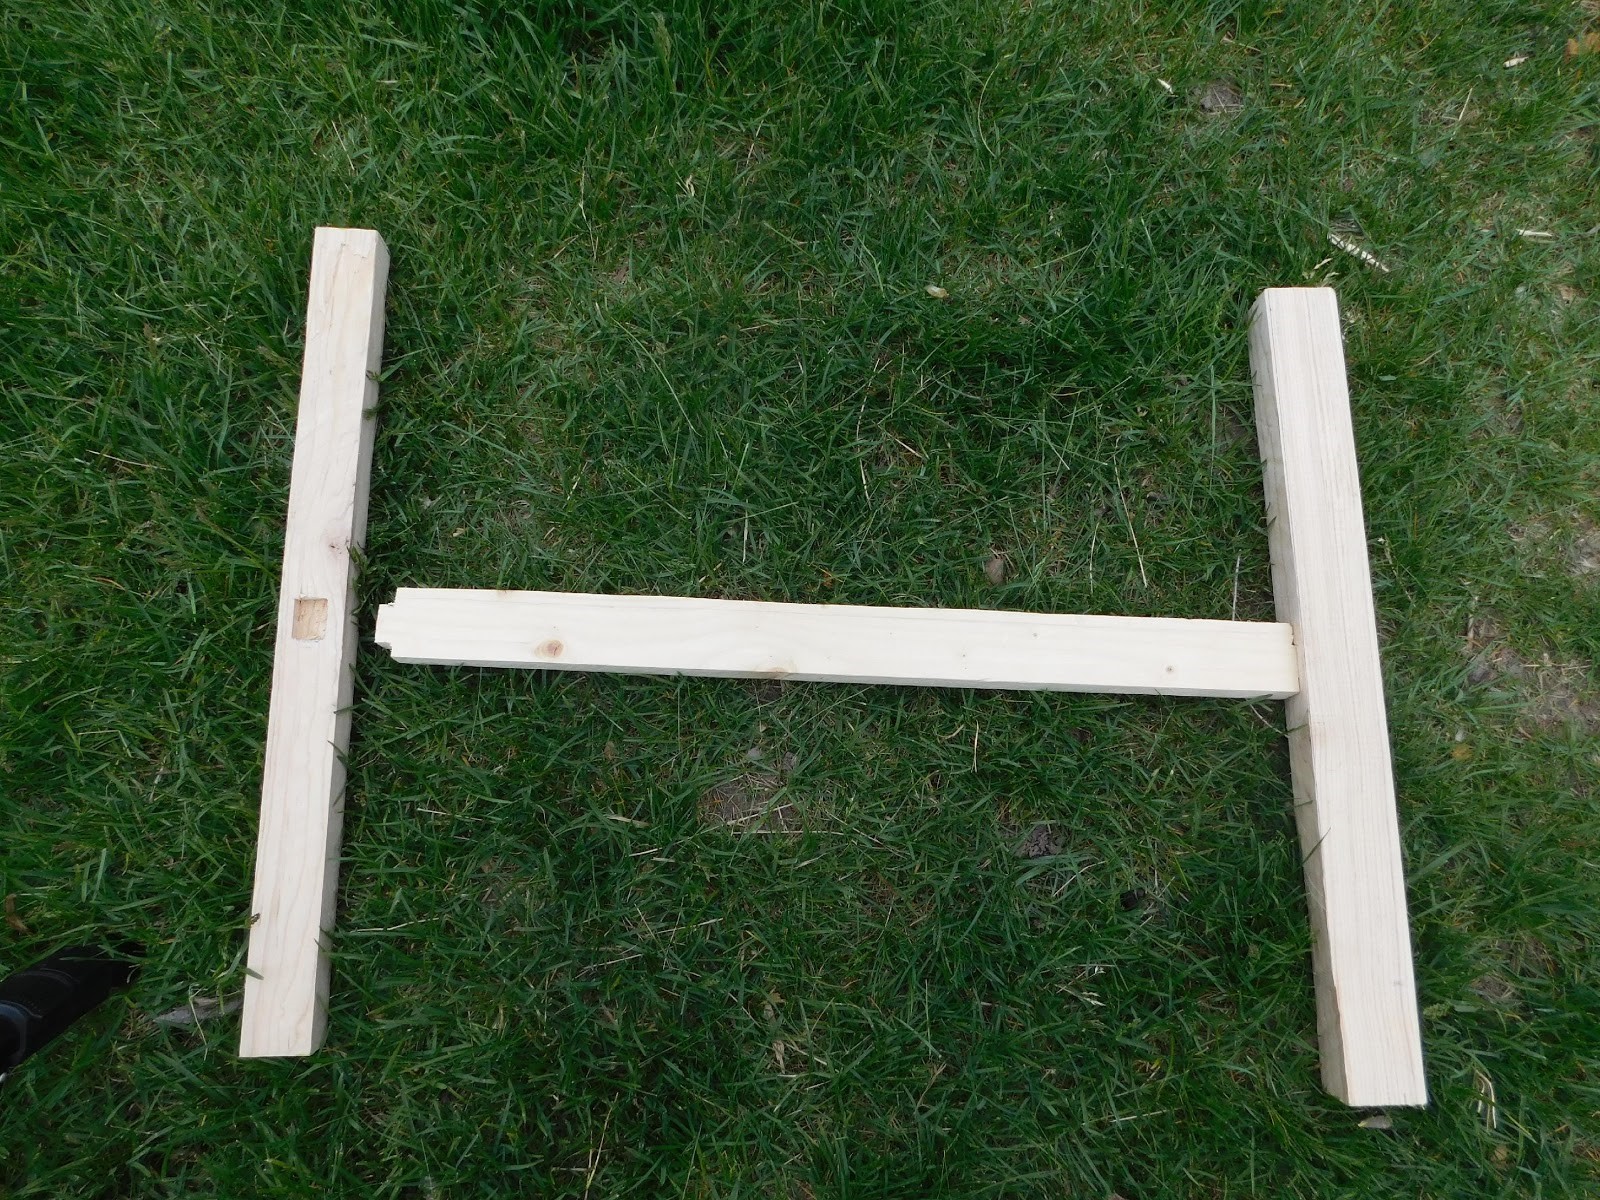
You will want the brace (1×2) to insert halfway up your handle. Measure 7 1/2 inches up the handle and make a mark. This will be the center of the slot you are soon to cut out. With your slot located, place the notched 1×2 centered on the mark, then trace out the shape of your slot around the notch. This will ensure a snug and custom fit to your saw.
With the size determined, the next step is to clean out the slot of material. Use your chisel to remove the wood from the slot. The closer you can come to matching the shape of your notch, the more snug the saw will fit together. Repeat on your other handle.
5. Drill the handles
The next step to make a take-down bucksaw is to drill the hole for the pins that will secure your blade. You will want to use a drill bit a shade larger than the bolts you will use. If you order the same blade, I used a 5/16-inch drill bit and ¼-inch bolts. Drill a hole in the center of your handle at least two inches from the bottom. Getting too close in to the edge can cause the wood to split and ruin your handle. Repeat on the other handle.
6. Cut your blade slot
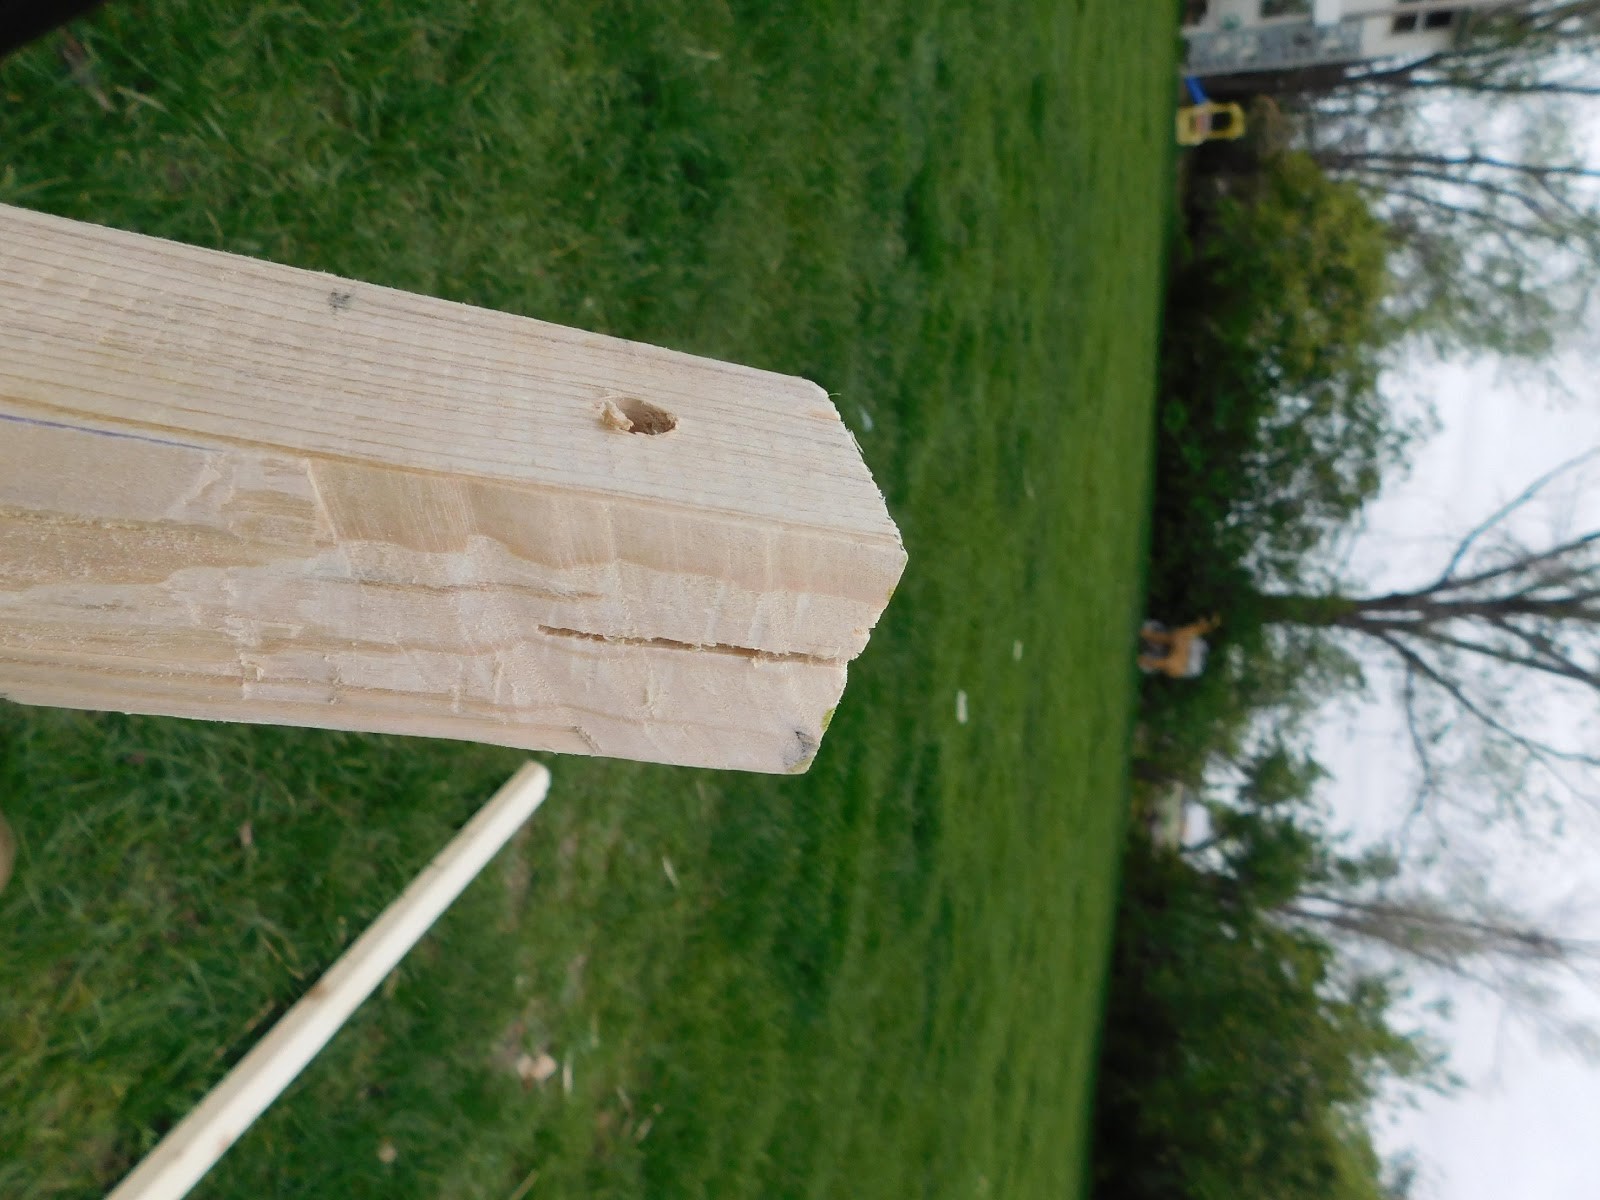
Now you need to use the handsaw in order to cut the slot for the saw blade. Mark the center of your handle on the side you just drilled your holes. Cut a vertical slot down your handle past the drilled portion. Repeat the process on the other handle.
7. Drill rope holes
You are now getting very close to having a custom take-down bucksaw for your next excursion. One of the final steps to make a take-down bucksaw is to drill a hole on the opposite end of your blade, big enough to allow your rope to pass through. Once again, aim for the center of your handle and at least two inches from the edge. Repeat on the other handle.
8. Lace your saw
Next, simply lace your rope through each handle and tie together. The string should be loose at this point. It will be tightened in a moment.
9. Set up your saw
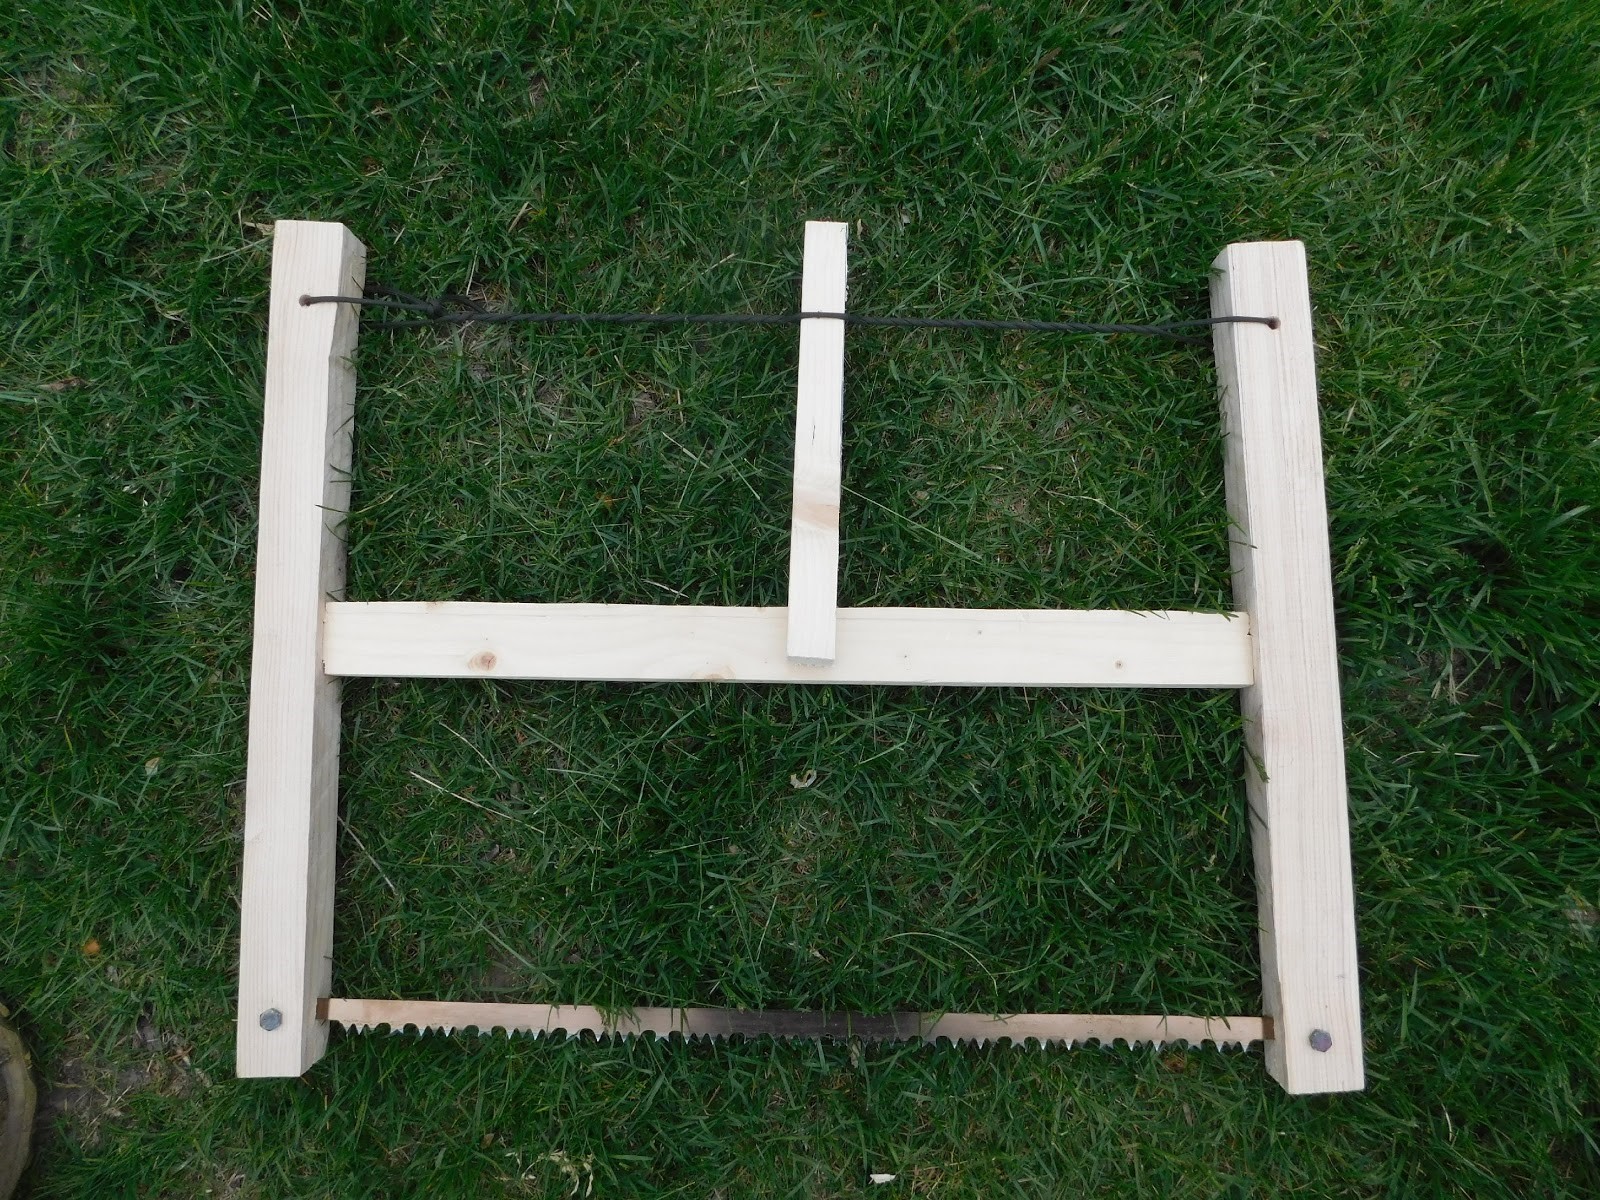
Finally, to make a take-down bucksaw come to life, simply assemble the saw together. Fit the brace into your handles and slide the blade into place, securing it with your bolts. After that, take your scrap lumber and begin to wind the rope around and around until the blade becomes taught. When the tension has become sufficient, simply “lock” the scrap piece off against the horizontal brace. A bucksaw is an ingenious design and works by drawing the top of the saw together to spread the bottom of your saw. This puts tension on the blade and holds it together, ready for work.
There you have it: Nine simple steps to make your own take-down bucksaw. The end product is very light, and breaks down into a compact package ready for backcountry use. If you’ve ever wanted to take a saw into the bush, but never thought you had the space, simply make your own take-down bucksaw and you will be happy to pack along this handy tool on your next outing or long-term experience.
What advice would you add? Share it in the section below:
Learn How To ‘Live Off The Land’ With Just Your Gun. Read More Here.