


Image source: Pixabay.com
If you’re anything like me, you’ve been canning and preserving food from your garden for years … decades even.
I remember helping my great-grandmothers shell peas and stem green beans way back when I was 3 or 4 years old. I shucked corn, peeled cucumbers and cubed pumpkin. Of course, I helped my mother prepare and can just about everything my dad planted in our garden every year.
Canning is a great way to reduce the cost of groceries, but there were always items we bought during the winter that I didn’t find out later that we could have canned.
Before we get to the list of items you can can, let’s take a look at a list of what you should not can.
1. Anything containing thickeners. Thickening agents used in pie fillings will break down under the high heat and pressure required to render them bacteria-free. This will make all your work to put those things up a waste.
2. Certain vegetables and fruits. The heat from pressure canning will destroy the flavor and render them mushy for the amount of time that it will take to be safe in processing, although some of them will be great pickled using a vinegar brine for water bathing. Don’t can broccoli, Brussels sprouts (pickled is OK), cabbage (pickled or sauerkraut is ok) cauliflower (pickled is ok), eggplant (pickled is ok), summer squash (pickled is ok), olives (pickled is ok), lettuce, artichokes, mashed parsnips, mashed squash, mashed potatoes and mashed pumpkin.
3. Certain meats. You should avoid high fat meats like pate, giblets (liver especially), hot dogs and meat with fillers. High fat meats will go rancid quickly and the heat used in pressure canning will not penetrate to the center of the jar to render it safe for consumption.
Now, let’s get to the stuff that you may not know you could can. I know it was a major frustration for my mom when we’d go to the store during the winter and see 50-pound bags of flour and rice that we couldn’t get because it would go bad before we could use it. One thing you don’t want to see when you open a bag of dry goods is weevils or other bugs.
Discover The World’s Healthiest Storable Survival Food!
We’re all familiar – or should be – with pressure canning and water bath canning. What you may not be familiar with is oven canning. Yes, oven canning.
With oven canning, you can can these eight foods – foods you may not have considered canning.
- White rice, oats, and other grains.
- Dried beans and lentils.
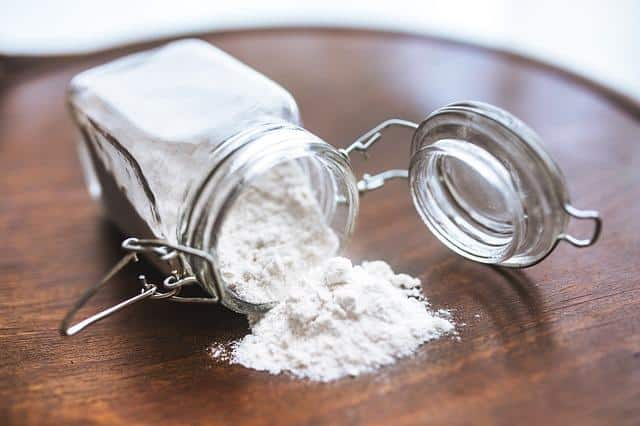
- Flour and cornmeal.
- Spices, salt, baking soda, etc.
- Raw or roasted nuts and seeds.
- Pre-made pasta that does not contain eggs.
- Powdered milk, cheese powder and gelatin sheets or powder.
- Dehydrated foods that are crisp enough to snap when bent.
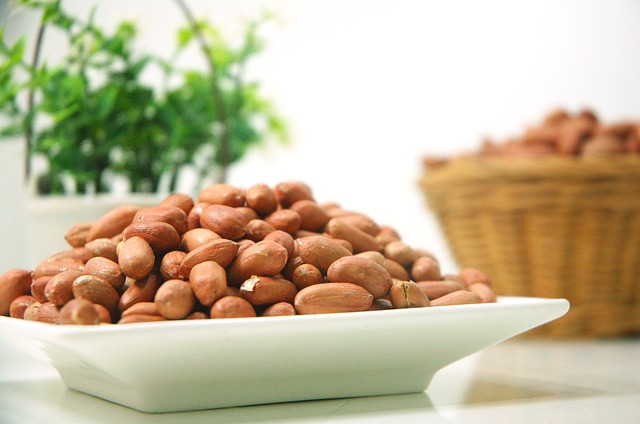
Image source: Pixabay.com
Oven canning is great for preserving dried goods that you want to stay fresh for a very long time. Baking the dry goods in the oven kills any insects or eggs that may be lurking within, which prevents those heart-breaking moments when you open a brand new container of flour, cornmeal or other fine-ground staple. You will still want to sterilize your jars and allow them to completely air dry before using this method, but for the most part it will be a “dry” canning process.
Oven Canning Method
Here are the steps:
- Sterilize your canning jars and lids and allow them to dry completely before use. Do not wipe dry. You can use half-gallon, quart or pint jars for this method.
- Preheat your oven to 200 degrees Fahrenheit.
- Fill your clean, dry canning jars with dried goods. You want to leave half an inch of head space in the jar. You also will want to utilize oxygen absorbers for certain items you are canning in this way.
- Place your filled jars in the oven and set your timer for one hour.
- Use pot holders or a towel to remove the jars from the oven.
- Wipe the rim of the jar with a damp cloth.
- Place your lid on the jar and screw the metal band on tightly.
- Return the jars to the oven and set the timer for an additional 30 minutes.
- Remove the jars from the oven and allow them to cool. As the jar cools, the lid will ping which ensures they are properly sealed and air tight.
- Label and date your jars. Store.
That’s all there is to the process. In case you didn’t know, oxygen absorbers are those annoying little packets that have “do not eat” stenciled all over them in packages.
It is important to note that all of the foods canned using this method should be dry with less than 10 percent moisture content to keep them safe to eat for more than 12 months. Pasta, nuts and dehydrated foods that you store using this process should be used within that 12-month period, since those foods have a moisture content that is between 10 and 25 percent.
Between water bath canning, pressure canning and oven canning – not to mention dehydrating and freezing – we should be able to put a major dent in our monthly food budget.
Discover The Trick To Saving Thousands At The Grocery Store. Read More Here.


