


Image source: Corporatepoet.com
One of the most common occurrences in any disaster scenario is for the power to go out.
Let’s face it: Our country’s electrical grid is in sad shape. Even the American Society of Civil Engineers gave it a D+ in the 2013 Infrastructure Report Card. Power outages are actually increasing in frequency, with repair times growing longer.
Of course, with the power out, everything in our homes that relies on electricity is out of order as well. That means not having light, refrigeration, computers, television, communications or heat. While several of those can be serious, from a pure survival point of view during colder months, the most serious is to be without heat.
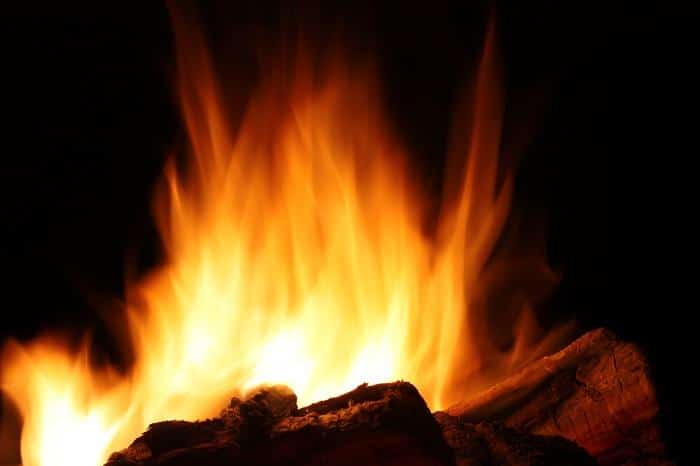
For many, the quick answer to being without heat is to heat with wood. That sounds good — if you’ve got a fireplace or a wood burning stove. But what do you do if you don’t have either of those? The biggest stack of firewood in the world isn’t going to do you the least bit of good if you don’t have someplace safe in your home to burn it.
Harness The Power Of The Sun When The Electricity Goes Out…
Notice that the key word in that last sentence is “safe.” Burning wood in a large pot sitting on your floor isn’t safe, nor is bringing in the barbecue grille and using it as a temporary fireplace. A safe place to burn your firewood means four basic things:
- A place for the fire itself which cannot burn.
- An area around the fire, which won’t burn if hot sparks fall on it.
- A way to get the smoke out of the house, so that anyone in the room won’t be overcome by carbon monoxide poisoning
- A way to get fresh air into the room to replenish the oxygen being consumed in the fire
Okay, so if you don’t have a fireplace or wood-burning stove installed in your home, how can you do that? Simple: Install a wood-burning stove temporarily.
Modern wood-burning stoves are large, impressive devices which are designed to provide the maximum efficiency. This is actually mandated by the EPA so that the stove doesn’t pollute. However, if you can get your hands on an old one, it is still usable in an emergency situation. While the older ones aren’t as efficient, they are usually smaller, which is convenient for a temporary installation. They are also not as well-insulated, so they will radiate heat from all sides.
Creating the Temporary Installation
In order to use the wood-burning stove, you’re going to need to create a place to put it. Ideally, this will be as close to the center of the room as possible, for the best heat dispersal. That’s also usually a clear area, with the furniture around the perimeter of the room. However, you may need to modify the location, moving the stove closer to a window, as the chimney will need to be run out a window.
The floor needs to be covered with a flameproof material for at least two feet all the way around the stove. Ideally, you could use firebrick, but you can also use ceramic tile or sheet metal. This fireproof material is there to prevent hot sparks from catching your home on fire. For a temporary installation, I like the idea of creating a system using a layer of insulation, covered by a layer of sheet metal (such as aluminum flashing), with a final cover of ceramic tile or brick. The metal will then be able to catch any sparks that might try to fall between the tiles.
World’s Smallest Solar Generator … Priced So Low Anyone Can Afford It!
Since these tiles or bricks aren’t going to be permanently attached and grouted, you’ll need to do something to hold them in place. That can be accomplished by making a simple wood frame around your flameproof material. Reinforce the corners so that it can’t come apart easily.
With the base in place, you can set your wood-burning stove. Double check to verify that you’ve covered a large enough area of the floor, especially in the front of the stove, as that’s the area where you are most likely to have sparks that could catch the carpeting on fire.
Running the Chimney
The hardest part of any wood-burning stove installation is putting in the chimney. That’s probably the reason why you don’t have one already installed in your house. We’re going to simplify that process by running the chimney out of a window. It may not look pretty and it may drive building inspectors crazy, but it will work during a crisis — and it will be safe.
There are two types of chimneys you can buy. One is a simple, single-walled round metal chimney pipe. This is the type that has been used for more than a century. It is still in use for gas-fired furnaces and hot water heaters. The second type is a triple wall-round chimney. This is used for permanent fireplace and wood-burning stove installations.
The idea behind the triple wall chimney is that the outer layer keeps cool, eliminating the ability for it to cause a fire. The three walls create a total of three air spaces. The middle one is where the smoke travels out. The outer one allows fresh air to flow in, from the outside. This air is then heated when it reaches the stove or fireplace and returns to the outside via natural convection. The outer and second airspaces are connected together at the bottom to allow this to work.
While the triple wall chimney is safer, I prefer the idea of the single wall for a temporary installation. The reason for this preference is that the chimney itself will radiate heat into the room, from the hot smoke that’s flowing through it. It’s not as safe, but you’ll have more heat, which is somewhat of a trade-off.
You’ll need to remove the upper pane of a window for the chimney to run out. The chimney itself will need to rise straight up from the stove and then make an almost 90 degree turn toward the window. From that point to the window, the chimney needs to rise a minimum of one foot for every 10 feet of run. This will ensure that the smoke is carried up and out by the hot air.
Where the chimney goes through the window will need to be sealed. It’s almost impossible to cut the glass in a circle and put it back, so I recommend cutting a piece of plywood and putting it there. Don’t actually allow the plywood to touch the chimney, but make the hole in it a little larger than the diameter of the chimney pipe. Fill the gap by cutting a piece of aluminum flashing and using it to cap the remaining space. Some fiberglass insulation in the gap is useful as well.
Another elbow will be needed in the chimney, outside the window, as well as a short piece of vertical chimney stack. You should also put a cap on the chimney to keep rain out of it. Make sure that the cap is mounted high enough above the level of the chimney to allow good airflow.
Also, ensure that the chimney is well-sealed, especially the horizontal run going over to the window. Aluminum tape, used for sealing ductwork (not duct tape) is ideal for this. It won’t burn from the heat and seals very well.
The unit is now ready for use. Make sure that you have some way for fresh air to get into the room, even if it means cracking open another window. Most of the time, doorways provide some leakage, although it might not be enough.
What tips would you add for installing emergency heat? Leave your reply in the section below:
Sign up for Off The Grid News’ weekly email and stay informed about the issues important to you


