 Print
Print
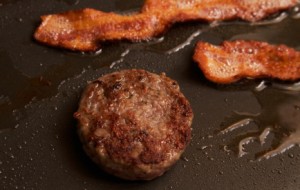 Canning of meats is a bit daunting for some, especially beginners. But there are people who have pioneered these preserving processes for us, so we can use their experiences to build up our confidence in this area. Learning these processes will allow you to have bacon and sausage on hand, even if you don’t have a freezer.
Before starting, inspect jars for nicks and cracks. Reusing rings is okay if they are in good shape – not dented or rusty. However, reusing lids is not. That may lead to food poisoning, so buy new lids each time. Wash jars, lids, and rings in soapy water. Rinse well. Boil jars, lids, and rings in a large kettle or canning pot. Keep jars, lids, and rings in boiling water until ready to fill.
Canning Bacon
You will need plain brown paper a foot wide (you can get this from a hardware store). You can also use butcher or parchment paper.
- Lay paper out on your work surface about two feet long.
- Line the raw bacon out on the paper as close together as possible, without overlapping. Depending on the thickness of your bacon, you will fit between eight and sixteen slices of bacon on this length of paper.
- Trim paper to the length of the bacon; don’t leave a paper tail.
- Cover with another layer of paper the same length.
- Lay a yardstick on top of the bacon and paper layers to help keep everything together, then fold the whole thing in half lengthwise.
- Starting at narrow edge, tightly roll the rectangle of bacon and paper. You will need to tuck as you roll.
- Slide the roll into a wide-mouth quart jar. It may need to be “screwed” in. If the roll won’t fit, unroll it just far enough to remove one slice of bacon, then put it into the jar.
- Repeat for all the bacon. You will fill approximately one quart per pound of bacon. There may be a few slices left over. Make some bacon bits for a salad or baked potato bar.
- Place lids and rings on the jars. It may take a bit of squishing to get them in place if the bacon sticks up above the jar rim.
- Do NOT add water or any other liquid to the jars. Bacon is canned RAW and DRY.
- Put two to three inches of hot water in your pressure canner (or the amount specified by the manufacturer).
- Place jars in canner so that the steam can freely move around each jar.
- Place the lid on the canner and fasten it securely so that the steam escapes only through vent.
- Let the steam vent for ten minutes (or follow manufacturers directions). This will allow all of the air to escape from the canner. If it is not vented properly, you will have air pressure as well as steam pressure and will get a faulty pressure reading.
- If you are using a dial gauge, close the petcock at this point. If you’re using a weighted gauge, put the weight in place.
- With either type of gauge, follow the manufacturers instructions for determining when ten pounds of pressure has been reached.
- Process at ten pounds of pressure for ninety minutes.
- Follow manufacturers directions for cooling and opening the canner.
- When you take your jars from the canner, there will be about an inch of liquid in the bottom of the jars. This is normal. When the fat cools, it will turn white and be solid.
- Cool the jars and check the seals to be sure they have sealed properly. Modern rings and lids are easily checked; slight pinging sounds will be heard as the jars cool. This sound is your signal that the vacuum seal has formed. The center of the lid will also dip slightly. To check for that dip, try pushing the center of the lid down; if it doesn’t push down, it is sealed. If the lid does push down and springs back up, the jar is not sealed. If the lid is dipped but pushes down and holds, the seal is questionable. If jars leak when tested, they are not properly sealed. Remove lid carefully and either reprocess with a new lid or use contents immediately.
- If using anything other than modern rings and lids, read the manufacturers instructions for the proper way to check your seals.
- Label and store in a cool, dry place. Shelf life is generally six to eight months, but up to a year is possible.
- To enjoy your preserved bacon, open jar and slide out bacon. Unroll and spread open. The paper will be greasy and creased, but it should not disintegrate. Peel the paper off the bacon (it will be a bit messy, but it will peel away).
- When paper has been removed, just fry like normal. It cooks up really well.
Canning Sausage
Canning sausage works best with freshly made sausage.
- Cook sausage to brown lightly. It can be made into patties or broken up into crumbles. Brown patties on both sides.
- Fill jars with HOT sausage, leaving one inch of headspace.
- Pour 1-2 inches of HOT sausage grease into jars.
- Place lids and rings on jars tightly.
- Put two to three inches of hot water in your pressure canner (or the amount specified by the manufacturer).
- Place jars in canner so that the steam can freely move around each jar.
- Place the lid on the canner and fasten it securely so that the steam escapes only through vent.
- Let the steam vent for ten minutes (or follow manufacturers directions). This will allow all of the air to escape from the canner. If it is not vented properly, you will have air pressure as well as steam pressure and will get a faulty pressure reading.
- If you are using a dial gauge, close the petcock at this point. If you’re using a weighted gauge, put the weight in place.
- With either type of gauge, follow the manufacturers instructions for determining when ten pounds of pressure has been reached.
- Process at ten pounds of pressure – seventy-five minutes for pints or ninety minutes for quarts.
- Follow manufacturers directions for cooling and opening the canner.
- Cool the jars and check the seals to be sure they have sealed properly. Modern rings and lids are easily checked; slight pinging sounds will be heard as the jars cool. This sound is your signal that the vacuum seal has formed. The center of the lid will also dip slightly. To check for that dip, try pushing the center of the lid down; if it doesn’t push down, it is sealed. If the lid does push down and springs back up, the jar is not sealed. If the lid is dipped but pushes down and holds, the seal is questionable. If jars leak when tested, they are not properly sealed. Remove lid carefully and either reprocess with a new lid or use contents immediately.
- If using anything other than modern rings and lids, read the manufacturers instructions for the proper way to check your seals.
- Label and store in a cool, dry place. Shelf life is generally six to eight months, but up to a year is possible.
- Be sure to heat to 170° F when reheating for your meal. Use the grease it was packed in to make gravy or fry potatoes (or both) to go with your meal.
Happy canning!
REFERENCES: Canning bacon process comes from Enola Gay at: https://www.rural-revolution.com/2011/01/canning-bacon.html Ball Blue Book 31st edition, copyright © 1984