


|
Listen To The Article
|

Survival Shelter
Cold weather puts a strain on anyone’s survival skills. The greatest problem you face is maintaining your body heat, which the cold will do everything it can to steal. Although being in a shelter can help protect you from the cold, it doesn’t always help as much as you’d like.
One of the biggest problems with most survival shelters is that they leak air. We have this problem with our homes as well, but a home heating system usually has enough overcapacity to make up for it. Nevertheless, those air leaks cost us money, in the sense that they make us burn more energy than we would otherwise.
If you have an energy audit done on your home, they will check for air leaks as well as places which aren’t properly insulated. Many people lose a lot of heat through their attic, because the insulation compresses over time, leaving them without enough insulation to meet their home’s needs. They also find that seals around doors and windows wear, allowing air leaks that steal precious heat.
Similarly, if you are in a winter survival situation, you need to run a home energy audit of your survival shelter. Your shelter probably won’t have much insulation and it will also have air leaks. Identify those so that you can do something about them.
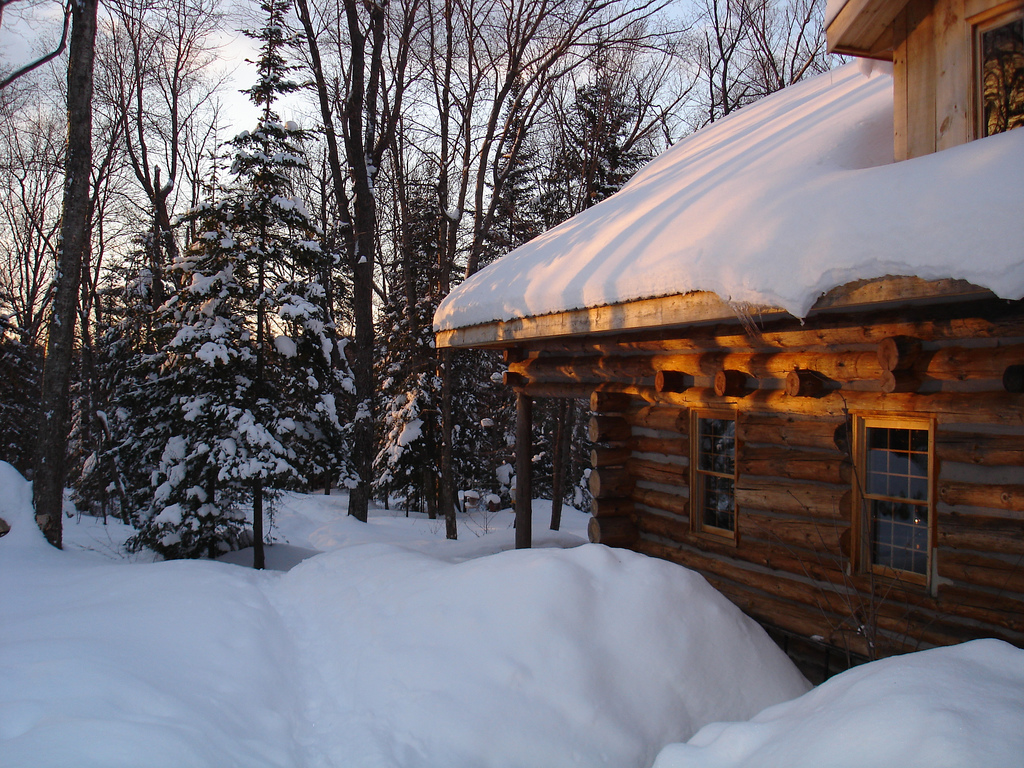
Keeping a Log Cabin Warm
In the days of log cabins, they would do this in the fall, before the weather became really cold. Most log cabins were chinked with mud, which would eventually fall out of the cracks between the logs. They would mix up some more mud, using clay instead of dirt if they could, and fill the space between the logs, “chinking them.”
Another common area that was a problem was the area between the bottom log and the ground. The bottom log never fit perfectly with the ground, leaving a gap where wind could come through. They would take care of this gap by “banking” their cabin.
Banking is nothing more than piling up dirt around the edges of the cabin to fill this space between the bottom log and the ground. Typically, they would bank it up about half the height of that bottom log, just to make sure that it wouldn’t pack down or wash away. Some log cabins actually had enough dirt banked around them through the years that it made the cabin look as if it had been built partially underground.
The same idea will work with almost any survival shelter. It doesn’t matter if you’ve made a log cabin, a yurt or a dirt bag building, you’ll find the same sort of problem around the base. By taking the time to “bank” the bottom of the walls, you eliminate one possible path for cold air to come into your survival shelter.
Using Snow For Banking
Survival Shelter
There’s still more that you can do, though. Once it snows, you can bank the walls again with snow. In fact, I’d recommend banking the walls with snow every chance you get, until the snow is piled up against your walls up to the eaves of your shelter. By doing this, you create somewhat of a snow cave or igloo.
Let me explain what I’m after here. Obviously, if you have enough snow to bank it up to the eaves, you’re living in a very cold area. So cold, that you probably have temperatures which dip well below 32 degrees Fahrenheit. The interesting thing about that: The snow piled up against your house won’t get much colder than 32 degrees. In a very cold winter, that’s actually quite warm.
Without the snow, you might have temperatures below zero on the outside of your shelter’s walls. That greatly reduces the chance of ever having temperatures of 70 degrees on the inside of your shelter. The greater temperature differential will make it harder to heat your survival shelter.
Wait, There’s More
With your walls covered in snow, the inside of your survival shelter should be considerably warmer, even if it never does hit 70 degrees. So, why isn’t it reaching 70 degrees? Perhaps because you don’t have any insulation.
The insulation we’re referencing here consists of many pockets of air, separated by some material. The key, though, is those pockets of air. The more pockets there are or the more layers of pockets there are, the better the insulation can separate the heat from the cold.
Your survival shelter probably doesn’t have many layers of air pockets and may only have one. With only one layer, it’s hard to keep heat in. It’s better than zero, but not good enough. You need to add more layers between the walls of your shelter and the outside air. You especially need to do this on your roof.
The easiest way to add lots of air pockets between the roof of your shelter and the outside air is with pine boughs and a tarp. Cut the ends of pine branches off and pile them on your roof. This may require reinforcing your roof, but it’ll be worth it. Once you have a good layer of pine branches, stretch the tarp over them and tie it tightly in place. Trapped between the roof of your shelter and the tarp, the pine branches will begin to act like insulation, helping to keep the heat inside of your survival shelter.
With a little hard work, your survival shelter can be warmer than ever – so warm, you won’t want to leave.
Do you have advice on making a survival shelter warmer? Share it in the section below:
Get $600 Worth Of Survival Blueprints … Absolutely Free!
")


