 Print
Print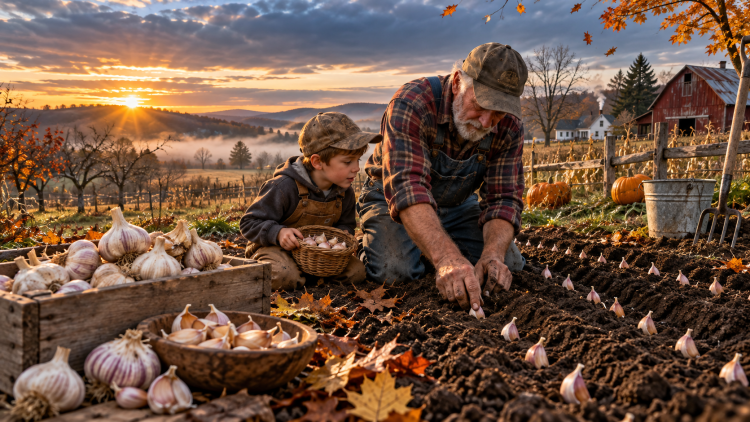
While Everybody Else Is Putting The Garden To Bed, Smart Homesteaders Are Sticking One Of The Easiest, Most Useful Crops In The Ground
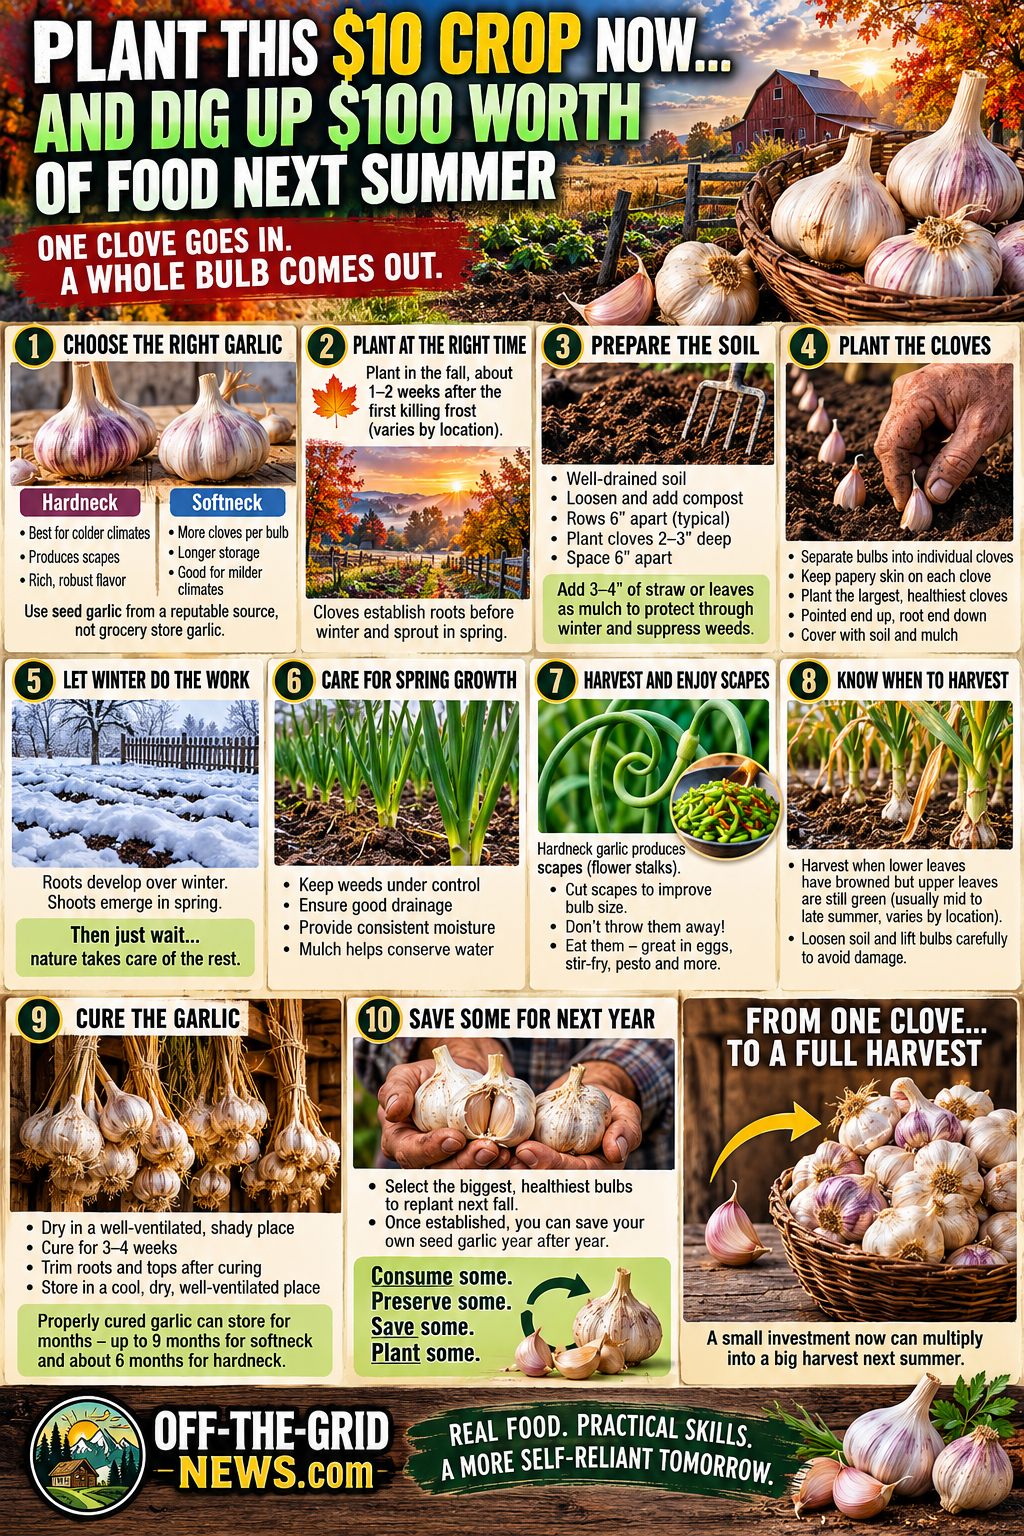
There’s something wonderfully backward about garlic. Just about the time everybody else is dragging the tomato cages to the shed, dumping dead pepper plants on the compost pile and declaring the garden finished for another year, that’s when you plant it.
You take a perfectly good head of garlic, break it apart, bury the individual cloves in cold dirt and walk away. Then winter arrives, snow piles over the garden, the ground freezes hard enough to bounce a shovel, and that little garlic clove sits underground looking about as productive as a fence post.
But come spring?
Up pops a green shoot. And by next summer, that one clove can become an entire bulb containing several new cloves.
That’s the kind of multiplication I like.
The $10 Garden Investment
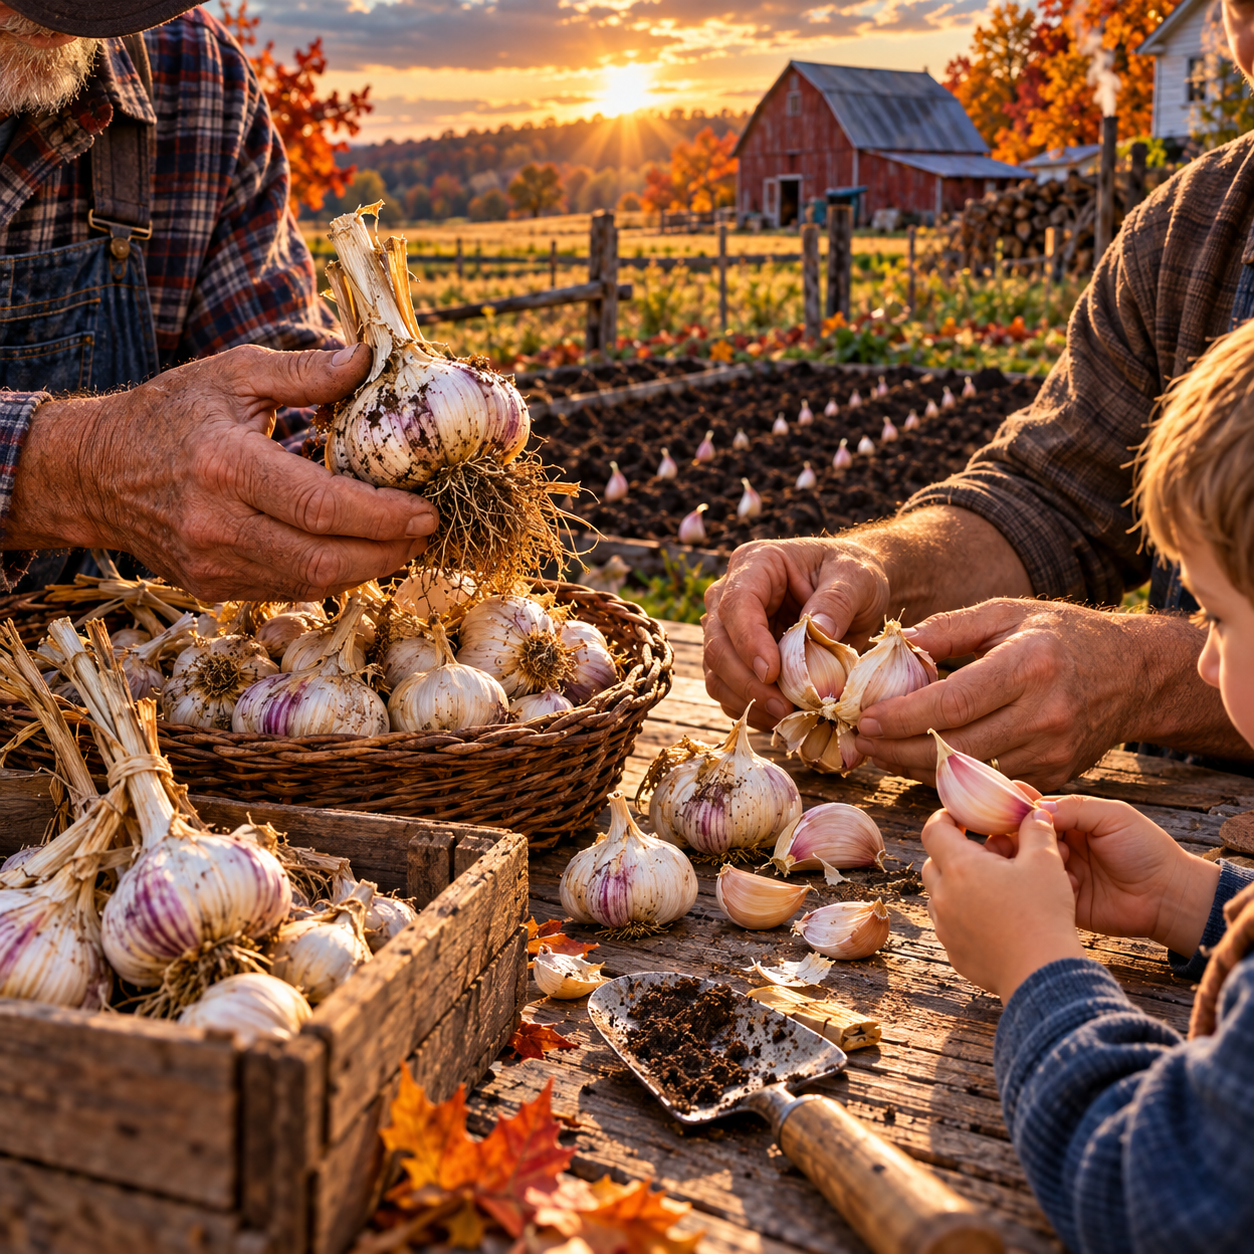
Go price good garlic at the grocery store sometime. Better yet, price locally grown garlic at a farmers market, and suddenly this humble little bulb doesn’t look quite so humble.
Depending on the variety, your location and how well it grows, a relatively modest investment in planting garlic can turn into a surprisingly valuable harvest. And because each planted clove develops into a new bulb, a handful of good seed garlic can become quite a pile of garlic by harvest time.
Now, I’m not promising that every $10 literally becomes exactly $100. Agriculture doesn’t come with that kind of warranty. Your soil may be different, your weather may stink, or something may decide your garden looks like an all-you-can-eat buffet.
The point is simpler.
Garlic gives the backyard gardener an awful lot of potential return from a very small patch of dirt.
And unlike zucchini—which can eventually leave you sneaking around after dark putting grocery sacks of the stuff on your neighbors’ porches—garlic is something most families actually use. You can cook with it, roast it, dry it, powder it, preserve it, save it for next year’s crop and, when properly cured and stored, keep it for months.
That’s a pretty respectable résumé for something that started as a clove shoved into the dirt.
But Don’t Plant Just Any Old Garlic
Here’s where people sometimes get sideways. They walk into the grocery store, buy three bulbs from the produce department, and figure they’re officially garlic farmers.
Maybe.
But I’d rather start with seed garlic intended for planting, preferably from a reputable grower or local source. The University of Minnesota Extension specifically recommends purchasing cloves from seed-garlic producers rather than planting ordinary grocery-store garlic because commercial varieties may not be adapted to colder growing conditions.
Varieties differ tremendously, and what grows beautifully in California isn’t necessarily what you want spending January underneath snow in Minnesota, Wisconsin, Michigan or northern Illinois. In colder country, hardneck garlic is usually especially interesting because these varieties are well suited to cold climates and produce those wonderful curling flower stalks called scapes.
Softneck garlic generally produces more cloves, stores well and is the type commonly used for those beautiful garlic braids hanging in old-fashioned kitchens. Climate matters, however, so don’t merely buy something labeled “garlic” and assume you’ve got the right horse for your particular race.
Buy garlic that makes sense where you live.
Your local university extension office can be surprisingly useful here. It’s one of those rare cases where somebody may give you good gardening advice without first trying to sell you a $79 online masterclass.
When Do You Plant It?
Here’s the wonderfully strange part.
Fall.
In colder climates, garlic is generally planted in autumn so the cloves can begin establishing roots before winter. The University of Minnesota recommends planting about one or two weeks after the first killing frost, with roots developing before the ground freezes and most shoots waiting until spring to emerge.
You aren’t trying to grow a garlic jungle before Christmas. You’re trying to establish the underground foundation so the plant is sitting there ready to move when spring arrives.
Think of it like setting fence posts before winter.
Farther south, the timing obviously changes. This is one of those occasions when somebody 700 miles away on YouTube shouldn’t necessarily be telling you exactly which Saturday to plant your garden.
Local conditions win.
Now Break Apart The Bulb
Here’s where your little investment starts multiplying. Take your seed garlic and carefully separate the bulb into individual cloves shortly before planting, keeping the papery covering around each clove intact.
And here’s an important little trick: plant the biggest, healthiest cloves. University of Minnesota Extension actually recommends saving the largest garlic for planting the following season.
It can be tempting to plant the tiny cloves because you want to eat the big ones. Fight the temptation, because you’re selecting the stock that will produce next year’s crop.
If you were breeding cattle, you wouldn’t keep the runt because you ate your best animal.
Same principle.
Pointy End Goes Up
Garlic planting isn’t exactly brain surgery. The pointed end goes up, the flatter root end goes down, and the cloves need enough room to form good bulbs without spending the summer elbowing one another.
For a northern-garden example, Minnesota Extension recommends planting cloves about six inches apart, with the base of each clove roughly two to three inches below the soil surface. Penn State gives somewhat different commercial spacing and depth recommendations, which is another reminder that soil, climate and production method matter.
Most importantly, garlic wants well-drained soil. Wet, poorly drained ground encourages bulb problems, while soil with plenty of organic matter gives the developing bulbs a much better place to work.
Then cover everything up.
And here’s where one of my favorite free homestead resources comes into play.
Leaves.
Those same leaves people rake into plastic bags and pay somebody to haul away can help insulate the garlic bed. Straw works nicely too; Minnesota Extension recommends roughly three to four inches of leaf or straw mulch to moderate winter soil-temperature swings, conserve moisture and help suppress weeds.
You’ve basically tucked your garlic into bed.
Then Comes My Favorite Winter Gardening Technique
Do nothing.
Seriously. You don’t need grow lights, seedling trays or a spray bottle sitting beside the kitchen window.
And you certainly don’t need an app connected to a Bluetooth soil sensor sending an emergency notification because your garlic is experiencing emotional distress.
Winter handles things.
Underneath that mulch, the garlic waits. Then the days lengthen, the soil begins warming, and one spring morning you’ll walk past what looked like an empty patch of dirt and notice little green spears poking through.
That’s when the magic becomes visible.
Garlic Doesn’t Like Competition
Once spring growth takes off, don’t let weeds steal the groceries. Garlic doesn’t compete particularly well with weeds, so early weed control matters, and mulch can make that job considerably easier.
Garlic also needs adequate moisture while actively growing, although you certainly don’t want those bulbs sitting in a swamp. Good drainage matters from planting right through harvest.
Remember, you’re trying to grow garlic.
Not rice.
And if you’re growing hardneck garlic, the plant eventually gives you another little dividend.
Don’t Throw Away The Scapes
Eventually you’ll see a strange curly green stalk emerging from your hardneck garlic. That’s the scape, and the first time you see one you may wonder whether your garlic has developed an antenna.
Cut it.
Removing young scapes can help improve bulb development, according to Penn State Extension, because the plant can devote more resources to the bulb rather than the flowering stalk.
But don’t toss those scapes onto the compost pile.
Eat them.
Chop them into eggs, sauté them in butter, toss them into stir-fry, make pesto out of them or throw them on the grill. Suddenly your garlic crop is feeding you before you’ve even dug the garlic.
That’s my kind of plant.
The Biggest Mistake May Come At Harvest
Eventually those beautiful green plants begin looking a little rough. That’s not necessarily a problem; it’s part of the plant’s normal march toward harvest.
As summer progresses, the lower leaves begin yellowing and dying back. Harvest too early and your bulbs may be undersized, but wait too long and the cloves can begin separating and pushing through deteriorating wrappers, hurting their storage quality.
Minnesota Extension recommends beginning harvest when the lower leaves have browned while roughly half—or a little more—of the upper leaves remain green. Depending on your climate and variety, that can put harvest somewhere around late June through July.
Don’t grab the stalk and yank it like a carrot. Loosen the soil carefully with a garden fork or shovel and lift the bulb, because freshly harvested garlic can bruise more easily than you might think.
And underneath that dirt is your payoff.
One clove went in. A whole bulb came out.
Now Don’t Ruin It
Freshly dug garlic isn’t quite ready for long-term pantry duty. It needs to cure, which dries the neck and outer skins and improves its ability to keep in storage.
Put the plants somewhere dry with plenty of airflow and keep them protected from harsh direct sunlight and rain. Minnesota Extension says garlic commonly needs about three to four weeks to cure properly, while good air circulation is especially important.
Don’t immediately scrub your beautiful bulbs squeaky clean. Once they’re cured, you can brush away loose dirt, trim the roots and tops appropriately, sort out damaged bulbs and move the good ones into storage.
Under the right conditions, storage life can be impressive. Oregon State University Extension says softneck garlic can store for up to about nine months, while hardneck varieties may keep for roughly six months.
But before you carry every last bulb into the kitchen, stop.
Look at your harvest.
Find some of the biggest, healthiest bulbs.
And put them somewhere else.
That’s Next Year’s Seed
This may be my favorite part of growing garlic. Once you’ve established healthy garlic suited to your location, you can save some of your best bulbs and replant the cloves the following fall.
Think about what just happened. You bought garlic, planted it, harvested it, ate most of it—and instead of consuming everything, you saved a portion of the harvest and put it back into the ground.
Then it multiplies again.
There is an entire philosophy of self-reliance sitting inside that little garlic bulb.
Modern consumer culture teaches us to use something up and go buy another one. The old homestead teaches something different: what comes off the land isn’t automatically divided into only two piles called eat it and throw it away.
Some is supper.
Some is storage.
And some is next year’s beginning.
Consume some. Preserve some. Save some. Plant some.
That’s how a pantry becomes a garden, and eventually how a garden begins helping feed itself.
The Little Crop That Works While You Sleep
We’re heading into October, and pretty soon the garden will look finished. Tomatoes will be gone, beans will be brown, frost will blacken the squash vines, and somebody will put the shovel in the shed until April.
But you don’t have to be finished.
Take one little patch of ground. Loosen the soil, work in some finished compost if the soil needs it, separate those healthy garlic cloves and put them into the earth.
Pointy side up.
Root side down.
Cover them with dirt, mulch them well, and walk back to the house.
Because while snow is blowing across the yard and you’re sitting beside the woodstove wondering whether spring will ever come again, next summer’s supper can already be growing underneath your feet.
And that’s about as off-grid as a $10 investment gets.