Raising chickens is a no-brainer when it comes to homesteading, and it is a good choice for the beginner. They are relatively easy and inexpensive to keep and care for. They can provide you with an abundance of eggs, which can make up an important part of your family’s diet and can also be sold or traded to meet your other needs. They can also provide you with a source of meat that is free from antibiotics, hormones, and pesticide residues.
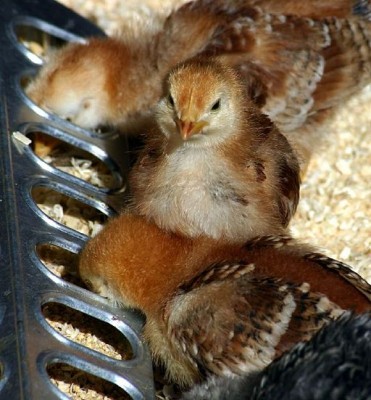
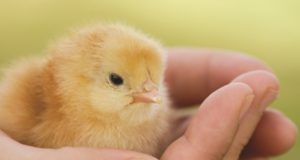
This time of year, you are probably seeing chicks hatch and little yellow fluff balls running around the coop. Keeping your chicks healthy and disease-free, giving them the right food and plenty of water, and keeping them safe are essential to making sure these little guys grow into successful breeders or egg layers for your future needs.
The Breeds
If you are only in the planning stages for your chicken livestock, now is the time to consider the breed or breeds you will select. There are a variety of chickens available in four main categories: egg layers, meat producers (or broilers), those that can produce both eggs and meat, and show chickens. If your needs are practical, you will want to consider birds from the first three categories.
Good eggers include Leghorns, which will give you 250 to 300 eggs per year per bird. Rhode Island Reds will give you similar quantities. Neither of these will be good eating birds, but excellent choices if you want eggs only. Most broiler chickens are Cornish or Cornish Cross and will grow large and plump. Dual-purpose chickens include Plymouth Rocks, Wyandottes, and New Hampshires.
An Absolute Beginner’s Guide to Raising Chickens…
The Coop
Even if you already have chickens, it’s important to consider the state and size of your coop before you start breeding them. Chicks up to six weeks of age need to have approximately a half square foot of space in the coop and adults need three square feet. If they have access to the outdoors, you can halve these space requirements. Make sure you have enough room for all the chicks you expect to hatch before they arrive. Having adequate space is essential for good hygiene and health for all of your chickens, both youngsters and adults. Space also helps to discourage the habit of cannibalism amongst the birds.
Make sure your chickens’ housing has a floor that can be cleaned. It can be the concrete floor of a barn or a wooden floor in a coop. To prevent parasites and infections in your new chicks, clean and disinfect the coop thoroughly. Cleaning should include the floor, walls, feeders, and waterers. There are numerous diseases that can affect poultry, and having good cleaning habits is the best prevention.
The Brooder
Your coop should include brooding areas for the new chicks when they arrive. The brooder is a separate area within the coop that is designed just for the chicks. It can also be outside of the coop. You can purchase a commercially made brooder, which is typically a metal box, but you can also make yours out of plywood or even just use a cardboard box. Just remember that those chicks will need about a half a square foot of space until six weeks. From six to eight weeks, the will need one square foot and from eight to twelve weeks, two square feet.
The brooder, whatever it is made of, needs to have a bottom and four sides. The sides should be at least eighteen inches high to keep the birds contained and to keep out drafts and cold air. It is helpful, but not necessary to have a mesh grating as the bottom of the brooder and to have it lifted off of the ground. This allows droppings to fall through, making it easier to clean the brooder. If you have a mesh bottom, cover it to a two-inch depth with wood chips, rice or oat hulls, or ground corn cobs. Do not use cedar chips, as the fumes are toxic to the chicks.
The brooder will also need to be positioned under a heat lamp to make sure the chicks stay sufficiently warm. It should be centered over the brooder at about eighteen inches from the floor. Use a red bulb to avoid making the brooder too bright and maintain a temperature of 95 degrees for their first week of life. After that, you can reduce the temperature by five degrees each week until you reach 70 degrees. Use a thermometer to measure temperatures in the brooder and adjust by raising or lowering the lamp. You can also look to the chicks to tell you if the temperature is right. If they huddle right under the lamp, it is probably too cold. If they spread out to the edges of the brooder, it is too warm.
Disease
Disinfecting the brooder and coop before the chicks arrive is important, but you will also need to keep the brooder clean as the chicks grow. Keep the floor dry and provide fresh water every day. Keep dirt and debris out of the food. Don’t let too many visitors near the chicks to avoid transfer of germs and illness. And don’t allow the chicks to mingle with the other poultry.
Cleanliness goes a long way towards preventing infections and parasites in your chickens, but it is not always enough. The chicks may need to be vaccinated against fowl pox, Newcastle, bronchitis, Marek’s disease, and other infections. Consult with a veterinarian or supply store to decide what you need.
Food and Water
Water is very important initially for chicks. They are often thirsty when they arrive, so have water ready immediately. Dip each chick’s beak into the water to inform them as to how to drink. If they won’t drink or are lethargic, you can add some sugar to the water. Provide your chicks with fresh, room-temperature water every day. A one-gallon fount is sufficient for a modest flock.
Your chicks need to get enough food and the right kind to be sure they grow into healthy birds. For the first six or eight weeks, you can feed them a starter feed from the supply store. If you are hoping to go natural with all of your animals, check the labels carefully. Many feeds have antibiotics mixed in. From eight weeks of age to about nine months, you need to switch over to a grower feed which will help them grow into nice, large birds. If the chicks arrive before you were able to purchase feed, you can give them dry quick oats or cooked egg yolks.
For the first week, spread the chicks’ feed on a newspaper so that they learn to peck the ground for food. After that, use a feeder that is large enough for all the chicks. Each one needs one inch of feeder space for the first two weeks, two inches up to six weeks, and four inches after that. The fount and the feeder should have a rim that is no taller than the chicks’ backs.
Protection
You will never get egg-laying chickens or broilers out of your chicks if they don’t survive to adulthood. There are plenty of predators out there that would love to make a meal of your little chicks, and it is up to you to protect them. If the brooder is going to be indoors— in a barn for instance—that can be locked up at night, they will be protected. Just be sure any barn cats cannot access them. If they are in the coop area, make sure all of your chickens are protected by fencing. It should be strong enough to deter dogs, coyotes, cats, raccoons, and any other animals that may invade. Be sure to sink the fencing at least six inches into the ground so that predators cannot dig under.
When you prepare well, practice good cleaning habits, and keep your chicks warm, watered, and well fed, you will be rewarded with healthy egg-laying hens and nice, fat broilers.
©2012 Off the Grid News
 Off The Grid News Better Ideas For Off The Grid Living


