Growing food in your garden is an excellent way to save money and live more frugally. You also don’t have to worry about unknown pesticides and other chemicals being in your food. However, since the growing season for vegetables doesn’t last all year, you need a way to preserve vegetables.
There are several ways you can preserve fruits and vegetables for use during the winter months, including canning, freezing, and drying them. The following tips will get you started preserving your fruits and vegetables.
Freezing Vegetables and Fruits
Freezing vegetables and fruits is a simple way to preserve them. There are only a few steps that you need to take prior to freezing to ensure that you have the highest quality vegetables. You may need to blanch or steam the vegetables prior to freezing. This helps the vegetables retain their color and flavor. However, some vegetables do not have to be blanched or steamed, and others have to be fully cooked before freezing. You need to make sure you know which method will work with the vegetables you are freezing.
Blanching
Blanching is a quick dip in boiling water. The vegetables or fruits don’t stay in the water long enough to cook, just long enough to stop the enzyme process from continuing. Every vegetable has a different amount of time that it needs to blanch. Steamed vegetables use the same process as blanched vegetables; however, you don’t submerge them. The kettle of boiling water has a rack added to hold the vegetables above the water. Once the time is up for steaming or blanching, the process is stopped by placing the vegetables in an ice bath.
Packing
You can pack your vegetables in freezer containers or freezer bags as soon as they are chilled. However, if you want to save space, freeze them on a cookie sheet before packing. If you freeze your vegetables before you pack them in containers and bags, they will use much less space.
Mark your frozen vegetables and fruits with the name of what is in the bag, the date you froze them, and the date they will expire. Fruits and vegetables will stay fresh in the freezer for various amounts of time. Make sure you research and find out so you can indicate it on the bags.
Canning Fruits and Vegetables
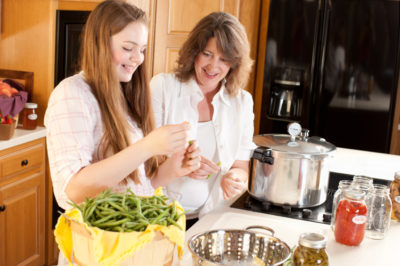
Canning uses high pressure and hot water to seal the vegetables or fruits in airtight jars. You will need a pressure canner for most vegetables, although you can use a hot water bath canner for highly acidic vegetables and for making jelly.
Before you start canning, you need to make sure you have a pressure canner, an extra-large stock pot for water bath canning, canning jars with lids and bands, canning salt, a wide-mouth funnel, and canning tongs or oven mitts. The use of these is described briefly below.
Stock Pot or Kettle: Before the pressure canner was invented, all canning was done in a water bath canner; however, this method does not kill all bacterial in the jars and is not safe for all vegetables. Tomatoes, pickles, and other acidic foods are usually safe in a water bath due to the natural acids. Bacteria cannot grow in these acids.
Prepare now for surging food costs and empty grocery store shelves…
Pressure Canner: Pressure canning is the method used for practically all vegetables. Before you start, you will need to research and find out how much pressure each vegetable needs and how long they need to be in the canner. After you have prepped your food and properly filled your jars, you put them in the canner for the appropriate amount of time. At the end of the canning time, the canner needs to cool so that you can safely remove the lid.
Canning Jars and Lids: Canning jars, lids, and bands are important in the canning process. These jars are designed to withstand the high heat required to kill and keep out bacteria. The jar lids and seals form a perfectly airtight seam. You can re-use canning jars; however, always buy new lids. Some people reuse the bands. This is fine if they are not bent or warped.
You can buy canning jars new or search thrift stores, garage sales, and even elderly friends and neighbors who no longer use them. Do not try to use jars from commercially purchased products, as they may break during the canning process.
Canning Salt: Canning salt is not a requirement. However, if you do want to use salt for flavor, do not use regular table salt. The iodine will make your vegetables soggy or discolored.
Canning Tips
Headspace: This is the amount of space between the foods and the top of the jar. It is necessary to give the food room to expand while it is canning.
Lids and Bands: Wipe the rim of the jars before putting on the rims and bands. If there is salt or food debris, you might not have a proper seal and your food may spoil.
Wipe the jar rim before you seal it because food debris or salt left behind will prevent it from sealing.
Jars: If you are using recycled jars, make sure they are clean. Place all jars in a warm water bath until you are ready to fill them with food. You can also keep the rings and lids in the hot water.
Bubbles: Before you put the seals on your jars, use a rubber spatula to remove any air bubbles from the jars. Slip the spatula down in the jars and you will see the air bubbles rise to the top.
Pop: After your jars come out of the canner and have cooled, you should hear them “pop.” This is the seal being pulled down and creating a vacuum. When you touch the lids of the jars, there should be no spongy feel; they should be tight and sealed to the jar.
Once you start canning your own vegetables, you will wonder how you ever ate store bought foods. The taste difference is amazing.
Drying Fruits and Vegetables
Dried fruits and vegetables make tasty snacks and store well for cooking later. They are not typically used as a side dish but rather are wonderful additions to soups and stews. Drying requires hot days, an oven, or a dehydrator. If you are trying to avoid using electricity, you can dry them in the sun.
You should cut your vegetables or fruit into uniform pieces. They should not be too thick, or they will not dry well. Keep in mind that you need to dry within one or two days of harvesting them from your garden.
You will need to blanch or steam your produce before drying. This will stop the enzyme process and give you a more flavorful end product.
If you are using a dehydrator, you can follow the instructions in the manual. If you are using the oven, you will need to research the various times for drying the produce. The sun should be your last option. The main reason is you need temperatures above 100° and no humidity.
Once you have your dried foods, you can package them in airtight bags and use them when needed. Dried foods stay fresh for a much longer time than other foods. Although it is not ideal for reconstituting to use on its own, it is wonderful cooked in other foods. Dried fruit also makes nutritious, healthy snacks.
Canning, freezing, and drying fresh fruits and vegetables is a great way to carry your summertime garden into the winter. You can serve your family nutritious foods that have ingredients you put in them, not what a manufacturer thinks they need. You will also save your family money.
 Off The Grid News Better Ideas For Off The Grid Living


