


 Who says you can’t grow a great variety of crops inside the comfort of your own home? For many urban and city dwellers, lack of an outside space can be a disheartening reality, and if there isn’t a community garden close by, you might feel like you’re missing out. Fear not – there are special varieties of tomatoes, lettuce, peppers, and cucumbers that all grow great in small confined spaces.
Before you go imagining piles of dirt on your carpet with little plants growing out of them, know that indoor gardening can be small, easy, and organized! While you’ll have to be much more careful not to make a mess than you would if gardening outside, a little prep work, time, and patience can help you avoid an epic disaster on your floor.
Let’s get started and get you on your way to putting your own homegrown food on the table!
Supplies
Startup costs for any garden can get expensive, so try to get the essentials first and upgrade later.
- Plant Stand – To keep your indoor garden nice and organized, we recommend you invest in some kind of plant stand, or build your own out of wood. You’ll want a stand with three shelves or more, with about 2 – 3 feet of space between each shelf to give your plants room to grow up. Instead of shelves, you could also do just one shelf on the ground to ensure your plants don’t run out of room.
- Seeds – Because space is of the essence, you probably won’t be growing corn or sunflowers, but you still have a lot of choices. For herbs, you can use any seed or cutting, as most herb plants don’t get bigger than ½ – 1 foot tall. For vegetables, dwarf varieties are your best bet:
- Dwarf Tomatoes: Tiny Tim, Red Robin, and the Small Fry
- Dwarf Lettuce: Midget and Tom Thumb
- Dwarf Peppers: Bull Nose Bell, Jingle Bells, and Mirasol (hot)
- Dwarf Cucumber: Spacemaster and Salad Bush
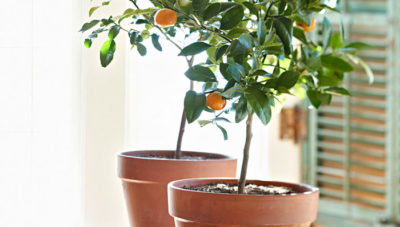
- Containers – To give your plants’ roots the room to grow, you’ll need containers with some depth. The EarthBox is great for all of your indoor plants and can hold 2 cubic feet of dirt. Terracotta or clay pots, also work great, but the important part is to ensure your containers have holes in them to prevent water build up. Water build up at the bottom of a pot can lead to root rot, which is devastating to any plant.
- Grow Lights – If you don’t have windows that get at least six hours of sunlight per day, you’ll need to invest in some grow lights. While many options exist for lighting, like high-density discharge lamps and incandescent, we recommend florescent lights for their usability and cost effectiveness. Choose white florescent lights and fixtures that allow you to adjust how close the light is to the plant (more on that later). A timer can help you regulate your lighting.
- Soil – To get you started, a simple potting mix will work. You can also make your own out of a combination of composted bark, coconut coir, peat, perlite, and vermiculite.
- Fertilizer – Fertilize once a month using a 10-10-10 or 20-20-20 organic fertilizer. Protogrow is also a great natural fertilizer.
- Heating Pad – While not absolutely necessary, a heating pad can help your seeds germinate faster, as most seeds need soil that is 75°F or hotter to sprout.
- Fan – A small oscillating fan can help circulate the CO2 that plants produce and simulate outside conditions. Fans aren’t required, but they can help.
Indoor Vegetable Gardening
For your indoor garden vegetables, you’ll most likely be starting from seeds, unless you can find a garden center that has dwarf varieties already started for you.
Without A Doubt The Best Kept Secret In Self-Reliance Gardening…
Before you begin, ensure you containers have holes in the bottom. If not, poke or drill a few holes in the bottom for water drainage. In a bucket, dump in your soil and add water slowly so that the soil becomes moistened, but not soggy. Add the mix to your containers and make ¼ inch deep holes for the seeds and drop in one seed per hole. Space each seed a few inches apart.
For the beginning stage, use a spray bottle to water the seeds with a fine mist. If you’re using a heating pad, keep it on at all times until the seeds sprout. Some gardeners like to keep their grow lights on 24 hours during this precious germination period. Keep temperatures up, soil moist, and within 5 – 10 days, you’ll have little sprouts shooting up from the soil.
A week or so after the sprouts have come up, there will be obvious stragglers that aren’t growing as well as the rest. Pull these weak plants out and try to keep about a foot between each plant.
After the critical germination state, you can start a day-night cycle with the lights (assuming you’re using grow lights). Most plants need 12 – 16 hours of light a day. Keep plants about 8 inches below the lights at all times, raising the lights up as your plants grow. Once you have established plants, you can stop misting every day. Water thoroughly once the top inch of soil is dry, usually until water comes out the bottom of the container.
Most dwarf plants take about 65 – 80 days to become harvestable.
Indoor Herb Gardening
If indoor vegetable gardening sounds like too much work, you can still grow a great indoor herb garden with much less effort!
Most herb seeds are finicky to germinate, so most growers use already established plants to get started. Any nursery or garden center will have a huge variety of herbs to choose from; basil, rosemary, parsley, and oregano are all great for indoor gardens. If you prefer to start from seeds, go to www.HeirloomSolutions.com. They have a wonderful variety of herbs and vegetable seeds to choose from.
Overall, the process remains the same for indoor vegetable gardening, except if you already have established plants, you won’t have to worry about planting or germinating seeds. Herbs can tolerate a wide range of conditions, but if you follow these simple rules, you can have herbs year round:
- Ensure your herb containers have holes in the bottom – herbs hate standing water!
- Water thoroughly when the top inch of dirt is dry – usually about once a week.
- Give your herbs 12 – 16 hours of light per day.
- Harvest the tops of your herb plants once they are strong and about 8 – 12 inches tall. If you see any herbs flowering, pinch off the buds.


