Image source: CDispatch.com
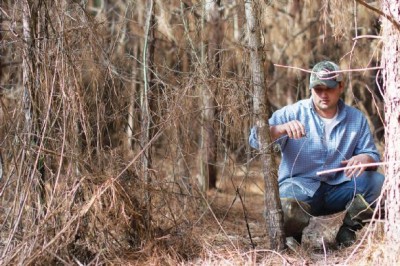
You’re stocked with venison you shot during season, but now the family complains about venison steak, venison burgers, and venison stew again. How can you provide some variation in the menu and still supply adequate protein? Trapping is a safe and enjoyable activity that can net a variety of small mammals with uniquely different flavors. In addition, it can become a family project with the making, setting, and checking the traps.
To trap an animal is to catch one without having to play an active role in the process at all times. In this article, the main purpose to trap an animal is for food, although you may be able to harvest some other necessities from the trapping of animals, such as furs or scents.
Animal trapping is perhaps one of the first methods of hunting. As far back as the Neolithic period, this method was used to keep food on the table and money in the pocket. In early colonial America, the fur trade was the newest and most sought after form of employment. Learning from the Native Americans, the new colonists focused on the beaver and other small animals, including fur animals like small cats and fox.
An extremely easy to build, but relatively effective trap is the T-snare trap. The materials needed are:
- Heavy survival/hunting/multipurpose knife
- Two sticks, approximately 2-3 feet long and as straight as possible. These will form the vertical base.
- A slightly smaller diameter stick about 1.5 feet to 2.5 feet long, as straight as possible. This will be the horizontal support system.
- A small, slightly stumpy looking stick, maybe 2-4 inches long. This will act as the trigger for the trap.
- Small diameter, relatively concealable, string or wire (or a suitable alternative like paracord or snare wire)
- A younger sapling that has some springiness to it
Just as in real estate, the three main components of a successful trap are location, location, location! The location of the trap will be paramount to your success. Try for known animal paths that run near water and food sources. If you are using items directly from the outdoors, then also look for young vegetation and saplings nearby to make your process easier. Try to think like an animal that is worrying about their food, shelter, and safety when trying to determine the ideal location to set a trap.
To build a trap in this style, you will want to mark the two vertical supports at the same spot to allow your horizontal support to sit level. Notch out a cradle area in the shape of a “C” in the vertical supports at the height that allows the horizontal support to fit into the two verticals, without extending out too much past the surface of the verticals.
An Outdoorsman’s Guide to Shelters, Tools, Weapons, Tracking, Survival, and More!
In the four-inch trigger piece, carve a “C” shaped notch as well, about in the middle of the wood which will allow it to rest on the horizontal bar. At one of the ends, carve a groove out to act as a nesting spot for the string/rope/wire which will be cut around the circumference of that end; it would be like a ring around the end of the trigger stick.
The end of the sapling spring piece will be about at the center of the trap. Generally speaking, the shorter the spring pole, the more tension potential.
Situate the verticals with enough room for the animal to get between them (slightly larger) and secure the poles in place with rocks or in the ground at even levels.
Place the horizontal support into the supporting notches. To form an “H”
Now take a single piece of twine or rope and attach one end to the tip of your spring pole using a slipknot. Measuring down to the horizontal bar with the spring pool flexed in position, attach the twine or rope to the notched circle on the trigger bar and continue it down to make the snare. Make a circle connected with a slip knot made with half hitches that isn’t too tight since it needs to move when triggered to snare the animal. Use enough twine or rope to make a circle large enough to cover the opening between the vertical sticks. With the knot just slightly elevated off the ground.
Before you set the trap, you need to block the surrounding area alongside the trap so that the animal doesn’t simply walk around. Use rock and tree branches to effectively make a barrier or fence, leaving only an open path into the trap.
Now you are ready to set the trap. Position the trigger pole onto the horizontal pole in the opposite direction that the horizontal pole is set into the vertical poles. This exerts opposing pressure keeping the horizontal pole stable and provides the ability for the animal to set off the trap from either direction. Position the snare and you are ready.
The point of the sapling is to add spring to the trap to ensure the snare part of this trap actually happens, so you will need to make sure that the tree can spring back upwards to return to its vertical position. The release of the tree simultaneously tightens the noose-like snare knot and elevates the animal off of the ground, keeping the “noose” tight. It is the most important part of the entire design.
Test the trap to make sure it functions properly. Beware as your poles or trigger may not be as stable as you had hoped and may become flying objects. Be aware of low lying branches on the spring pole as in windy conditions, they may inadvertently set off the device. You may need to trim back any bothersome branches before the trap is set.
Now comes the hardest part of the entire process—waiting for a thirsty or hungry animal to walk into your trap. Hopefully the terrain wasn’t interrupted too much and the animal is unsuspecting of what awaits.
Set as many of these devices as you will have time to check. You wouldn’t consciously leave a hanging animal dangling from a tree to die slowly of starvation. Check your traps daily and enjoy the fruits of your labors.
Beaver and raccoon are pretty common species from traps like this, but opossum and muskrats are easily subdued as well with this method. The trap described above isn’t as difficult to perform as it is to read, and once you have it dialed in, it can be extremely efficient. It’s difficult for the animal to recognize, as it’s made with natural items. This information is more for trying out the trapping process and for survival when you won’t have access to traps that are commercially made.
In all reality, you can buy quality reusable traps for a small amount of money that can be used with incredible effectiveness, so you may be better off doing so, as the cost is outweighed by the long life and usefulness of the traps. The goal in trapping is more to create a “passive” supply of animals that will supplement your other methods for gathering meat. Use trapping to help stabilize your hunting intake, and make the best use of your active time.
 Off The Grid News Better Ideas For Off The Grid Living


